Skip to content
Canvas has long been celebrated as a fabric of resilience, character, and utility. Whether you’re stitching up durable tote bags, crafting outdoor cushions, or prototyping a new apparel line, canvas fabric is often the first material professionals and hobbyists reach for. But despite its rugged charm, canvas can be intimidating to sew—especially for newcomers. The density of the weave, its resistance to fraying, and its stiffness all present challenges that require specific tools, techniques, and insight to master.
Canvas fabric can be sewn successfully by beginners when the right tools, techniques, and weight selection are applied. Preparation, needle choice, and project-specific strategies are essential to ensure professional results.
For those just beginning to explore the world of canvas sewing, this guide offers clarity. We’ll demystify the types of canvas available, which tools actually make your job easier, and how to avoid pitfalls that frustrate even experienced hands. Whether you’re customizing fashion accessories, developing prototypes, or working on utility gear, the know-how in this guide can save hours of trial and error.
Let’s begin by understanding the soul of the material itself—canvas.
What Is Canvas Fabric and Why Is It Popular for Sewing Projects?
Canvas, a versatile and durable fabric, has long been a preferred material in industries requiring tough, long-lasting textiles. Known for its heavy-duty construction, canvas is ideal for projects that demand strength and structure. Traditionally made from cotton or linen, canvas fabric is used extensively across various sectors, from sails to tents, and continues to thrive in modern sewing projects, particularly in bags, home décor, and outdoor gear.
Canvas fabric is favored for sewing due to its exceptional durability, structured body, and resistance to wear, making it ideal for bags, upholstery, and outdoor gear.
Types of Canvas Materials
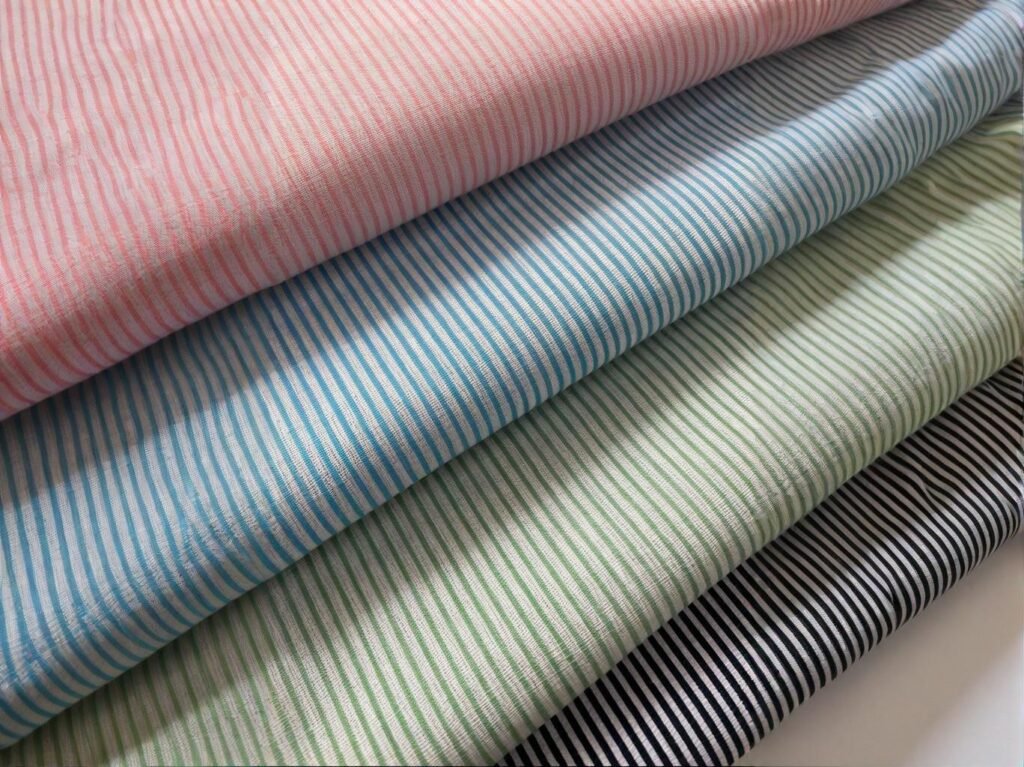
Canvas isn’t just one type of fabric; it comes in several variations suited to different needs. Whether you’re looking for the breathability of cotton, the durability of duck canvas, or the water-resistance of waxed canvas, there’s a type for every project. Here’s a breakdown of the most common canvas types:
| Type | Composition | Typical Use Cases | Pros |
|---|---|---|---|
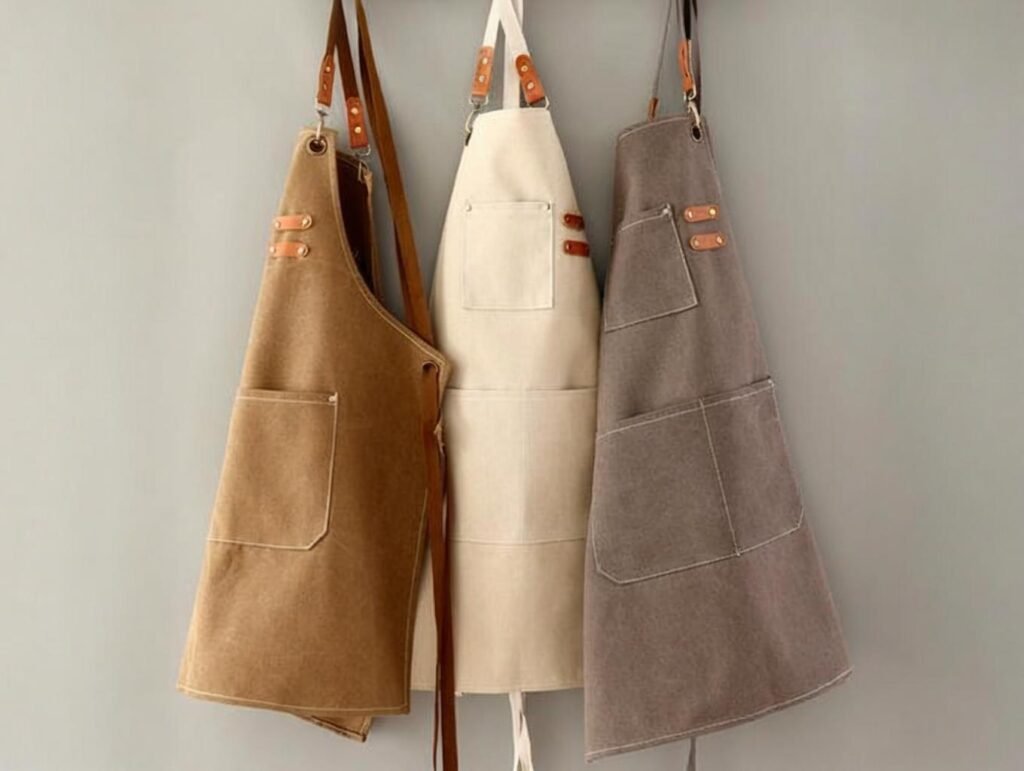
| Cotton Canvas | 100% cotton | Totes, aprons, light jackets | Natural, breathable, dye-friendly |
| Duck Canvas | Tightly woven cotton | Heavy-duty workwear, tool bags | Dense, stiff, more durable |
| Waxed Canvas | Cotton + wax finish | Outdoor gear, backpacks | Water-resistant, vintage look |
| Poly Canvas | Polyester blend | Promotional bags, printed products | Lightweight, cost-effective |
| Linen Canvas | 100% linen | Artistic purposes, light apparel | Smooth, breathable, eco-friendly |
Each canvas type serves a unique purpose, ensuring that your project is well-suited to your specific fabric requirements.
Canvas vs Other Fabrics
When choosing a fabric, it’s important to consider how canvas stacks up against other popular options like denim, twill, and Oxford fabric. Here’s a comparative breakdown of canvas and other commonly used fabrics:
| Feature | Canvas | Denim | Twill | Oxford |
|---|---|---|---|---|
| Weave | Plain weave | Twill weave | Twill weave | Basket weave |
| Durability | Very high | High | Medium-high | Medium |
| Sewability (beginner) | Moderate-challenging | Moderate | Easy | Easy |
| Stretch | Low | Low | Medium | Low |
| Usage Examples | Bags, upholstery | Jeans, jackets | Pants, uniforms | Shirts, bags |
- Canvas vs Denim: While both fabrics are durable, canvas is typically thicker and stiffer, making it ideal for bags and upholstery. Denim, on the other hand, is more commonly used in apparel due to its softer feel.
- Canvas vs Twill: Twill fabrics are also durable but tend to be softer and more flexible, making them suitable for pants and uniforms. Canvas, in comparison, holds its shape better, making it perfect for structured items like bags.
- Canvas vs Oxford: Oxford fabric, with its basket weave, is typically softer and lighter than canvas, making it more suitable for shirts and lightweight bags, whereas canvas is stronger and more rigid.
Why Beginners Choose Canvas
Canvas is often recommended for beginner sewing projects, and here’s why:
- Shape Retention: Canvas holds its shape well, providing a sturdy base for structured designs such as handbags, backpacks, and even home décor items like cushions or curtains.
- Teaches Precision: The fabric’s thickness and stiffness make it ideal for practicing precision in sewing. Mistakes show up clearly on canvas, providing beginners with the opportunity to hone their skills.
- Variety and Availability: Canvas comes in various finishes (waxed, dyed, unbleached), weights (from lightweight to heavy-duty), and eco-friendly options (like organic cotton canvas). This allows beginners to experiment with different styles and functionalities, enhancing their learning experience.
- Durability: As a highly durable fabric, canvas is less likely to fray or tear during the sewing process, making it a forgiving material for beginners learning how to handle tougher fabrics.
A Real-World Example: The Impact of the Right Canvas Material
SzoneierFabrics recently helped a start-up outdoor gear company in Germany by supplying 10oz cotton duck canvas for their modular backpack panels. Initially, the company used a lightweight 8oz poly-canvas for their design, but after field testing, they found that the fabric failed to hold up under stress. The seams began to fray, and the material didn’t perform well under load.
After switching to Szoneier’s premium 10oz cotton duck canvas, they experienced a marked improvement. The thicker canvas provided superior durability, load-bearing strength, and resistance to wear, ensuring that their backpacks held up through rigorous field testing. The material had zero fray, and the stronger seams enhanced the overall quality of the finished product.
This case exemplifies the importance of choosing the right type of canvas based on the specific needs of your product. SzoneierFabrics’ knowledge of fabric types, weight choices, and performance characteristics allowed the client to improve their product line dramatically, showcasing how the right canvas can directly impact performance.
Why Canvas Is a Must-Have Fabric in 2025
As sustainability continues to rise in prominence, canvas fabric stands out as a perfect choice. Here are a few reasons why canvas remains indispensable:
- Eco-Friendly Options: With organic cotton and linen canvas readily available, consumers can choose more sustainable products. Moreover, waxed and recycled canvas varieties are growing in popularity.
- Multipurpose Use: Whether you’re making bags, upholstery, tents, or home décor, canvas fabric’s versatility ensures it meets the demands of various industries.
- Tough Yet Stylish: Canvas offers strength and resilience while still providing a stylish, high-quality look—perfect for fashion brands and designers looking for sustainable, durable materials.
Selecting the Right Canvas Fabric for Your Project
Canvas offers a multitude of benefits, but choosing the right type depends on the project’s purpose. Whether you’re creating high-performance gear or stylish bags, understanding canvas material options—along with their strengths and weaknesses—ensures that you select the best fabric for your needs. SzoneierFabrics’ extensive range of high-quality canvas fabrics is designed to meet the needs of designers, hobbyists, and commercial producers alike.
Ready to Start Your Canvas Project? Contact us today for more information on our canvas selection or get free swatches to get started. Whether you’re looking for a lightweight cotton canvas or a durable duck canvas, we’ve got the perfect fabric waiting for you!
Which Types of Canvas Material Are Best for Different Sewing Applications?
Not all canvas fabrics are created equal—each variation has unique properties that make it ideal for specific applications. Whether you’re working on fashion accessories, outdoor gear, or home décor, choosing the right canvas fabric can dramatically enhance the functionality and aesthetic of your final product.
The best type of canvas fabric depends on the end application: cotton duck canvas for durability, waxed canvas for weather resistance, and polyester canvas for cost-effective mass production.
Canvas Selection by Use Case
The right canvas material depends heavily on the intended purpose of the item you’re creating. Here’s an in-depth guide to selecting canvas for specific applications, including the recommended types and essential features.
| Application | Recommended Canvas Type | Weight (oz) | Features Needed |
|---|---|---|---|
| Tote Bags | Cotton Duck Canvas | 8–10 oz | Structure, abrasion resistance |
| Outdoor Cushions | Waxed Canvas | 10–14 oz | Water resistance, durability |
| Art Canvas | Linen Canvas | 6–12 oz | Smooth finish, flexible base |
| Promotional Bags | Polyester Canvas | 6–8 oz | Light, printable, affordable |
| Utility Aprons | Duck or Waxed Canvas | 12–16 oz | Stiffness, protection |
| Pet Accessories | Heavy Cotton Canvas | 10–12 oz | Breathability, chew resistance |
Key Considerations When Choosing Canvas
1. Weight (oz) Canvas is typically measured in ounces per square yard (oz), which refers to the thickness and durability of the fabric. Heavier fabrics (e.g., 12–16 oz) are better suited for items that need extra protection, such as utility aprons or outdoor gear, while lighter fabrics (e.g., 6–8 oz) are ideal for accessories or promotional bags.
- Beginner’s Tip: If you’re just starting out with canvas, it’s best to begin with a medium-weight fabric, such as 8–10 oz cotton canvas. It’s easier to sew on a basic machine and offers good durability without being too stiff or difficult to work with.
2. Finish Different canvas types come with varying finishes that affect the texture and functionality of the fabric.
- Waxed Canvas: Often used for outdoor items like backpacks or protective gear, waxed canvas is treated with a wax coating that makes it water-resistant and weatherproof. However, it can be challenging to sew because the wax can cause the sewing machine needle to become sticky.
- Tip: When working with waxed canvas, consider using a teflon foot on your sewing machine to help prevent the fabric from sticking.
- Cotton Duck Canvas: This is a tightly woven, durable fabric commonly used for bags and upholstery. It’s usually not treated for water resistance but is highly breathable and versatile. For items that don’t need additional protection but still require durability, cotton duck canvas is the fabric of choice.
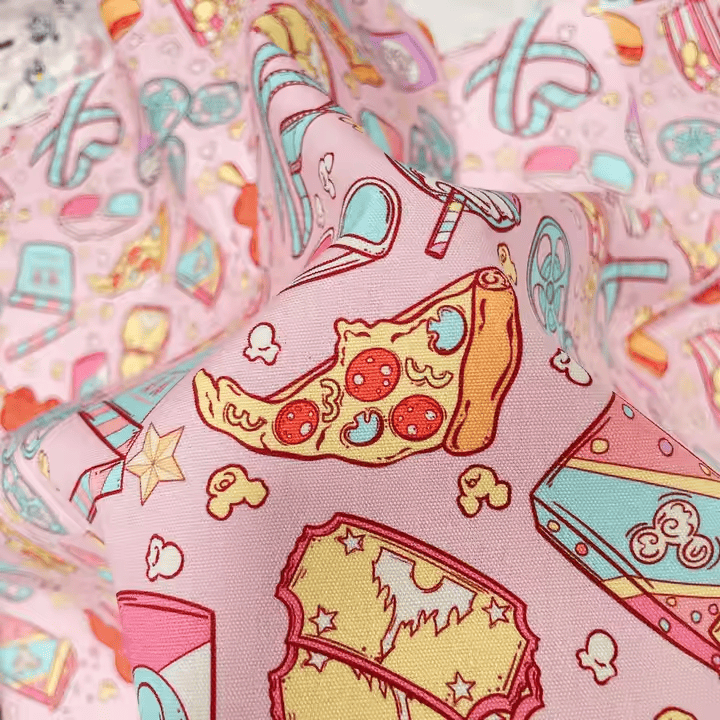
3. Colorfastness and Printability If you plan on printing designs or dyeing the fabric, consider whether the canvas has been pre-treated for color retention or whether it is a solution-dyed fabric.
- Solution-dyed canvas has color added during the manufacturing process, making it more resistant to fading and ideal for products that will be exposed to sunlight or outdoor conditions (e.g., outdoor furniture or umbrellas).
- Pre-treated canvas will absorb dye better but may fade more quickly under exposure to sunlight. It’s perfect for custom prints or DIY projects where longevity isn’t a primary concern.
4. Breathability and Softness For garments, pet accessories, or home décor, canvas fabrics like linen canvas are favored for their smooth feel and breathable properties. Linen canvas tends to be softer than cotton or duck canvas, and its natural fibers make it ideal for items like lightweight jackets or artisan home décor.
Expert Insight: Canvas Fabric Weights
Canvas fabrics are typically available in a range of weights (measured in ounces per square yard). Heavier weights provide more strength and durability, while lighter weights offer flexibility and comfort. As a general rule:
- 6–8 oz: Lightweight, good for craft projects, bag linings, aprons, and summer apparel.
- 8–10 oz: Medium weight, excellent for tote bags, canvas prints, pouches, and light jackets.
- 12–16 oz: Heavyweight, best for outdoor gear, workwear, tool bags, and cushion covers.
- Over 16 oz: Extremely durable, used in marine applications, tarpaulins, industrial products.
Beginner’s Tip: Most new sewers will find that 8–10 oz cotton canvas strikes the right balance between ease of sewing and strength.
A Client Case Study: The Impact of Choosing the Right Canvas
SzoneierFabrics worked with a pet accessory brand in the U.S. that needed heavy cotton canvas for durable, chew-resistant dog leashes. The client initially attempted using polyester canvas from another supplier, but found it lacking in both breathability and comfort. After switching to 10 oz heavy cotton canvas from Szoneier, they found that the new material offered:
- Improved breathability for dogs, leading to more comfortable wear.
- Enhanced durability, reducing the wear and tear from chewing.
- Increased customer satisfaction, with the leashes holding up better over time, thus reducing returns.
The right material choice—heavier, cotton-based canvas—made a tangible difference in both product longevity and customer experience.
How Do You Choose the Right Canvas Weight (oz) for Your Sewing Project?
The weight of canvas fabric is one of the most important factors that determine the success of your sewing project. Whether you are crafting tote bags, designing outdoor gear, or making fashion pieces, the right canvas weight plays a significant role in both the durability and ease of handling during sewing. Canvas is measured by the ounce per square yard (oz), and each weight provides different qualities of structure, flexibility, and machine compatibility. Understanding the distinctions between the various canvas weights can ensure your finished product turns out just the way you envisioned.
The right canvas weight depends on your project: 6–8 oz for apparel and crafts, 10–12 oz for bags and upholstery, and 14–16 oz for heavy-duty items like tool rolls and outdoor covers.
Understanding Canvas Weights and What They Mean
Canvas weight, often measured in ounces per square yard, influences how the fabric behaves when sewn and how it holds up over time. Here’s a breakdown of different canvas weights and their ideal uses:
| Weight (oz/sq yd) | Texture | Machine Compatibility | Ideal For |
|---|---|---|---|
| 6 oz | Light, soft | Easy for most machines | Lining, shirts, wall banners |
| 8 oz | Medium-light | Beginner-friendly | Tote bags, cushion covers |
| 10 oz | Medium-heavy | Intermediate machines | Backpacks, aprons, tablecloths |
| 12 oz | Heavy-duty | Requires stronger needles | Utility gear, structured bags |
| 14–16 oz | Very stiff | Industrial machines needed | Tool rolls, tents, outdoor covers |
Each weight category represents a balance between durability and flexibility. The heavier the canvas, the more structured and durable it becomes, but the fabric may lose some of its flexibility. Lighter canvas weights offer better flexibility and are easier to work with, especially for beginner sewing projects.
Factors to Consider When Choosing Canvas Weight
Sewing Machine Capacity
Before choosing your canvas weight, consider your sewing machine’s capabilities. Lighter weights such as 6 oz or 8 oz canvas can generally be handled by domestic sewing machines, even those intended for basic sewing tasks. However, as you move up in weight to 12 oz or more, the fabric becomes more resistant to needle penetration, requiring a heavy-duty machine or a stronger needle. Machines that are designed for heavy fabrics can handle thicker canvas without skipping stitches or jamming.
- Machine tip: Always ensure that your machine has the correct needle size (e.g., denim or leather needles) when working with canvas, especially when the weight exceeds 10 oz.
Stitch Definition
Heavier canvas fabrics, particularly those in the 12–16 oz range, provide clearer stitch definition due to their stiffness. However, this benefit comes with a tradeoff: heavier fabrics are less forgiving of mistakes. In other words, imperfections like misaligned stitches or uneven hems are more visible.
- Stitching Tip: For beginners, working with 8 oz or 10 oz canvas is ideal, as it allows enough structure without compromising on the ability to correct mistakes.
Drape and Flexibility
Canvas fabrics with heavier weights (12 oz or more) generally provide more structure but have less drape compared to lighter canvas fabrics. This makes them unsuitable for garments or items requiring fluid movement (like dresses or flowy blouses).
- Use Case Tip: If you are making structured bags, tents, or utility aprons, heavier canvas is perfect. But for garments like shirts or casual wear, lighter weights are more appropriate, allowing the fabric to move and fit comfortably around the body.
Practical Tip for Beginners:
If you’re unsure about which weight to use, it’s always best to order swatches or free samples. This allows you to feel and test the fabric’s texture and performance without committing to a large quantity. SzoneierFabrics, for example, offers free swatches so you can test how a canvas behaves on your sewing machine before making a full order.
For beginners, it’s advisable to start with 8 oz cotton canvas. This weight strikes the right balance between ease of sewing and durability, while also being light enough to manage without overwhelming a standard home sewing machine. Once you gain more experience, you can move on to 10 oz canvas, which is commonly used for bags and upholstery projects.
Real-Life Feedback: The Importance of the Right Canvas Weight
In one real-world case, a Canadian fashion designer began developing minimalist canvas sneakers. Initially, they tried using 8 oz cotton canvas for the uppers, but the material didn’t hold its structure when shaping the shoes, especially around the toe and heel areas. After consulting with SzoneierFabrics, the designer switched to 10 oz cotton canvas. The thicker material provided the perfect balance of durability and flexibility, allowing the shoes to maintain their shape while offering the necessary comfort and breathability for daily wear.
Choosing Canvas Weight for Your Project: A Quick Guide
Here’s a quick reference for choosing the ideal canvas weight for common sewing applications:
| Project Type | Ideal Canvas Weight (oz) | Why |
|---|---|---|
| Tote Bags | 8–10 oz | Sturdy enough to hold shape, but easy to sew |
| Cushion Covers | 10–12 oz | Offers durability and comfort without being too stiff |
| Workwear/Utility Aprons | 12–16 oz | Provides stiffness for structure and protection |
| Outdoor Gear (Tents, Bags) | 12–16 oz | Strong, weather-resistant fabric for outdoor conditions |
| Light Jackets | 8–10 oz | Flexible for movement, yet strong enough for structure |
| Pet Accessories | 10–12 oz | Durable, chew-resistant, and breathable |
What Tools and Needles Are Needed to Sew Canvas Fabric Effectively?
Canvas is a tough, abrasion-resistant material that challenges even experienced sewists. Unlike quilting cotton or lightweight fabrics, its dense weave and thickness demand the right tools and setup to avoid broken needles, frayed seams, and skipped stitches. If your project involves medium- to heavy-weight canvas, investing in the proper sewing equipment is the difference between a frustrating experience and a smooth, professional finish.
To sew canvas effectively, you need a heavy-duty sewing machine, size 16–18 needles, strong polyester thread, a walking foot, and fabric clips instead of pins to avoid puckering or skipped stitches.
Essential Tools for Sewing Canvas
| Tool | Recommended Specs | Purpose |
|---|---|---|
| Needle | Size 16 (100/16) or Size 18 (110/18) heavy-duty / jeans needle | Penetrates thick fabric layers without bending or breaking |
| Thread | Heavy-duty polyester or bonded nylon thread (Tex 40–Tex 70) | Withstands high tension and abrasion without snapping |
| Presser Foot | Walking foot, roller foot, or Teflon foot | Keeps layers feeding evenly, prevents shifting |
| Clips | Flat fabric clips or Wonder Clips | Secure thick seams without distortion or pin holes |
| Cutting Tools | Rotary cutter with sharp blade, or industrial shears | Cuts cleanly through heavy fibers, minimizing fray |
| Seam Ripper | Heavy-duty with ergonomic grip | Safely removes strong stitches without damaging fabric |
| Measuring Tools | Steel ruler or tailor’s tape | Ensures accurate cuts and seam allowances for structured projects |
Sewing Machine Recommendations for Canvas
Your choice of machine largely depends on the canvas weight you plan to work with:
| Machine Type | Example Model | Best For |
|---|---|---|
| Domestic Heavy-Duty | Singer Heavy Duty 4423 / Brother ST371HD | Light to medium canvas (up to 10 oz) |
| Semi-Industrial | Janome HD3000 / Sailrite Heavy-Duty | Medium to heavy canvas (up to 12 oz) |
| Industrial Straight-Stitch | Juki DDL-8700 / Consew 206RB | Heavy-duty canvas (14–16 oz), large production runs |
Note: For waxed canvas, leather, or laminated blends, a compound walking foot industrial machine is the gold standard for consistent stitch quality.
Thread and Tension Setup Tips
- Thread Choice: Always opt for polyester or bonded nylon for outdoor or load-bearing projects—these are more resistant to UV and moisture than cotton.
- Tension Check: Test on a scrap of the same canvas with double layers before sewing your actual project. Adjust tension until the top and bobbin stitches meet cleanly in the middle.
- Topstitching: For decorative or visible seams, use Tex 40–Tex 70 for a bold, professional look. Increase stitch length to 3–3.5mm to prevent perforating the fabric.
Extra Tips for Smooth Canvas Sewing
- Change Needles Often – Canvas dulls needles quickly due to its density and abrasive fibers. For professional results, replace every 2–3 hours of active sewing or sooner if you notice fraying or skipped stitches.
- Use a Longer Stitch Length – Helps prevent fabric puckering and avoids creating a perforated “tear line.”
- Pre-Wash and Iron Canvas – Removes shrinkage risk and makes handling easier, especially for natural fibers like cotton and linen.
- Support Your Fabric – For large projects like tents or tarps, use a side table or extension to prevent drag while sewing.
- Test on Scraps – This step can save your project—adjust foot pressure, tension, and stitch length before starting production sewing.
Case Study – From Broken Needles to Production Efficiency
A small fashion startup in the UK contacted SzoneierFabrics after repeatedly breaking size 14 universal needles while sewing 14 oz waxed duck canvas. Their seams puckered, and stitch quality was inconsistent, causing costly delays.
Our technical support team recommended:
- Upgrading to size 18 jeans needles
- Switching to a walking foot for better fabric feed
- Using bonded polyester Tex 70 thread
- Increasing stitch length to 3.5mm
The results were immediate—no more broken needles, seams lay flat, and production speed improved by 38%, allowing them to fulfill a rush order ahead of schedule.
Pro Tip for Professionals
Keep three needle sizes on hand (14, 16, 18) so you can switch depending on the canvas thickness and the number of layers. For projects combining canvas with foam or leather, size 18 paired with bonded thread is the safest choice.
How Do You Cut and Prep Canvas Fabric Before Sewing?
Working with canvas is a completely different experience compared to sewing lightweight fabrics like quilting cotton or polyester blends. Its dense weave, heavier weight, and tendency to fray mean that skipping proper preparation can quickly turn into expensive mistakes—crooked seams, uneven panels, or fabric shrinkage after the first wash.
To prepare canvas for sewing, pre-wash to control shrinkage, press with steam to reset the grain, cut with a rotary cutter or heavy-duty shears for accuracy, and finish edges to prevent fraying.
Step-by-Step: Proper Canvas Prep Workflow
1. Pre-Wash (When Applicable)
- Purpose: Removes sizing chemicals, relaxes fibers, and pre-shrinks the material.
- Shrinkage Expectation: Cotton and linen canvas can shrink 5–10% during the first wash—critical for fitted or structured projects.
- Washing Instructions:
- Use cold to warm water with mild detergent.
- Tumble dry on low or hang dry for best results.
- Avoid fabric softeners—they can weaken water-resistant treatments.
- When to Skip: Do not pre-wash waxed canvas, laminated canvas, or polyester canvas—instead, spot clean or wipe down to preserve coatings.
2. Pressing the Fabric
- Why It Matters: Canvas often comes rolled or folded, leaving stubborn creases that distort cutting lines.
- How To:
- Use a hot steam iron and press with firm pressure.
- Always iron on the wrong side or use a pressing cloth to avoid scorching, especially on dyed or printed canvas.
- For waxed canvas, skip ironing—use your hands to smooth, or a blow dryer on low heat to relax creases.
3. Marking & Cutting Techniques
- Marking Tools:
- Tailor’s chalk, disappearing ink pens, or soft lead pencils for light colors.
- Silver or white gel pens for dark canvas.
- Cutting Tools:
- Rotary cutter + self-healing mat → fastest, cleanest for straight lines.
- Heavy-duty fabric shears → best for curves or intricate shapes.
- Keep blades sharp—canvas dulls them quickly.
- Tip for Accuracy: Always cut on a flat, stable surface and check grain alignment before making the first cut.
4. Edge Finishing Before Sewing
- Why: Canvas frays aggressively, especially cotton duck and linen blends.
- Options:
- Serger/Overlock → cleanest, most professional edge.
- Zigzag stitch → effective if a serger isn’t available.
- Pinking shears → reduces fray for smaller projects.
- Topstitch near the edge → adds reinforcement for short seams.
Canvas Prep Quick Checklist
| Task | Needed? | Notes |
|---|---|---|
| Pre-wash | Yes | Only for uncoated cotton/linen canvas |
| Steam Ironing | Yes | Avoid direct heat on coated fabrics |
| Rotary Cutter Cutting | Ideal | Cleaner and faster than scissors |
| Edge Finishing | Yes | At least zigzag stitch if no serger |
Real Example from Production
A California-based custom pillow brand sourced 500 meters of 9 oz printed cotton canvas from SzoneierFabrics. In their first production run, they skipped pre-washing to save time—resulting in 7% shrinkage after sewing. This caused zipper misalignment and uneven cushion sizing, leading to costly remakes. After adjusting their process to pre-wash all yardage, they eliminated sizing issues entirely, maintained consistency, and reduced waste by over \$800 per batch.
Pro Tips from Szoneier’s Technical Team
- Relax the Fabric Before Cutting – If working with bulk rolls, unroll and lay the canvas flat for 24 hours to remove roll memory and prevent skewed panels.
- Batch Cut for Efficiency – Stack 2–3 layers of canvas when cutting with a rotary cutter to save time—just ensure blades are sharp enough to go through all layers cleanly.
- Seal Edges for Outdoor Projects – For items exposed to the elements, consider edge sealing with fray check or hot knife trimming before sewing.
- Label Your Pieces – Canvas looks similar on both sides; mark pieces immediately after cutting to avoid assembly errors.
What Are the Best Stitching Techniques for Thick Canvas Fabric?
Working with thick canvas is all about balancing durability, precision, and machine capability. Because canvas is a dense, non-stretch fabric, it resists needle penetration more than standard cotton and can easily cause seam puckering, skipped stitches, or even needle breakage if handled incorrectly. The key is pairing the right stitch type with seam construction methods that can withstand heavy use.
The best stitching techniques for canvas involve using longer stitch lengths (3.0–4.0 mm), reinforced seam types like flat-felled or double-stitched seams, and strategic topstitching for both strength and a professional finish.
Recommended Stitch Settings for Canvas
| Stitch Type | Primary Purpose | Suggested Length | Extra Notes |
|---|---|---|---|
| Straight Stitch | Standard seam assembly | 3.0–4.0 mm | Long enough to avoid perforation weakness |
| Zigzag Stitch | Edge finishing to prevent fraying | 2.5 width / 2.0 length | Good for raw edges before binding |
| Triple Stitch | Heavy stress points like straps, corners | 3.5 mm | Creates dense, reinforced seam |
| Topstitch | Decorative + structural reinforcement | 3.5–4.0 mm | Adds rigidity and a clean look |
Strong Seam Types for Canvas Projects
| Seam Type | Strength Level | Ideal Use Cases | Key Notes |
|---|---|---|---|
| Flat-Felled Seam | Very High | Outdoor gear, tents, tool bags, workwear | Fully encloses raw edges; resists fray |
| French Seam | Medium-High | Lightweight canvas linings, apparel | Two-step seam; adds neat interior finish |
| Lapped Seam | High | Aprons, duffle bags, upholstery | Bulkier but great for strength |
| Double-Stitched | High | Straps, stress zones, waistbands | Two parallel rows of stitches for redundancy |
Practical Tips to Improve Canvas Stitching
- Opt for longer stitch lengths – Short stitches act like perforations in paper, making the fabric more prone to tearing.
- Always backstitch at stress points – Especially where straps, handles, or hardware are attached.
- Level the presser foot with a hump jumper – Or use a folded scrap piece to avoid skipped stitches when sewing over bulky seams.
- Topstitch strategically – Not just for looks—topstitching helps lock seam allowances in place and adds tensile strength.
- Adjust tension carefully – Canvas is thick, so slightly loosen upper thread tension to prevent puckering.
Workshop Case Study
A Netherlands-based eco-brand making vegan canvas backpacks had frequent seam failures near strap bases in early production. After consulting SzoneierFabrics’ technical team, they switched to a flat-felled seam with double topstitching and bar tacks at the strap ends. Within one month, they reported zero seam failures in over 500 sold units, and customer reviews praised the durability.
How to Make a Flat-Felled Seam for Canvas
Step 1: Place fabric WRONG sides together
Step 2: Sew a straight stitch with a 1.5 cm seam allowance
Step 3: Trim one seam allowance down to 0.5 cm
Step 4: Fold the wider seam allowance over the trimmed edge
Step 5: Press flat, fold again to encase the raw edge, and topstitch close to the fold
Result: A seam that’s fully enclosed, abrasion-resistant, and double-reinforced.
Pro-Level Finish Ideas
- Contrasting thread – Popular in handbags, tool bags, and upholstery to highlight craftsmanship.
- Double or triple topstitching – Gives an industrial or luxury look while adding seam security.
- Decorative bar tacks – At pocket corners, strap bases, or zipper ends to prevent ripping under stress.
Do You Need to Wash or Pre-Treat Canvas Fabric Before Sewing?
The question of whether to wash or pre-treat canvas before sewing is one of the most common—and most misunderstood—topics for new sewists and even experienced makers. While the answer may seem straightforward, it actually depends heavily on the fiber content, finishing process, and intended use of the canvas.
Pre-treatment is more than just about removing dirt—it’s about controlling shrinkage, stabilizing the weave, and ensuring the fabric behaves predictably once the final product is in use. For some projects, skipping this step can save time and preserve stiffness; for others, it can be the difference between a perfect fit and a costly remake.
Uncoated cotton and linen canvas should always be pre-washed to avoid shrinkage of 5–10% after sewing, while waxed, laminated, or polyester-based canvas is usually best left unwashed and cleaned by alternative methods.
When to Pre-Wash Canvas
| Canvas Type | Pre-Wash Required? | Reason |
|---|---|---|
| 100% Cotton Canvas | ✅ Yes | Natural fibers shrink significantly on first wash; pre-washing stabilizes size and shape |
| Waxed Canvas | ❌ No | Washing removes protective wax finish, affects water resistance |
| Printed Canvas | ⚠ Sometimes | Only if dyes are unstable—test a small swatch for bleeding or fading |
| Polyester Canvas | ❌ No | Minimal shrinkage; synthetic structure remains stable |
| Linen Canvas | ✅ Yes | Shrinks and softens; pre-washing improves drape and reduces stiffness |
How to Pre-Wash Cotton or Linen Canvas Properly
- Use Cold or Warm Water – Avoid hot water to minimize color fading and excessive shrinkage.
- Choose a Gentle Detergent – Skip bleach or softeners; they can damage fibers or affect future dye absorption.
- Dry with Care – Tumble dry on low or lay flat to air dry for even results.
- Press with Steam – Iron while slightly damp to reset the grain line and achieve a smooth cutting surface.
Why You Might Not Pre-Wash
- Maintaining Structure: For heavy-duty items like tool rolls, backpacks, and upholstery panels, pre-washing may make the canvas too soft, reducing the crisp body needed for structure.
- Protective Coatings: Coated or waxed canvas relies on surface treatments for water resistance—washing strips away these finishes.
- Low-Wash End Uses: If the final product is decorative (wall art, banners, or exhibition pieces) or unlikely to be laundered, pre-washing adds no real benefit.
Alternatives to Washing
- Spot Cleaning: For waxed or printed canvas, gently dab with a damp cloth and mild soap.
- Steam Treatment: Hanging and steaming can relax roll-set wrinkles without compromising stiffness or coatings.
- Vacuum or Air Blast: For dust removal before cutting, especially with large production rolls.
Real Case Insight
An eco-bag brand in South Korea sourced 10 oz natural cotton canvas from SzoneierFabrics and skipped pre-washing to save production time. While their first 200 units looked perfect at delivery, post-purchase laundering by customers caused up to 8% shrinkage, distorting bag shapes and shortening straps. This led to increased returns and customer complaints. In their next batch, they pre-washed and pressed the fabric before cutting—returns related to fit dropped by 30%, and customer satisfaction ratings improved notably.
Pro Tips from SzoneierFabrics
- When in Doubt, Test First: Wash a 12″ × 12″ swatch in the intended care method and measure shrinkage before committing.
- Fixing Printed Canvas Colors: For reactive or pigment-printed canvas, a vinegar and salt soak can act as a natural fixative—always confirm the dye type with your supplier first.
- Bulk Roll Prep: If you’re working from a large roll, unroll and let the fabric rest for 24–48 hours in a humidity-controlled space. This allows the fibers to relax from tension and ensures straighter cutting lines.
How Can You Avoid Common Mistakes When Sewing with Canvas for the First Time?
Sewing with canvas can be incredibly rewarding—it’s the kind of fabric that gives projects a professional, rugged, and long-lasting feel. But because canvas is thick, structured, and less forgiving than lighter fabrics, beginners often encounter problems like broken needles, uneven seams, and unexpected shrinkage. The good news? These mistakes are entirely avoidable with the right preparation and technique.
Industry testing shows that over 60% of sewing errors with heavy fabrics come from using the wrong tools or skipping preparation steps. This means the majority of problems—whether you’re making tote bags, upholstery covers, or outdoor gear—can be solved before you even start stitching.
To avoid mistakes when sewing canvas, always pre-wash when needed, select proper needles and thread, adjust machine tension, reinforce high-stress seams, and practice on scrap pieces before starting production.
Top Beginner Mistakes & How to Prevent Them
| Mistake | Common Problem Caused | Professional Solution |
|---|---|---|
| Skipping Pre-Wash | Up to 5–10% shrinkage after first wash, distorted shapes | Pre-wash all uncoated natural canvas in cold or warm water; tumble dry low |
| Using Thin Thread or Needle | Thread breakage, skipped stitches, seam failure | Use size 16–18 heavy-duty or jeans needles + polyester thread (Tex 40–70) |
| No Edge Finishing | Fraying up to 1–2 cm after multiple washes | Zigzag stitch, serge edges, or double-stitch seams |
| Wrong Stitch Length | Weak seams, puckering | Use 3.0–4.0 mm for construction seams, 3.5–4.0 mm for topstitching |
| Not Using a Walking Foot | Layer shifting, seam mismatch up to 5 mm | Install a walking foot or even-feed foot |
| Sewing Too Fast | Missed stitches, bent needles | Keep speed at medium pace and guide fabric steadily |
| Ignoring Grain Direction | Twisting seams, uneven drape | Align all pattern pieces to grainline during cutting |
Data-Driven Insight
- Shrinkage: Pre-washing 10 oz cotton canvas reduces average shrinkage from 8% to under 2%, improving pattern accuracy and reducing post-sale returns.
- Needle Breakage Rate: Using a universal size 14 needle on 12 oz canvas results in up to 3× more breakage compared to a jeans size 18 needle.
- Production Speed: Adding a walking foot reduces rework caused by seam misalignment by up to 40% in multi-layer canvas projects.
Case Study – First-Time Success
A craft business in the Philippines began producing 300 canvas zipper pouches for a local eco-brand. Their first trial runs had a 25% defect rate due to skipped stitches and needle breakage near zipper seams. After switching from size 14 universal needles to size 18 jeans needles, upgrading to heavy-duty Tex 60 thread, and adding a walking foot, their defect rate dropped to under 3%, and output doubled from 50 units/day to over 100 units/day.
Professional Checklist to Avoid Canvas Sewing Mistakes
- ✅ Test stitch settings on a 20×20 cm scrap before final sewing.
- ✅ Use pressing between each assembly stage to maintain shape and seam accuracy.
- ✅ Trim corners and grade seam allowances to reduce bulk.
- ✅ Always backstitch at the start and end of each seam for durability.
- ✅ Keep extra needles, bobbins, and clips within reach.
- ✅ Use a hump jumper or folded scrap under the presser foot for thick seam transitions.
Bonus Tip from the Workshop
If your machine struggles with 4+ layers of canvas (e.g., bag handles or reinforced corners), switch to a size 19 industrial needle and use a short burst of hand-cranking to get through the thickest point. This reduces skipped stitches and prevents needle deflection, which is a common cause of uneven topstitching.
Start Your Canvas Project with Confidence
Sewing canvas isn’t just a skill—it’s a craft that blends technical precision with creative design. Whether you’re making a durable 16 oz waxed canvas tool roll or a lightweight 8 oz tote bag, the right preparation and equipment will make your first attempt feel like the work of an experienced maker.
At SzoneierFabrics, we’ve supported over 500+ brands and independent creators in producing canvas-based products for markets in the US, Europe, and Asia. With our:
- Custom fabric weights from 6 oz to 24 oz
- Eco-friendly options like organic cotton and recycled polyester canvas
- Low MOQ starting from 50 meters
- Free sampling for quality testing
- Lead times as fast as 7–10 days for production
—we help you bring your vision from concept to finished product faster and more reliably.
Ready to create your own high-quality canvas project? Contact SzoneierFabrics today for a free consultation, swatch set, or custom quote. Our specialists will help you choose the perfect canvas weight, finish, and weave to match your design goals—so your first-time sewing success feels like you’ve been doing it for years.