
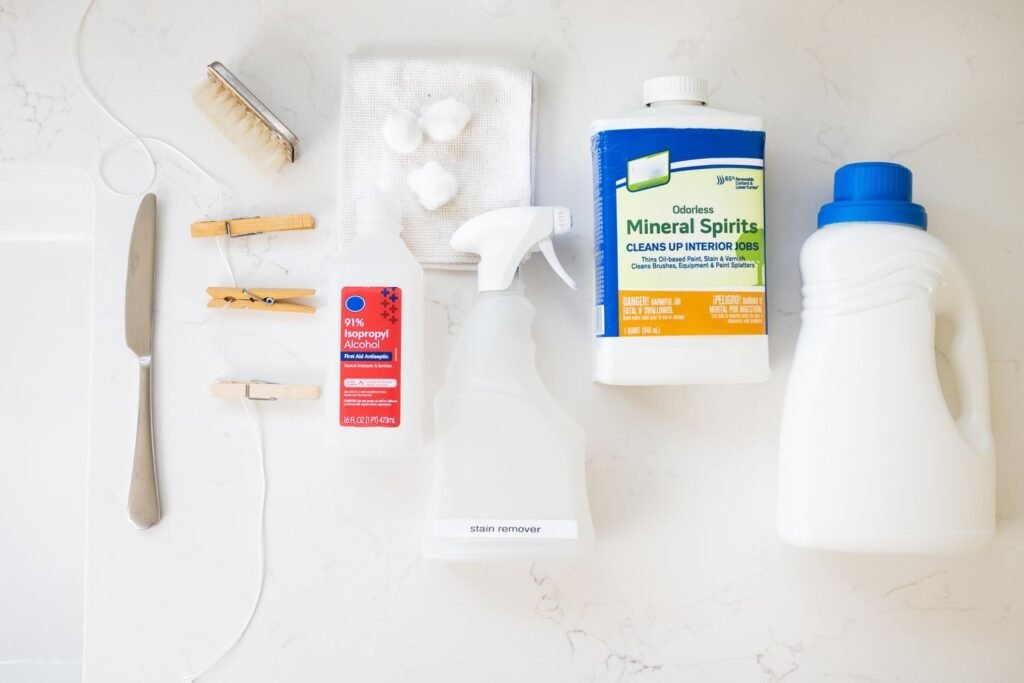
Acrylic paint stains are one of those problems everyone hopes will never happen—until they do. A dropped brush in a sampling room, a splatter during logo testing, or residue transferred from a painted surface can instantly turn finished fabric into waste. What makes the situation more frustrating is that acrylic paint is designed to dry fast, bind strongly, and resist water, which is the opposite of what textile teams want when a stain appears.
The challenge today is no longer just how to remove acrylic paint, but how to remove it without harsh chemicals, excessive water use, or damage to modern fabrics. As garment production shifts toward cleaner processes and lower environmental impact, traditional solvent-heavy stain removal methods are becoming less acceptable, less compliant, and less practical.
In essence, acrylic paint can be removed from fabric in an eco-friendly way by acting early, understanding how acrylic polymers bond to different fibers, and using controlled mechanical action combined with low-toxicity, biodegradable solvents or surfactants. The goal is not brute-force removal, but controlled separation of paint from fiber—before the polymer fully crosslinks.
Many factories that master this process don’t just save fabric; they protect consistency, reduce rework, and quietly improve yield. The difference often comes down to a few decisions made in the first minutes after the stain appears. Let’s start by understanding why acrylic paint is such a stubborn enemy in the first place.
What makes acrylic paint stains particularly challenging to remove from fabric in eco-friendly garment facilities?
Acrylic paint stains are difficult for one fundamental reason: acrylic paint is a plastic coating, not a dye. A dye migrates into fiber and can sometimes be lifted or chemically reversed. Acrylic paint, by design, dries into a flexible polymer film that sits on the surface and mechanically bonds to the fiber—then hardens into a “skin” that resists water, mild detergents, and most low-hazard cleaners.
In an eco-friendly garment facility, the challenge increases because the most aggressive “quick fixes” are often restricted: acetone-heavy removers, toluene-based solvents, and strong solvent blends that can strip polymer films quickly are avoided due to VOC limits, worker safety protocols, and wastewater compliance. That shifts the entire removal strategy away from brute force and toward three controllable variables:
- Timing (how fast you respond before film formation completes)
- Chemistry awareness (what can soften acrylic without violating safety rules)
- Mechanical technique (blotting, lifting, controlled scraping/peeling, and low-impact agitation)
When a facility relies on low-VOC and water-reduction systems, the “skill” of removal becomes less about chemical strength and more about process discipline—the right action at the right minute with the right fabric handling.
Why acrylic paint behaves differently on fabric
Acrylic paint behaves differently because it undergoes a physical transformation that many stains do not: it starts as a waterborne emulsion and then becomes a continuous polymer layer. That transformation has two implications:
- Water only works while the paint is still wet. Once water evaporates, the polymer particles fuse, and water can’t re-separate them.
- The paint doesn’t just discolor the fiber—it adds a solid layer. So removal is not “washing out color.” It is lifting or breaking a film.
This is why teams can see a stain “look fine” after a quick rinse, only to discover later that the remaining residue cures and becomes a stiff, shiny patch that permanently changes hand feel.
Acrylic paint is a polymer film, not a stain
Acrylic paint typically consists of:
- Acrylic polymer emulsion (plastic particles in water)
- Pigments (color particles)
- Additives (plasticizers for flexibility, surfactants, adhesion promoters, thickeners)
When wet, those polymer particles float in water. As the water evaporates, the particles pack together and fuse into a continuous plastic film. That film grips fibers like a thin glue layer. On textured textiles, the film can anchor around fiber hairs and yarn twist; on open weaves, it can bridge gaps and “lock in” at yarn intersections.
| Stage | What happens | Removal difficulty |
|---|---|---|
| Wet (fresh) | Polymer still mobile | Easy |
| Semi-dry | Film forming | Moderate |
| Fully cured | Polymer crosslinked | Very hard |
Once cured, removal is no longer about “cleaning.” It becomes controlled peeling, controlled softening, or controlled abrasion—and all three can damage fabric if done carelessly.
A practical way to explain this to operators is: you’re not removing a stain; you’re removing a thin layer of plastic that bonded itself to the textile.
Why eco-friendly processes raise the bar
Eco-friendly facilities typically limit:
- Volatile organic solvents (VOC control)
- High-temperature chemical stripping (energy and worker exposure concerns)
- Excessive wastewater discharge (water-reduction goals, effluent limits)
- Harsh chemistry that can irritate skin or require heavy PPE (worker safety)
Those restrictions remove many conventional shortcuts and force better process control.
| Constraint | Impact on paint removal |
|---|---|
| Low-VOC rules | Fewer aggressive solvents |
| Water reduction goals | Less rinsing tolerance |
| Worker safety focus | Mild chemistry only |
So the removal “toolkit” becomes more technical:
- You must stop the paint from spreading (blot, don’t rub).
- You must avoid driving paint deeper into yarns (no aggressive brushing while wet).
- You must choose methods that lift film gradually without shredding fibers.
- You must balance spot-treatment success against fabric damage risk and rework cost.
In other words, a facility might technically be able to remove more paint with harsher chemistry—but the eco-compliant approach prioritizes acceptable removal + minimal fiber damage + repeatable procedures.
Fabric structure makes a big difference
The same acrylic spill can behave like a removable surface layer on one fabric and a permanent bonded patch on another. The reason is surface geometry and absorbency.
| Fabric characteristic | Paint interaction |
|---|---|
| Smooth filament yarns | Paint sits on surface |
| Fuzzy staple fibers | Paint penetrates |
| Open weaves | Paint seeps deeper |
| Coated fabrics | Paint bonds chemically |
Here’s what that means in practice:
- Smooth filament yarns (many polyesters, some nylons): acrylic often stays closer to the surface. If caught early, it may lift more cleanly because it has fewer “anchor points.”
- Fuzzy staple fibers (cotton, viscose, wool blends): acrylic can wick between fibers and wrap around surface hairs. Even after removal, leftover polymer can leave stiffness or a slightly darker patch.
- Open weaves (loose canvas, gauze structures, certain knits): paint can migrate through to the back quickly, doubling the cleaning area.
- Coated fabrics (PU, acrylic-coated textiles): the paint may bond more strongly because polymer-to-polymer adhesion is better than polymer-to-fiber adhesion. Removal is harder and risks stripping the coating.
This is why a method that looks successful on polyester can fail on cotton, and why “one universal remover” almost never works across mixed fabric programs.
Why viscose and other cellulosics can be trickier than they look
Even though acrylic paint doesn’t “dye” the fabric, cellulosic fibers (cotton, viscose, ramie) often show worse visible damage after removal because:
- They swell and absorb water more readily (paint spreads if mishandled)
- Fiber surfaces are more textured at microscopic level (more anchoring points)
- Mechanical scraping can fuzz or raise the nap, creating a permanent light patch
So eco-friendly removal has a double requirement: remove polymer and avoid surface disturbance that makes the stain look worse even if the pigment is mostly gone.
The economic reality for eco-friendly facilities: “damage avoidance” is part of removal success
In production, success isn’t defined as 100% paint removal. It is defined as:
- Can the fabric return to acceptable appearance?
- Is hand feel acceptable (no stiff “boardy” patch)?
- Is shade consistency maintained after drying?
- Does the treatment create halos, rings, or abrasion marks?
- Is the process repeatable without escalating chemical use?
This is why timing and technique are critical: the longer acrylic cures, the more aggressive the mechanical action must become—and the higher the risk of fiber damage.
A common real-world scenario
In one sampling workshop, a water-based acrylic logo test splashed onto cotton canvas. Immediate blotting removed most of it. The same spill, left untouched for 20 minutes, required multiple cleaning cycles and still left stiffness in the fabric. The difference was time, not chemistry.
That “20-minute threshold” is a real operational lesson. Many facilities can’t respond instantly, so the best eco-friendly practice is to build a rapid-response routine:
- Identify the spill fast
- Stop spread immediately
- Keep the area from drying (if appropriate and safe)
- Route it to trained spot-treatment staff before the film fully forms
How do different types of acrylic paint interact with various fabric fibers?
Not all acrylic paints behave the same, and not all fabrics respond equally. If you treat every “acrylic stain” with the same remover, you’ll get inconsistent results—sometimes you’ll lift the paint cleanly, and other times you’ll drive pigment deeper, leave a stiff halo, or damage the fabric finish.
The fastest way to improve removal success while staying eco-friendly is to think in terms of paint type × fiber type interaction:
- Paint type controls how the film forms: viscosity, binder load, flexibility additives, and how fast it coalesces into a continuous plastic layer.
- Fiber type controls where the paint goes: capillary penetration, surface energy, dye/finish compatibility, and how much mechanical action the fabric can tolerate.
Acrylic paint is typically an aqueous acrylic polymer emulsion: water carries pigment and polymer particles; as water evaporates, the particles soften and fuse (coalesce) into a film. Once that film fully cures, it behaves more like a flexible plastic than a “stain.” That’s why removal is easiest early, and why older stains require softening the film first before any lifting works.
Matching paint chemistry to fabric behavior
Before you reach for any product, make two quick identifications:
- Paint category (what kind of acrylic is it?)
- Fabric fiber and finish (what is the paint sitting on, and what coatings exist?)
This small step prevents the most common “eco” failure: using too much water on absorbent fibers (drives pigment in), or using aggressive solvents/heat on coated fabrics (damages the coating).
Common acrylic paint types in garment environments
| Paint type | Typical use | Removal difficulty |
|---|---|---|
| Water-based craft acrylic | Sampling, DIY | Low–moderate |
| Soft-body acrylic | Textile tests | Moderate |
| Heavy-body acrylic | Artwork, signage | High |
| Acrylic with fabric medium | Stretch prints | Very high |
Why removal difficulty increases across this list:
- Viscosity: Heavy-body paint sits thicker on top, forms a stronger film, and “bridges” between fibers. That film can crack off in pieces, but it also bonds stubbornly at edges where it keys into the textile.
- Binder concentration: Paints designed for durability usually have higher binder load (more polymer relative to water), which creates a tougher film.
- Additives and mediums: Fabric medium and similar additives are designed to keep acrylic flexible after drying—great for wear, bad for removal. Flexibility often means the film stays rubbery instead of brittle, so it resists scraping and lifts less cleanly.
A helpful rule for teams: the more the paint is engineered to behave like a “textile print,” the more it behaves like a permanent coating. That’s why “acrylic with fabric medium” is usually the hardest class to remove without some compromise (either time, repeated cycles, or slight fabric hand change).
Fiber-by-fiber interaction overview
| Fabric fiber | Paint behavior | Key challenge |
|---|---|---|
| Cotton | Absorbs paint | Deep penetration |
| Polyester | Surface adhesion | Film bonding |
| Nylon | Strong attraction | Chemical affinity |
| Blends | Uneven behavior | Patchy removal |
| Coated fabrics | Chemical bonding | Risk of coating damage |
These behaviors come from basic textile physics:
- Cotton and other cellulosics have internal structure and capillaries that pull liquid in quickly.
- Polyester is hydrophobic and smooth; paint tends to sit more on the surface, but when it cures it can form a continuous film that grips mechanically.
- Nylon can interact strongly with certain chemicals and finishes; it’s also more heat-sensitive than many people assume, so overheated “quick fixes” can permanently change sheen or texture.
- Blends create two different stain mechanisms at once: one fiber absorbs, the other holds a surface film.
- Coatings (PU, PVC, acrylic coatings, DWR layers, laminations) act like a plastic surface that can bond with the acrylic film—removal becomes a “polymer-on-polymer” problem.
Cotton: absorbent but forgiving
Cotton is the classic “soaks it up fast” fabric. That absorbency creates a deep-stain risk, but cotton is also relatively tolerant of controlled mechanical action and re-wetting—so you have a good chance of success if you act early and work systematically.
What typically happens:
- Fresh paint: wicks into yarns quickly, especially in looser weaves or knits.
- Early treatment: water-based approaches can work if you don’t flood the area.
- Dried paint: binder/pigment sits inside the yarn bundle; surface scraping alone won’t solve it.
Eco-friendly removal works best when you treat cotton like a “fiber penetration” problem:
- Re-wet with controlled moisture (not soaking): use a damp towel blot from the back side when possible, so you push paint out rather than deeper.
- Use surfactants to loosen and lift pigment: mild dish soap or textile-safe surfactant solutions help break the boundary layer and improve lift.
- Mechanical lifting matters: soft brush, fingernail edge, or plastic scraper for thick films—slow, repeated lifts are safer than hard scrubbing.
Practical note for production floors: cotton looks like it’s improving quickly in the first 60 seconds, then stalls. That’s normal. The first lift is surface pigment; the remaining color is embedded binder in the yarn. Plan for multiple cycles rather than pushing harder.
Polyester: smooth but stubborn
Polyester does not absorb water-based acrylic the same way cotton does, so paint often stays nearer the surface initially. That sounds good—until the acrylic cures into a continuous film that grips across the fabric surface.
Common behavior on polyester:
- Paint “sits on top,” especially on tightly woven polyester or microfiber.
- Once cured, the film can anchor into surface texture (micro-roughness) and become difficult to peel cleanly.
- Excess heat can create sheen change, glazing, or slight distortion.
Eco-friendly removal on polyester is usually a “film softening” process:
- Patience beats force. Short dwell times repeated are safer than one aggressive attempt.
- Mild alcohols (used carefully) can soften the acrylic film edge and help lift it. Apply sparingly with a swab, not a pour.
- Surfactants help once the film begins to break, because pigment can redeposit as a faint haze.
A practical warning: polyester can show permanent luster changes if you use high heat or aggressive rubbing. Even if the paint comes off, the “clean” spot may look different under light. That’s why slow softening and gentle lifting usually produce better final appearance than speed.
Nylon: strong attraction and higher risk of process damage
Nylon is often the “surprise” fabric in cleaning rooms: stains can cling, and the fabric can be more sensitive to heat, certain chemicals, and abrasion than teams expect—especially on lightweight nylon used in bags, windbreakers, and technical shells.
What makes nylon tricky:
- Acrylic film can adhere strongly to nylon surfaces and finishes.
- Nylon is prone to surface changes from heat and friction (gloss shifts, slight hardening).
- Many nylon products are coated or DWR-treated, which adds another layer of compatibility risk.
Eco-forward removal approach:
- Start with gentle softening (mild alcohol applied locally; avoid soaking seams and coated zones).
- Use mechanical lift at the film edge rather than scrubbing across a wide area.
- If the fabric is coated, treat it like a coated fabric first (see below), because the coating is often the first thing to get damaged.
Blended fabrics: the hidden problem
Blends combine the worst of both worlds because the paint does two different things in one spot.
| Issue | Result |
|---|---|
| Cotton absorbs | Deep stain |
| Polyester resists | Surface film |
| Uneven cleaning | Halo marks |
This is why blends create “cleaning halos”:
- You remove the surface film from the polyester-rich surface area,
- but pigment remains inside cotton yarns,
- leaving a faint ring or patchiness that looks worse than before.
Eco-friendly strategy for blends:
- Treat it in two phases: film lift first, then penetration lift.
- Avoid over-wetting. Over-wetting spreads pigment through the cotton side and enlarges the visible area.
- Always do a small test clean first, because halo risk is high.
Coated fabrics: chemical bonding and finish risk
Coated fabrics (PU-coated nylon, PVC-coated polyester, acrylic-coated canvases, laminated waterproof shells) behave differently: paint is often sitting on a polymer surface that can partially fuse with the acrylic binder. Now you’re not just “removing paint,” you’re managing two plastic-like layers.
Typical risks:
- Coating softening or tackiness if wrong solvent is used
- Surface whitening from abrasion
- Loss of water resistance from micro-damage
- Gloss change or permanent texture shift
Eco-friendly removal priorities here:
- Use the mildest method possible, and accept that “perfect removal” may be unrealistic without compromising the coating.
- Focus on localized lifting rather than wide-area rubbing.
- Avoid heat as a shortcut. Heat can permanently deform coatings.
Why paint type matters as much as fiber type
The same cotton fabric will behave very differently depending on the paint category:
- Water-based craft acrylic: often thinner, lower binder, easier to re-wet early.
- Soft-body acrylic: more binder, designed for smooth coverage; penetrates moderately and cures stronger.
- Heavy-body acrylic: thick film that may peel in chunks but bonds strongly at edges.
- Acrylic with fabric medium: engineered for flexibility and wash resistance; the binder system is “built to stay.”
Paints formulated for flexibility often bond more aggressively to fibers because they’re designed to survive bending, stretching, and laundering without cracking. From a removal perspective, you’re fighting a coating designed not to fail.
Quick field checks that improve outcomes
These small, low-tech checks help teams choose the right approach without lab testing:
- Touch test (dried):
- Brittle, crackly film → heavy-body without medium (often scrapes/peels better)
- Rubbery, flexible film → fabric medium / textile-intended (harder; needs softening and time)
- Water reactivity test (tiny corner):
- Slight tack/softening with water → fresher or lower binder
- No change → fully cured film; needs softening before lifting
- Fabric ID check:
- If uncertain, do a burn test only if your facility allows it; otherwise check purchase spec, labels, or supplier BOM.
Human perspective: why mistakes happen
Most failed removals happen because teams assume “acrylic is acrylic” or “fabric is fabric.” In reality, the interaction between the two matters more than either alone.
Common failure patterns in real facilities:
- Flooding cotton with water and spreading pigment outward
- Overheating polyester/nylon to “speed it up,” then leaving a shiny patch
- Treating coated fabrics with the same chemistry used for uncoated textiles
- Scrubbing blends aggressively and creating a permanent halo
Facilities that train staff to identify both paint type and fabric type reduce fabric loss dramatically, not because they use exotic chemicals, but because they stop doing the wrong thing first.
Practical takeaway for eco-friendly removal programs
If you’re aiming for eco-friendly removal with high success rates, build your SOP around these principles:
- Identify before you act: paint category + fiber + coating/finish
- Remove in the right order: lift film first, then address embedded pigment
- Use time instead of force: dwell + repeat cycles beats harsh chemistry
- Protect the substrate: coated fabrics and synthetics need gentler handling than cotton
- Test on blends: always, because halo risk is real
Which eco-friendly solvents and natural cleaners are effective for breaking down acrylic paint on textiles?
Eco-friendly acrylic paint removal works when cleaners soften the polymer film or reduce adhesion at the fiber interface—without swelling, bleaching, or weakening the textile. Acrylic paint is a water-based system while it’s wet, but once it cures it becomes a tough acrylic polymer film. That’s why “green” removal is rarely a single-step job: the best results come from progressive softening + controlled mechanical lift, repeated in short cycles, instead of one aggressive chemical shock.
In practice, fresh or semi-dry acrylic responds best to low-toxicity alcohols and plant-derived surfactants, while cured paint requires staged softening—never aggressive stripping. Facilities that layer mild methods outperform those that jump straight to “strong” chemistry.
What actually works—and why
Before you pick a cleaner, first classify the paint state (this changes everything):
- Fresh (0–30 minutes): paint still water-reactive; surfactant + warm water can do most of the work
- Semi-dry (30 minutes–6 hours): surface skins over; alcohol “plasticization” becomes important
- Cured (6–24+ hours): film is cohesive; removal becomes a peel-and-lift process (soften edges, lift mechanically, repeat)
Also note the textile variables that decide your safe “green window”:
- Fiber type: cotton vs polyester/nylon vs wool/silk
- Construction: loose knits trap paint deeper than tight plain weaves
- Finishes: water repellent, PU coatings, prints, heat transfers can be alcohol-sensitive
- Colorfastness: some dyes and prints can lift before the paint does
3.1 Biodegradable alcohols (controlled use)
Alcohols don’t dissolve acrylic completely; they plasticize and swell the film, especially at the paint edge where the film is thinnest. That swelling breaks the “grip” at the fiber surface so you can lift paint gradually.
| Option | Typical concentration | Best use case | Notes |
|---|---|---|---|
| Ethanol (bio-based) | 70–90% | Polyester, nylon | Fast action, low residue |
| Isopropyl alcohol | 70% | Surface films | Use sparingly on prints |
| Denatured bio-ethanol | 80% | Cured paint edges | Ventilation required |
How to use alcohol effectively without over-wetting the fabric:
- Apply with a pad, not a soak. Over-soaking pushes softened paint deeper into the yarn bundle.
- Work from the outside edge toward the center, so you don’t spread the stain.
- Use short dwell times: 30–90 seconds, then lift. Reapply as needed.
- Blot with a clean absorbent towel between cycles to remove softened binder.
Best mechanical action pairing:
- Blunt scraping with a plastic card on sturdy fabrics
- Soft toothbrush for textured weaves (light pressure, short strokes)
- Microfiber cloth rub for smooth synthetics
When to avoid or reduce alcohol:
- Screen prints, heat transfers, coated fabrics, and delicate dyes (alcohol can dull or lift some finishes)
- Wool and silk (they can be damaged by the wrong pH and rough handling; alcohol can also change hand-feel)
3.2 Plant-derived surfactants (the quiet workhorses)
Surfactants don’t “melt” acrylic. They work by:
- lowering surface tension so the cleaner can penetrate under the paint edge
- emulsifying paint additives (plasticizers, wetting agents, dispersants)
- helping released particles stay suspended so they don’t redeposit
| Surfactant type | Source | Strength |
|---|---|---|
| Alkyl polyglucosides (APG) | Corn, coconut | Mild–moderate |
| Saponins | Soapnut, yucca | Mild |
| Amino acid surfactants | Fermented sugars | Mild |
Where plant surfactants shine:
- Fresh paint on cotton and blends
- Pre-softening step before alcohol on semi-dry paint
- Post-lift cleanup (removes the sticky residue that causes re-adhesion)
Practical dilution guidance (so you don’t leave residue):
- Start with a low concentration (think “dishwashing strength,” not thick soap).
- If you see foaming but no lift, don’t keep adding surfactant—switch to alcohol edge-softening + lift.
- Rinse or flush after lifting; surfactant left in the textile can attract soil and make the area look dull later.
3.3 Mild alkaline solutions (used carefully)
Mild alkalinity can destabilize acrylic binder systems and improve soil release, but only within a safe pH range. High alkalinity is not “eco” if it damages the fiber or dye.
| Solution | pH range | Fabric compatibility |
|---|---|---|
| Sodium bicarbonate | 8–8.5 | Cotton, canvas |
| Mild carbonate blends | 8.5–9 | Heavy cottons |
When mild alkaline solutions help most:
- cotton canvas, heavy cotton twills, and robust blends
- situations where you need a slight boost to undercut tacky residue after lifting
How to use safely:
- Use warm water (not hot) and short contact time (2–5 minutes).
- Agitate gently, then rinse thoroughly.
- Never combine alkalinity with aggressive brushing on weak fibers; the combination can create fuzzing and abrasion.
Avoid on:
- wool, silk, acetate, and delicate finishes
- bright reactive dyes with uncertain washfastness (alkalinity can shift shade or cause bleeding in some dye systems)
3.4 Enzyme cleaners (supporting role)
Enzymes don’t “digest” acrylic polymer, but they can remove organic binders and soils that lock paint in place—especially when paint was mixed with fabric softeners, body oils, food, or starches.
| Enzyme type | Benefit |
|---|---|
| Protease | Loosens protein residues |
| Amylase | Removes starch-based binders |
| Lipase | Breaks oily additives |
Where enzymes actually help:
- after you’ve lifted most paint mechanically and you’re fighting a halo or residue ring
- when paint is embedded with mixed soils (workwear, uniforms, upholstery)
- as a second-stage wash to restore hand-feel and remove tack
How to get enzyme value (and avoid wasted time):
- Use lukewarm water (enzymes generally dislike high heat).
- Give them time: 10–20 minutes, then rinse.
- Don’t expect enzymes to remove a cured acrylic film alone.
3.5 What to avoid (even if they work fast)
Some solvents work quickly but create fiber damage, compliance problems, odors, or long-term textile weakness.
| Agent | Why it’s risky |
|---|---|
| Acetone | Fiber damage, VOC |
| MEK | Health & compliance risk |
| Paint thinner | Residue, odor |
| Chlorinated solvents | Restricted |
Why “fast” is often expensive:
- They can melt synthetic fibers or weaken yarns (especially some acetate blends and coated materials)
- They can drive dissolved binder deeper, creating a permanent shadow
- They introduce air-quality and worker safety issues that many facilities can’t justify
Eco-friendly success is about progressive softening, not chemical shock.
A practical, staged “green” removal workflow (works for most textiles)
Stage 1: Protect the fabric and prevent spread
- Place an absorbent towel under the stain.
- If paint is thick, lift excess with a spoon or dull edge (don’t smear).
- Work from edge to center.
Stage 2: Surfactant lift (best for fresh paint)
- Apply plant-based surfactant solution.
- Gently agitate 30–60 seconds.
- Blot and rinse.
Stage 3: Alcohol edge-softening (semi-dry to cured)
- Apply ethanol or IPA with a pad to the edge.
- Wait 30–90 seconds.
- Lift with controlled scraping or gentle brushing.
- Blot between passes.
Stage 4: Mild alkalinity rinse (optional boost for sturdy cottons)
- Short soak 2–5 minutes.
- Agitate lightly.
- Rinse thoroughly.
Stage 5: Enzyme cleanup (for residue halos)
- 10–20 minutes at lukewarm temperature.
- Rinse and air dry.
Fabric-specific cautions (so you don’t “remove paint” by ruining the textile)
Cotton / canvas
- Usually tolerant of surfactants and mild alkalinity.
- Can be abraded by aggressive brushing; use a controlled, short-stroke method.
Polyester / nylon
- Alcohol works well for softening paint film.
- Watch out for printed surfaces and coatings; patch-test first.
Wool / silk
- Avoid alkalinity and harsh rubbing.
- If you must treat, use surfactant + minimal alcohol, shortest dwell time, and very gentle lift.
Coated fabrics, PU/TPU laminations, printed/heat-transfer graphics
- High risk category.
- Keep alcohol contact minimal; test a hidden area first.
- Prefer surfactant-based undercutting and mechanical lift with low pressure.
How should garment facilities safely test and prepare stained fabric before paint removal?
Testing and preparation are the difference between successful recovery and permanent damage. Acrylic paint removal must start with a structured assessment, not improvisation. Facilities that skip testing often create halos, dye migration, color loss, surface “shine,” or fiber distortion—issues that can be more costly than the original stain.
Acrylic paint behaves like a film-forming polymer: when wet, it’s mostly water plus pigment and binder; once cured, it becomes a flexible plastic-like layer that can bond to fiber surfaces and lodge into yarn interstices. That is why the same remover can be “safe” on one fabric and destructive on another. A safe prep routine isolates risk, preserves finishes, and increases first-pass success.
Below is a practical workflow used by many production floors: triage → micro-testing → mechanical reduction → moisture control → stop/continue decision. This approach protects bulk production because it forces decisions based on observed fabric response, not assumptions.
A practical pre-treatment workflow
4.1 Identify paint state and fabric type (fast triage)
Start with speed and clarity. Your objective in the first 2–5 minutes is to determine whether the stain is still removable with minimal intervention or already cured and likely to require controlled softening and lifting.
| Check | What to look for | Decision impact |
|---|---|---|
| Paint state | Wet, tacky, cured | Method selection |
| Fabric fiber | Cotton, PET, blend | Solvent choice |
| Fabric finish | Coated, dyed, printed | Risk level |
| Location | Surface vs penetration | Dwell time |
Rule: If the paint is still wet—stop everything else and blot first.
Practical triage notes that prevent expensive mistakes
- Wet paint: treat like a spill response. Blot (do not rub), isolate the area, and keep the stain from spreading. At this stage, aggressive solvents are rarely necessary and can drive pigment deeper.
- Tacky paint: the film is forming. Mechanical removal can still work if done gently, but solvents may smear the polymer and enlarge the affected zone if overused.
- Cured paint: behaves like a bonded film. Removal becomes a controlled process of softening, lifting, and repeating. Expect longer labor time and a higher risk of finish change.
- Fiber matters:
- Cotton/viscose/linen: more tolerant of many water/alcohol systems, but also more prone to dye bleeding on certain reactive dyes or unstable prints.
- Polyester (PET)/nylon: generally lower absorbency, but heat and certain solvents can distort surface texture, sheen, or coatings.
- Blends: act like the “weakest link.” If one component is sensitive, treat the whole fabric as sensitive.
- Finish matters more than people think: coatings, water repellents, PU films, softeners, and calendaring can be altered by alcohols, surfactants, or friction—creating permanent shine patches.
Quick risk rating (useful on the production floor)
- Low risk: undyed or stable dyed cotton, uncoated fabric, paint mostly on surface
- Medium risk: printed goods, dark saturated colors, blends
- High risk: coated/laminated fabrics, heat-sensitive synthetics, delicate weaves, or visible finish effects
This risk rating guides how conservative your testing should be.
4.2 Colorfastness and finish testing
Always test in a hidden area. The point isn’t just “does color bleed?”—it’s also “does the finish change?” because finish damage can appear as gloss shifts, rough handfeel, whitening, or patchy texture that fails QC under lighting.
| Test | How | Pass criteria |
|---|---|---|
| Alcohol rub | Light swab | No dye transfer |
| Water blot | Damp pad | No bleeding |
| Surfactant dab | Short dwell | No sheen change |
If any test fails, downgrade the method.
How to run these tests so they are meaningful (not “checkbox testing”)
- Use a consistent swab pressure: “light swab” should be a gentle wipe, not scrubbing. If your team varies pressure, results become unreliable.
- Standardize a dwell time for tests:
- Alcohol rub: 5–10 seconds of contact, then wipe once
- Water blot: 15–30 seconds of contact, then lift straight up
- Surfactant dab: 30–60 seconds, then blot
- Observe under two lighting angles:
- Straight-on for color change
- Raking light for sheen/texture changes
- If the fabric has a print, test on:
- the print color
- the background color
- a seam allowance (often dyed differently due to pressure/heat)
What “failure” looks like in real production terms
- Dye transfer on swab: the color system is vulnerable; avoid stronger solvents and minimize friction.
- Bleeding halo after water blot: very high risk of ring formation; solvent-based spot cleaning may still cause migration.
- Sheen change after surfactant dab: finish is sensitive; mechanical agitation must be reduced and solvent choices must be milder.
A common best practice is to keep a simple internal “test ladder”: if alcohol fails, you do not proceed with alcohol-based paint-softening on the stain. You switch to lower-risk approaches and accept partial removal if needed.
4.3 Mechanical preparation (often overlooked)
Mechanical steps reduce chemical demand. In practice, the best facilities remove as much mass as possible before introducing solvents. This lowers the amount of softened polymer that can smear into surrounding fibers.
- Gently scrape thick paint with a plastic edge
- Lift flakes once softened
- Avoid metal tools
| Tool | Use |
|---|---|
| Silicone spatula | Edge lifting |
| Soft nylon brush | Surface agitation |
| Microfiber pad | Blotting |
Mechanical prep technique that prevents “spread”
- Work from outer edge toward center to reduce ring expansion.
- Remove only what is raised above the fabric surface first. Don’t force paint out of the weave while it is still brittle; that can break fibers or fuzz the surface.
- If cured paint is thick, “micro-crack” the film gently with the silicone edge (minimal pressure) to help later softening agents reach under the paint.
- Use the soft nylon brush only after the paint begins to soften. Brushing cured paint often drives fragments deeper or raises nap on fabrics.
Why metal tools are risky Metal edges can:
- cut yarns (especially in lightweight weaves)
- scratch coatings
- leave permanent abrasion marks that look like dye loss
Plastic and silicone tools give you control without the sharp failure modes.
4.4 Moisture management before treatment
Water content matters. One of the most common causes of halos is improper moisture control. Too dry and your softening agent doesn’t travel under the film; too wet and you drive dissolved binders or pigments outward.
| Fabric state | Result |
|---|---|
| Bone-dry | Poor penetration |
| Slightly damp | Optimal |
| Over-wet | Halo risk |
Light pre-dampening helps solvents travel under the paint film.
What “slightly damp” means on a production line
- The fabric should feel cool to the touch, not wet.
- A microfiber pad pressed on the area should not pick up free water.
- If the fabric is thin, dampen from the back side when possible to control surface spread.
Controlled pre-dampening method
- Use a clean mist bottle or a lightly damp pad.
- Apply moisture in a zone slightly larger than the stain (e.g., 1–2 cm beyond the edge), then blot to even out.
- Wait 30–60 seconds so moisture distributes through the yarns rather than pooling on the surface.
This step improves “under-film” access and reduces the need for longer solvent dwell times later.
4.5 Decision tree: when to stop
Not all stains should be chased endlessly. A professional facility protects the garment first, then targets stain reduction within safe limits.
| Condition | Recommendation |
|---|---|
| Deep penetration + cured | Partial removal only |
| Coated fabric damage risk | Stop early |
| Visible fiber distortion | Abort |
Knowing when to stop saves fabric integrity.
How to make the stop/continue decision objectively Use these checkpoints before escalating:
- Is the paint primarily on the surface or inside the yarns?
- Surface-heavy stains are better candidates for high removal.
- Penetrated stains often require aggressive steps that risk finish change.
- Has the fabric already shown warning signs? Stop escalation if you see:
- whitening of fibers (stress or finish disruption)
- fuzzing/pilling around the stain
- sheen patch in raking light
- print edge blur or dye migration
- Is the “damage risk” now higher than the “stain impact”? For many commercial garments, a faint shadow can be acceptable, while a sheen patch or color loss is not.
Recommended escalation ladder (simple and safe)
- Level 1: blotting + minimal mechanical lift
- Level 2: controlled dampening + repeat mechanical lift
- Level 3: mild chemical approach only if tests pass (small area, short dwell)
- Level 4: stop and route to rework strategy (panel replacement, cover stitch, patch, redesign) if risk rises
Facilities that document this ladder reduce operator variability and prevent “hero cleaning” that ruins garments.
Additional facility controls that improve first-pass success
These steps are not “extra paperwork.” They are what makes the process repeatable across operators, shifts, and fabric lots.
A) Set up a micro-test zone
- Always keep an approved “test kit”:
- swabs, microfiber pads, silicone tool, nylon brush
- labeled bottles for water, mild surfactant solution, and approved solvent (if used)
- Use a disposable protective barrier under the fabric to prevent transfer through layers.
B) Define safe dwell times and agitation limits Even before choosing a remover, define what your facility considers safe:
- Dwell time per cycle (e.g., 30–90 seconds for trial steps)
- Max cycles before stop review (e.g., 3–5 cycles)
- Agitation rules (no scrubbing; blotting only unless specifically approved)
C) Control temperature Heat can accelerate polymer softening, but it also increases risk:
- Warm environments can increase dye migration and finish change.
- Many synthetics and coatings react badly to localized heat. If you use heat at all, keep it mild and uniform, never concentrated.
D) Record what you learn For repeat styles and fabrics, a short internal record improves speed next time:
- Fabric construction, dye/print type, finish notes
- Which tests passed/failed
- Which approach succeeded without finish change
Over time, this becomes a practical in-house knowledge base that reduces trial-and-error.
5) What step-by-step methods can be used to remove acrylic paint from cotton, polyester, and blended fabrics without harming the material?
The safest way to remove acrylic paint is to match the method to the fiber, then work in short, controlled cycles that soften and lift paint rather than force it out. In eco-friendly facilities, you usually don’t have permission to “blast” the stain with high-VOC solvents or aggressive strippers—so the winning approach is sequencing:
mechanical first → mild chemistry second → rinse/neutralize last, with clear stop rules to prevent fiber damage.
In practice, cotton favors re-wetting + surfactants, polyester favors controlled alcohol softening, and blends require a split strategy with careful edge control to avoid halos and texture change.
Fiber-specific removal workflows
Before any fiber-specific steps, apply these universal controls (they prevent 80% of damage complaints):
- Control spread: place an absorbent pad underneath; blot outward-to-inward.
- Work from the back when possible: pushing paint out of the yarn path is safer than pushing it deeper.
- Short cycles: 1–5 minutes work, then reassess. Acrylic responds to time + repetition better than brute force.
- Avoid heat until the end: heat can set acrylic and can also distort synthetics or finishes.
- Always test first: inside seam, hem, or spare swatch—especially for dyed cotton, brushed finishes, coated fabrics, and printed polyester.
5.1 Cotton and cotton canvas (absorbent fibers)
Why cotton behaves this way
Cotton absorbs paint quickly while wet because water and binder can wick into the fiber/yarn spaces. The advantage is that cotton also swells in moisture, which can help loosen dried residue and push particles outward—if you control the water and don’t rub.
Step-by-step (eco-friendly)
- Scrape only if paint is thick and fully dry: Use a blunt edge (plastic card). Lift flakes gently; do not abrade the surface.
- Pre-dampen the stained area with warm water (not hot). Keep the whole affected area evenly damp to prevent ring edges.
- Apply a plant-based surfactant solution 1–2% (or a mild eco detergent diluted to a similar strength).
- Allow 2–5 minutes dwell. Keep it damp; do not let it dry during dwell.
- Gently agitate from the back side with a soft brush or microfiber cloth. Use light strokes, not scrubbing.
- Blot with a clean absorbent cloth. Replace cloth sections frequently so you don’t redeposit softened paint.
- Light rinse (or spray rinse) to remove loosened binder and pigment. Do not flood-rinse unless necessary.
- Repeat in short cycles until improvement stops. Two to six cycles is normal for cotton canvas.
| Risk point | How to avoid it |
|---|---|
| Halo rings | Keep area uniformly damp |
| Fiber fuzzing | Use soft bristles only |
| Color loss | Test surfactant first |
When cured paint remains (localized stiffness or “ghost film”)
If you’re down to a thin, stiff residue and pigment shadow:
- Apply a bicarbonate paste (pH ~8.5) locally (small area only).
- Dwell 3–8 minutes, keep it damp, then lift with gentle back-side agitation and blot.
- Rinse thoroughly and blot-dry.
Why it helps: bicarbonate adds mild alkalinity and a fine abrasive effect that can disrupt the film edge without harsh solvents. When not to use: delicate dyed cottons that shift under alkalinity, enzyme-treated finishes, or fabrics with unstable prints.
Stop rule for cotton: If you see surface whitening, nap disturbance, or a fuzzy “burnished” patch, stop and reassess—cotton damage is often harder to reverse than a faint paint shadow.
5.2 Polyester (smooth filament fibers)
Why polyester is different
Polyester filaments are smooth and hydrophobic. Acrylic paint tends to sit more on the surface and form a film. That sounds easier—until friction creates micro-scratches or heat softens the polyester surface, making the mark look shiny or permanently altered.
The goal is plasticize and lift, not soak.
Step-by-step (eco-friendly)
- Dry lift first: If paint is cured, gently lift the thick film edge with a fingernail or plastic card. Do not scrape hard—polyester can sheen or snag.
- Lightly pre-dampen with cool water (just to control spread and reduce friction).
- Apply 70% bio-ethanol or IPA to a pad or cloth (no soaking). Press onto the paint area.
- Wait 30–60 seconds. This softens the acrylic film edge.
- Lift edges with a silicone spatula or plastic tool, working from the outer edge toward the center.
- Blot immediately to remove loosened material.
- Follow with a mild surfactant rinse and blot dry to remove alcohol residues and any loosened binder.
| Risk point | How to avoid it |
|---|---|
| Sheen change | Avoid heat and friction |
| Print damage | Isolate printed areas |
| Odor residue | Use low-odor alcohols |
Key rule
Never scrub polyester aggressively. Scrubbing can push softened paint into tiny surface texture and can also cause permanent gloss change, especially on matte fabrics.
Stop rule for polyester: If the area starts looking glossy, flattened, or “different angle reflective,” stop. That’s surface alteration, not remaining paint.
5.3 Blended fabrics (cotton/poly, tri-blends)
Why blends are tricky
Blends have two behaviors at once:
- cotton portion: paint can penetrate and bind into yarn spaces
- polyester portion: paint can form a surface film
That’s why one single method often fails. If you treat the blend like cotton, you may spread pigment and cause halos. If you treat it like polyester with alcohol everywhere, you may create uneven removal and texture difference.
Split-strategy approach
- Treat absorbent zones like cotton
- Treat smooth zones like polyester
- Work from the outside inward
- Use the mildest method that moves the stain, then escalate only where needed
| Step | Action |
|---|---|
| 1 | Map fiber dominance visually |
| 2 | Start with mild surfactant |
| 3 | Spot-use alcohol only where needed |
| 4 | Rinse lightly between stages |
Step-by-step (eco-friendly)
- Map the fabric response: touch a damp swab to an inconspicuous area—does it absorb quickly (cotton-heavy) or bead slightly (poly-heavy)?
- Start with cotton-style surfactant cycles (1–2%, 2–5 min dwell), focusing on the absorbent areas first to prevent deeper setting.
- Blot and light rinse. Reassess: if a thin film remains on smoother yarn areas, move to spot alcohol.
- Apply alcohol only to the film zones, using a pad with controlled contact (30–60 seconds), then lift carefully.
- Rinse lightly to avoid migrating loosened pigment into the cotton portion.
- Repeat only where progress continues. Overworking is what creates halos and texture mismatch.
Stop criteria (blends)
If halos, uneven texture, or visible patchiness appear, pause and reassess. Over-cleaning blends causes more damage than partial paint residue.
Quick decision guide: choose the lowest-risk next move
If you want your operators to move fast without guessing, a simple decision logic works:
- Paint is still wet: blot → rinse cool/warm → mild surfactant → blot (no alcohol needed yet)
- Paint is semi-dry (tacky): keep damp → surfactant dwell → back-side agitation → blot; avoid heavy friction
- Paint is fully cured film: mechanical lift first → targeted alcohol (poly zones) or bicarbonate paste (cotton zones) → rinse/neutralize
Quality-control checks after treatment (prevents “looks clean now, fails later”)
Before releasing the piece back into production:
- Dry down check: some residue reappears after drying as film tightens.
- Hand-feel check: stiffness usually means polymer residue remains.
- Shade check under angled light: sheen change indicates fiber surface damage on synthetics.
- Seam/print boundary check: alcohol and agitation can lift prints or disturb coatings.
Do specific tools or equipment improve acrylic paint removal in an eco-friendly workflow?
Yes. In most real cleaning rooms, tools—not stronger chemicals—decide whether acrylic paint comes out cleanly. Acrylic paint becomes a plastic-like film after it dries; if you can soften that film locally and lift it precisely, you can reduce solvent use, shorten dwell time, and avoid the two most expensive mistakes: fiber damage and “halo” marks.
Eco-friendly facilities typically build their process around three controlled forces:
- Gentle mechanical action (lift or shear the film without shredding fibers)
- Controlled moisture (just enough to re-wet or lubricate, not enough to spread pigment)
- Localized energy (steam or low heat applied briefly and only where needed)
This “precision first” approach aligns with what conservation and coatings science says about acrylic films: many acrylic emulsion films can remain relatively soft around room temperature (their glass-transition behavior contributes to softness and tack), and heat can make the surface more vulnerable to deformation or bonding if misused.
Tools that actually make a difference
6.1 Steam (low pressure, controlled)
Steam is one of the best eco-forward tools because it can soften acrylic film without adding detergent load. But it must be tightly controlled: too much heat or time can change sheen on synthetics, relax coatings, or drive paint deeper into absorbent cotton.
| Parameter | Recommended range |
|---|---|
| Temperature | 90–120°C |
| Pressure | Low |
| Exposure time | 5–10 seconds |
Why steam works (when used correctly)
- It delivers heat fast, then dissipates fast, which helps you soften the film at the edge rather than heating the whole panel.
- It slightly rehydrates the interface, improving lift with a spatula or pad.
- It reduces reliance on alcohols or stronger removers for “first break” of the film.
Best for
- Edge lifting on semi-cured or moderately cured acrylic
- Re-activating “soft-body” paint films before mechanical lift
- Preparing thick paint ridges for controlled scraping
Avoid Direct steam on heat-sensitive finishes, thin coated shells, or fabrics with fragile surface textures.
Practical safety note: many consumer ironing guides show that common textile fibers have temperature limits where surface damage can occur; for example, nylon and acrylic are often listed around the 135°C range, and polyester around 148°C, while cotton and linen tolerate much higher. That’s one reason short steam pulses can be safer than longer, hotter heat exposure—but only when you keep it brief and keep the nozzle moving.
Steam technique that improves first-pass success
- Work from the outer edge toward the center of the paint spot.
- Steam 5–10 seconds, then immediately lift with silicone spatula or microfiber pad.
- Repeat cycles rather than increasing heat/time.
- Always keep a dry microfiber pad nearby to blot loosened pigment before it re-deposits.
6.2 Ultrasonic cleaning (spot use)
Ultrasonic energy can help cleaning liquid penetrate under the paint film and disrupt the boundary layer, which can reduce chemical dependence on some stains. The key is to treat ultrasonics as a controlled lab tool, not a blanket garment solution.
| Benefit | Limitation |
|---|---|
| Reduces solvent need | Not for delicate weaves |
| Uniform agitation | Requires setup control |
Research and industry sources describe ultrasonic washing/cleaning as effective for soil removal through cavitation and mechanical action, but also highlight that textiles interact strongly with ultrasonic energy and system design matters (bath size, power, frequency, coupling). Museum conservation trials also report ultrasonic-assisted wet-cleaning approaches for textiles under controlled conditions, often using barriers and careful validation.
Where ultrasonics help in acrylic paint removal
- Test swatches: validating whether a mild surfactant solution plus ultrasound can undercut the film
- Panels and components: removable fabric pieces that can be isolated and inspected closely
- Rigid or tightly woven fabrics: where mechanical handling won’t distort the weave
Where ultrasonics can backfire
- Delicate weaves, loose knits, brushed surfaces
- Laminated/coated fabrics where water + vibration may affect adhesion
- Garments with trims, fused interlinings, or bonded seams
If you want ultrasonics to stay eco-friendly, control these variables
- Use the mildest effective solution (avoid heavy solvents)
- Keep time short and inspect between cycles
- Validate on a hidden area or swatch first, especially for dyed fabrics and prints
6.3 Mechanical tools (low aggression)
Mechanical tools are the backbone of eco-friendly acrylic removal because acrylic is often a film problem, not a “stain” problem. Your goal is to separate paint film from fibers with minimal fiber loss.
| Tool | Purpose |
|---|---|
| Silicone spatula | Lift softened paint |
| Soft nylon brush | Controlled agitation |
| Microfiber pads | Absorb loosened paint |
Rule If fibers start to pill or fuzz, stop immediately.
Why silicone spatulas beat metal scrapers
- Silicone edges conform to weave texture and reduce snagging.
- They lift film by shear rather than cutting fibers.
- They’re easier to control on coated fabrics and synthetics.
When a soft nylon brush is appropriate
- After the film has softened and started to break up
- On durable fabrics where gentle agitation helps release pigment particles
- When paired with a small amount of surfactant and controlled moisture
When brushing is the wrong choice
- Brushed fleece, microfiber suede, delicate knits
- Any area where you see surface bloom, fuzzing, or pilling beginning
- Coated fabrics where abrasion can permanently change gloss
A useful workflow habit is to treat mechanical steps like sanding a finished surface: light pressure, frequent checks, and stop before visible damage appears. Mechanical overwork is the fastest way to turn a removable stain into a scrap panel.
6.4 Workflow support equipment
Most “removal failures” aren’t chemistry failures—they’re inspection and control failures. Small support tools dramatically improve consistency and reduce rework.
| Equipment | Value |
|---|---|
| Adjustable lighting | Spot micro-residue |
| Magnification lens | Inspect fiber damage |
| Moisture meters | Prevent over-wetting |
Adjustable lighting
- Acrylic residue can be invisible head-on and obvious under raking light.
- Move light at a low angle to catch sheen differences, film edges, and remaining gloss patches.
Magnification
- Helps you distinguish between residual film and fiber fuzz.
- Prevents over-scrubbing when the remaining “stain” is actually fiber disturbance.
Moisture meters
- Especially useful on cotton, blends, and thicker fabrics where over-wetting drives pigment deeper or creates halos.
- Helps standardize “damp vs wet” across operators, reducing variability.
If you run production-scale correction work, these tools are often cheaper than one batch of fabric loss. They also make training easier, because you can show staff what “too wet” or “fiber damage starting” looks like in real time.
6.5 What doesn’t help (despite common belief)
| Tool | Why it fails |
|---|---|
| High-pressure washers | Drive paint deeper |
| Hard bristle brushes | Fiber damage |
| Heat guns | Polymer bonding |
High-pressure washers They can blast pigment into yarn bundles and widen the affected area. On blends, this often creates the “halo ring” that never fully disappears.
Hard bristle brushes They remove fibers faster than they remove acrylic film. You may “win” the stain and lose the fabric appearance.
Heat guns Heat guns often do the opposite of what you want: instead of softening and lifting, they can make the acrylic film flow and bond more tightly or alter the fabric surface (especially synthetics). The risk is higher because heat guns are hard to control precisely, and temperature at the surface can spike quickly. Guidance on safe heat exposure for common fabrics (nylon/polyester) is conservative for a reason.
A practical eco-friendly equipment workflow (how the tools fit together)
If you want a repeatable process that minimizes chemical load, structure it like this:
Step 1: Inspection and containment
- Identify fiber type and whether there’s a coating/lamination.
- Use adjustable light to map the true paint boundary.
- Mask or isolate surrounding area to avoid spread (especially on cotton).
Step 2: Local softening (steam first, not solvent)
- Apply low-pressure steam in short bursts (5–10 seconds).
- Immediately blot with microfiber to prevent re-deposit.
Step 3: Mechanical lift
- Use silicone spatula to lift film from the edge inward.
- Avoid scraping across dry paint—soften first.
Step 4: Residue cleanup
- If faint pigment remains, use a mild surfactant and minimal moisture.
- Nylon brush only if fabric is durable and film is already broken.
Step 5: Dry control and final check
- Dry quickly but gently (no hot blasts).
- Re-check under raking light and magnification for micro-film residue.
This sequence keeps chemistry as a “finishing tool,” not the main weapon. That’s the core idea of eco-friendly removal: replace chemical intensity with process control.
Where eco-friendly workflows usually save the most money
Even if your facility cares about sustainability, the biggest immediate wins are operational:
- Less rework: better first-pass success due to precise lifting and inspection
- Less fabric damage: fewer rejects from fuzzing, shine marks, or coating damage
- Lower chemical consumption: fewer rinses, less wastewater load
- Shorter training time: tools make technique easier to standardize
Eco-friendly workflows are about precision, not power.
Are there preventative treatments or coatings that reduce acrylic paint adhesion on fabric during production and handling?
Yes—prevention is usually the most eco-friendly (and cheapest) solution. In real production environments, the biggest savings don’t come from “stronger removers,” they come from not letting acrylic lock into the fiber bundle in the first place. The goal is not to make fabric completely paint-proof (that often requires heavy coatings that ruin hand feel and create downstream issues). The goal is to reduce wetting, slow bonding, and keep the paint sitting on the surface long enough to blot or lift safely.
When prevention is done right, facilities typically see:
- fewer permanent stains and rework cycles
- higher first-pass yield (less downgrade to B-grade)
- less chemical use and lower wastewater load
- fewer “mystery stains” caused by tool transfer and dried drips
Practical prevention strategies that work
7.1 Temporary surface finishes (low-impact)
Temporary finishes create a weak boundary layer that acrylic struggles to anchor to. Think of them as a “release layer”: they don’t stop paint from landing, but they reduce penetration and make early removal much easier.
| Finish type | How it helps | Notes |
|---|---|---|
| Light silicone emulsions | Lowers surface energy | Washes out easily |
| Bio-based waxes | Delays wetting | Cotton-friendly |
| Starch alternatives | Sacrificial layer | Best for sampling |
How each option behaves in practice
Light silicone emulsions
- Best when you need a quick, low-add-on finish that does not visibly change the fabric.
- Most effective on synthetics and blends where acrylic tends to “grab” quickly.
- Works especially well for worktable contact stains (smears) because the paint film doesn’t bond as aggressively to the fiber surface.
Bio-based waxes
- Useful for cotton/canvas where paint can wick into the yarn.
- The benefit is time: waxy finishes delay wetting so paint stays “beaded” longer.
- Often preferred for sampling rooms because it still feels natural, but gives you a few extra minutes to act before the stain becomes permanent.
Starch alternatives / sacrificial layers
- Best when the priority is easy strip-off later, not long-term performance.
- Works well in sampling, artwork, mockups, print strike-offs where fabric will be washed anyway.
- If you’re doing repeated handling, the sacrificial layer can be your “insurance”—it gets stained, then gets removed in laundering.
Operational note: Temporary finishes are most effective when paired with a “fast blot” SOP. They buy time, but they don’t replace action.
7.2 Hydrophobic vs breathable balance
Over-engineering protection can backfire. Many teams try to solve paint stains by asking for “maximum repellency,” but heavy repellents often create secondary problems: poor bonding for later processes, uneven hand feel, or stains that become difficult to wash out because paint bonds to the coating itself.
| Approach | Outcome |
|---|---|
| Heavy coatings | Stain resistant but hard to clean |
| Light hydrophobic finishes | Easier paint lift |
| Breathable treatments | Maintain hand feel |
Why heavy coatings can be counterproductive
- Acrylic may stick to the coating as a continuous film; once that film cures, it can be harder to remove than a stain that lightly penetrated.
- Some heavy finishes create a “shiny” look or stiffness that fails sampling approval.
- Downstream issues: printing, lamination, seam tape adhesion, or even dyeing can be impacted if the coating isn’t fully removable.
The sweet spot
- A light, breathable hydrophobic finish that keeps paint near the surface and allows quick blotting.
- The finish should be removable or compatible with the next process step (washing, dyeing, printing, bonding).
If you’re choosing between two protective options and everything else is equal, pick the one that:
- does not dramatically change hand feel
- does not create a hard film
- does not require harsh stripping to remove
7.3 Zonal protection (smart prevention)
Treating entire fabric rolls is often unnecessary if the risk is concentrated in certain areas (sampling tables, artwork stations, print strike-off benches, hand-paint zones). Zonal protection gives you most of the benefit with less chemistry and fewer side effects.
Instead of treating entire rolls:
- protect high-risk zones only
- use removable table covers
- apply spot protection where paint is handled
What zonal prevention looks like in a well-run workshop:
- Dedicated “paint bench” surface (removable, washable mat)
- Edge guards on table corners (common drip/drag points)
- Sleeve and cuff protection (most stains come from cuffs brushing wet paint)
- Tool zones with absorbent pads (brushes and palettes are frequent transfer sources)
Zonal prevention is also easier to audit: you can visually confirm protection is in place before work starts.
7.4 Process discipline matters more than chemistry
Most acrylic paint stains become permanent because the response is delayed. Acrylic cures by water evaporation and film formation—so the first minute matters more than the first hour.
| Practice | Impact |
|---|---|
| Covered worktables | Immediate |
| Dedicated paint zones | High |
| Fast blot protocol | Critical |
| Tool cleaning discipline | Prevents transfer |
What “fast blot protocol” means in the real world
- A visible kit at every paint station: absorbent cloth, mild surfactant spray, alcohol pad (if allowed), waste bag, and a simple 4-step instruction card.
- A rule: blot, don’t rub in the first response. Rubbing pushes paint into yarns.
- A target time: respond within 60 seconds whenever possible.
Facilities that train teams to react in the first 60 seconds save the most fabric.
Tool cleaning discipline (often the hidden cause)
- Many stains are not “paint accidents”—they’re transfer stains from dried paint on:
- rulers, pattern weights, clamps
- table edges and tape dispensers
- gloves, aprons, sleeves
- brush handles and bottle caps
A simple daily routine prevents this:
- wipe tools before leaving the station
- wash reusable mats at defined intervals
- discard contaminated absorbent pads before they become a transfer source
Practical selection guide: which prevention method fits which scenario?
- Sampling rooms / strike-offs: temporary finishes + zonal protection + fast blot SOP
- Artwork/hand-paint zones: removable covers + sacrificial layers + strict tool discipline
- General factory handling (risk of transfer): covered tables + dedicated zones + sleeve/cuff control
- High-value fabrics: light breathable hydrophobic finish + strict 60-second response training
How can garment facilities implement sustainable stain-removal protocols that protect workers, reduce waste, and meet environmental standards?
A sustainable stain-removal system is not just a recipe—it’s a repeatable protocol that balances stain performance, fabric protection, worker health, and environmental responsibility. The facilities that do this well treat stain removal like any other controlled production step: they standardize decisions, restrict high-risk chemicals, measure outcomes, and continuously reduce waste.
Two practical truths guide 2025-ready programs:
- “Eco-friendly” must also be people-safe and audit-ready (chemical inventory, SDS discipline, controlled use patterns, and discharge management). This aligns with widely used chemical management expectations across the textile supply chain, such as the ZDHC Chemical Management System approach.
- Most environmental failures in stain removal come from inconsistent operator behavior (over-application, long dwell times, uncontrolled rinsing, and poor solids capture), not from a single “bad chemical.”
Below is a facility-level blueprint you can implement as an SOP, designed for real-world garment lines where speed matters.
Building a compliant, low-impact workflow
A low-impact workflow has four pillars:
- Standardize the response so operators don’t improvise
- Use a chemical hierarchy that restricts risk and limits VOC exposure
- Control wastewater and solids as a system (not after the fact)
- Measure success using KPIs that drive continuous improvement
8.1 Standardized response workflow
Consistency reduces errors and prevents the most common sustainability failure: “over-cleaning” (too much chemistry, too much water, too much rework).
| Step | Purpose |
|---|---|
| Immediate blotting | Prevent penetration |
| Fabric & paint ID | Method selection |
| Small-area testing | Risk control |
| Staged removal | Fiber protection |
| Stop criteria | Prevent damage |
Documenting this flow reduces over-cleaning.
How to make this operational (not just a poster on a wall)
- Create a 1-page decision card at each stain station with:
- fabric categories used in your facility (e.g., cotton jersey, PET shell, nylon/PU coated)
- what is allowed at each chemical “level”
- maximum dwell time per cycle (e.g., 30–90 seconds for spot work)
- a clear “stop” rule (when to escalate to supervisor or rework)
- Define roles:
- Operator: performs triage + Level 1–2 only
- Lead/QA: approves Level 3 use and verifies test results
- EHS/Chemical manager: maintains chemical list, storage, ventilation checks, waste handling
- Set a default “cycle limit”:
- Example: max 3 cycles at a given level before either stopping or escalating
- This prevents endless chasing that causes fabric distortion and water waste
This approach mirrors how strong chemical programs reduce risk through systems, not individual heroics—consistent with broader chemical management frameworks in the industry.
8.2 Chemical selection hierarchy
Choose the mildest effective option first. This reduces worker exposure, reduces VOC emissions, and cuts wastewater treatment load.
| Level | Agent type |
|---|---|
| 1 | Water + blotting |
| 2 | Plant-based surfactants |
| 3 | Bio-alcohols (spot use) |
| 4 | Mild alkalinity |
| 5 | Abort and reassess |
If level 3 fails, reassess—don’t escalate blindly.
What “hierarchy” should mean in practice
- Level 1: Water + blotting
- Use when paint is wet or tacky, or when pigment transfer risk is high
- Sustainability win: near-zero chemical impact, minimal VOC
- Operational note: blot from edge toward center to prevent rings
- Level 2: Plant-based surfactants
- Use for light film disruption, emulsifying residues, and assisting lift after mechanical prep
- Require controlled dilution and small-volume application
- Avoid uncontrolled foaming or heavy rinse—over-rinsing is a major wastewater driver
- Level 3: Bio-alcohols (spot use)
- Use only after colorfastness/finish testing passes
- Keep it “spot-only,” not flood cleaning
- Worker protection is critical: alcohols are volatile, and exposure needs ventilation control
OSHA’s exposure table lists an 8-hour permissible exposure limit for isopropyl alcohol of 400 ppm (with a 500 ppm short-term value shown on the annotated table). This is exactly why “green” is not the same as “no control needed.”
- Level 4: Mild alkalinity
- Use sparingly and only when you have clear fabric tolerance data
- Alkalinity can shift dyes, damage finishes, and raise wastewater treatment burden
- If you need to be here frequently, it’s a sign your upstream controls are weak (poor immediate response, poor mechanical reduction, or wrong tools)
- Level 5: Abort and reassess
- This is a sustainability feature, not a failure
- The cost of one damaged garment can exceed the savings from “trying harder”
- Reassess includes: partial removal acceptance, panel replacement, decorative cover, or rework strategy
Make the hierarchy audit-ready with a “Restricted Use List”
Many buyers and brands anchor chemical expectations to MRSL-based frameworks. The ZDHC MRSL (Jan 2025 edition) is a widely referenced list that restricts intentional use of specific chemical substances in textile and related processing. Even if your stain removers are “small volume,” you should still ensure your stain station chemicals align with the same chemical governance philosophy as your main wet processing.
For solvents specifically, ZDHC also provides guidance on responsible solvent use patterns, VOC management, and safer alternatives.
8.3 Worker safety integration
Eco-friendly also means people-safe. Sustainability claims collapse immediately if your process increases headaches, dermatitis, repetitive strain injuries, or near-miss incidents.
| Risk | Control |
|---|---|
| Vapor exposure | Ventilation, low-VOC |
| Skin contact | Gloves, training |
| Repetitive motion | Ergonomic tools |
Low-toxicity systems reduce PPE burden and fatigue.
How to integrate safety without slowing production
- Ventilation where it matters
- If Level 3 agents are used (even “bio-alcohols”), you need local airflow control, not just a general fan
- Add a simple checklist: “Is exhaust on? Is the hood unobstructed?” before the shift starts
- Track odor complaints as a leading indicator (odor is not a metric, but it’s often the first warning)
- PPE that operators will actually use
- Choose glove materials compatible with your allowed agents
- Train staff on “gloves don’t replace behavior”: the correct technique is small-volume application + blot, not flooding
- Ergonomics
- Repetitive scrubbing is a double loss: it increases injury risk and increases fabric damage (which increases waste)
- Use tools that reduce force: microfiber pads, silicone spatulas, soft brushes used only after softening
- Rotate tasks on long shifts
OSHA also broadly emphasizes solvent exposure hazards and the need to control exposure during cleaning and rinsing activities.
8.4 Wastewater and residue control
Even green chemistry needs management. Waste reduction is not only about what you use—it’s about how much you use and what enters drains.
| Measure | Benefit |
|---|---|
| Low-volume application | Less discharge |
| Filtration pads | Capture paint solids |
| Neutral pH rinse | Easier treatment |
Keeping paint solids out of drains is critical.
The sustainability trap: “rinse it until it’s gone”
Most stain stations waste water because operators chase visual cleanliness with repeated rinsing. The better approach is to control solids and limit rinse volume:
- Capture solids at the source
- Use disposable or washable filtration pads under the work area
- Mechanically lift flakes and collect them as solid waste (not rinse them away)
- Store collected solids in sealed containers to prevent spread
- Low-volume techniques
- Use measured spray bottles or dispensers with known output (e.g., 1–2 ml per pump)
- Set a maximum rinse volume per incident (for example, “no more than 200 ml unless supervisor approves”)
- Neutral pH rinse discipline
- If you used mild alkalinity, neutralize properly before discharge
- Neutral pH is easier for downstream wastewater management and reduces the chance of dye disturbance during rinsing
For facilities seeking external proof of environmental maturity, standards like OEKO-TEX® STeP emphasize that facilities need structured environmental management practices and documented assessment of environmental aspects. You do not need certification to benefit from the discipline: chemical inventory, wastewater monitoring routines, and management systems are good operational practice.
8.5 Measuring success (beyond “it looks clean”)
If you want sustainability to stick, you must measure it. Otherwise the stain station becomes a black box that quietly consumes chemicals, water, labor, and rework time.
| KPI | Why it matters |
|---|---|
| Fabric recovery rate | Cost control |
| Rework frequency | Process quality |
| Chemical usage per unit | Environmental load |
| Worker incident rate | Safety |
Facilities that track these metrics improve continuously.
Define the KPIs with clear formulas
- Fabric recovery rate (%)
- (Recovered garments that pass QC ÷ total stained garments processed) × 100
- Why it matters: your best sustainability result is the garment you don’t scrap
- Rework frequency (%)
- (Garments requiring a second stain attempt ÷ total stained garments processed) × 100
- Why it matters: rework is often the biggest driver of extra water and extra chemical use
- Chemical usage per unit
- Track ml per stain incident by chemical level
- Aim to reduce Level 3 usage through better Level 1–2 performance and better mechanical prep
- Worker incident rate
- Track skin irritation reports, odor complaints, near-miss spills, repetitive strain complaints
- Sustainability that harms workers is operational debt
Add two KPIs that procurement teams appreciate
- Cost per recovered unit
- Total labor + chemistry + water + disposal ÷ recovered units
- Time-to-clear
- Average minutes from stain receipt to QC pass
- If your sustainable method doubles time, it may be rejected by production reality—so optimize technique, not just chemical choice
A realistic implementation plan for facilities
To roll this out without chaos, many factories use a 30–60 day structure:
- Week 1–2: Baseline
- Measure current recovery rate, chemical usage, and rework
- Identify top 3 stain types (acrylic paint, oil/grease, dye transfer, etc.)
- Week 3–4: Standardize
- Train staff on the workflow table and stop criteria
- Introduce measured dispensers and solids capture
- Week 5–8: Optimize
- Reduce Level 3 frequency by improving mechanical prep and moisture control
- Audit chemical inventory against MRSL principles and your buyer requirements
- Review ventilation checks and exposure controls for any volatile agents
- Ongoing: Report
- Monthly KPI review
- Adjust allowed agents and techniques based on data
Supplier insight
At SzoneierFabrics, procurement-focused buyers often request cost trend discussions and process transparency, not just chemical names—because sustainability is now evaluated as a system: consistent methods, controlled chemical use, worker safety, and wastewater discipline.
If you want, I can also rewrite this section into a ready-to-use SOP format (training bullet points, operator checklist, and a one-page decision card) while keeping the same H2/H3 structure and your tables.
Clean Results Come from Smart Systems, Not Harsh Chemicals
Removing acrylic paint from fabric doesn’t require aggressive solvents or wasteful processes. It requires understanding paint chemistry, respecting fiber behavior, and acting early with precision. When facilities shift from reaction to preparation—from force to finesse—they protect fabric quality, reduce waste, and support cleaner production.
The real win is not removing every stain perfectly. It’s reducing how often stains become permanent problems.
At Szoneier, we work with garment facilities and brands to develop custom fabrics, finishes, and process-ready materials that perform better in real production environments—whether that means easier cleaning, higher durability, or smarter surface behavior. With free design support, low MOQs, fast sampling, and short lead times, we help teams turn production challenges into controllable systems.
If you are looking to develop custom fabrics, protective finishes, or performance materials that support cleaner, more efficient production, contact Szoneier to request samples or a tailored quotation.