 Skip to content
How Do Hunting Bags with Rifle Carry Systems Work?

A hunting backpack becomes much more complicated the moment a rifle is attached to it. The bag is no longer carrying only clothing, optics, water, and field equipment. It must stabilize a long, rigid object with an uneven center of gravity, protect a sensitive scope and action, keep the muzzle controlled, prevent the stock from striking the hunter’s legs, and still allow the rifle to be accessed without an awkward struggle.
That sounds simple when the pack is standing on a showroom floor. It becomes a very different engineering problem on a steep slope, in wet brush, or after the pack has been loaded with twenty or thirty kilograms of equipment and harvested meat.
A hunting bag with a rifle carry system uses an integrated scabbard, side-mounted cradle, center-mounted carrier, or quick-release sling to secure the rifle to the backpack and transfer its weight into the pack’s frame, shoulder harness, and hip belt. A well-designed system controls movement at both the buttstock and fore-end, protects the scope and action from impact, maintains a safe muzzle orientation, and allows the user to release the rifle without completely removing the pack.
The best system is not simply the one that releases the rifle fastest. It is the one that balances four competing demands: secure retention, controlled access, carrying comfort, and protection of the firearm.
Too little retention allows the rifle to bounce, rotate, or catch on branches. Too much retention slows access and may require both hands. A deep scabbard protects more of the rifle but adds weight and may trap moisture or debris. A lightweight sling saves space, yet it exposes more of the firearm to weather and impact. A side-carry position may offer easy access, but it can make the load feel uneven. A center-mounted system improves balance but may be more difficult to reach while wearing the pack.
Current hunting-pack systems show how differently manufacturers solve this problem. Eberlestock offers packs with integrated rifle scabbards, including models designed around a full-width scabbard for rifles with larger profiles and bulky optics. Stone Glacier uses a lightweight two-part quick-release sling that supports the rifle from the pack frame and allows the rifle to be released through an upper tether without removing the pack. VORN takes another approach, building a quick-release rifle compartment into the backpack so the rifle can be released from the back through a dedicated mechanism.
These are not merely styling differences. Each system changes the bag pattern, frame design, webbing layout, material requirements, weight distribution, sewing reinforcement, and field behavior.
Firearm safety must remain the starting point throughout development and use. A rifle carry bag does not replace safe handling practices. The muzzle must remain pointed in a safe direction, the user’s finger must remain outside the trigger guard until ready to shoot, and local regulations governing loaded firearms, transport, obstacles, vehicles, and public access must be followed. Hunter education guidance also recommends unloading and casing firearms for vehicle transport and unloading before crossing obstacles such as fences, streams, or difficult terrain.
Imagine a hunter climbing through a steep stand of young trees. The backpack is loaded, both hands are needed for balance, and the rifle is secured behind the shoulder. Halfway through the climb, the muzzle catches a branch and the rifle begins to rotate. The hunter reaches backward, but the upper strap is hidden beneath a compression cord. The problem is not the strength of the fabric. It is that the entire carry sequence was never tested under the conditions in which the bag would actually be used.
That is why a dependable rifle-carry backpack must be designed around movement, terrain, firearm geometry, and human reach—not around an attractive product photograph.
What Is a Rifle Carry System?
A rifle carry system is the complete set of components that secures a rifle to a hunting bag, controls its position, transfers its weight, protects critical parts, and permits intentional release. It may include a scabbard, buttstock cup, barrel strap, fore-end cradle, frame attachment, compression webbing, protective lining, quick-release buckle, muzzle cover, and scope-protection panel.
The system should be evaluated as part of the backpack rather than as a loose accessory. A strong rifle holder attached to a weak bag panel can tear away under movement. A secure lower cup becomes ineffective when the upper strap allows the rifle to rotate. A fast-release buckle creates little value when the rifle stock is wedged tightly between the bag and frame.
movement. A secure lower cup becomes ineffective when What Does the System Include?
Most rifle carry systems use at least two retention points. The lower point supports the buttstock or lower section of the rifle, while the upper point controls the barrel or fore-end. These two points prevent the firearm from sliding downward and reduce side-to-side rotation.
More protective systems add a third function: enclosure. A scabbard partially or fully surrounds the rifle, protecting the trigger area, action, scope, stock, or muzzle according to its depth and shape.
A complete system may include the following parts:
| Component | Main function | Common design risk |
|---|---|---|
| Buttstock cup | Supports rifle weight | Cup too shallow or narrow |
| Barrel or fore-end strap | Controls upper movement | Strap contacts or pressures the scope |
| Scabbard body | Protects rifle and controls rotation | Poor fit for large optics or wide stocks |
| Frame attachment | Transfers weight into pack structure | Attachment sewn only to outer fabric |
| Quick-release mechanism | Allows intentional access | Accidental release or excessive operating force |
| Compression strap | Stabilizes the rifle against the pack | Slow access or strap confusion |
| Muzzle cover | Keeps out rain, snow, and debris | Traps moisture or becomes difficult to remove |
| Scope protection | Reduces impact and weather exposure | Excess bulk or pressure on adjustment turrets |
| Retention keeper | Secures loose webbing and hardware | Difficult to operate with gloves |
| Reinforcement panel | Spreads force around attachments | Creates a stiff, noisy section |
The visible rifle holder is only one part of the load path. The lower support should connect to strong webbing, a frame, or a reinforced panel. The upper retention point should attach to a stable area that does not collapse as the bag empties.
A system attached only to a flexible pocket may appear secure when the bag is full. As contents are removed, the pocket may fold and allow the rifle to lean outward. The firearm then begins to move like a lever, placing greater force on the remaining attachment points.
For that reason, the rifle-carry system should be tested with the bag empty, half loaded, fully loaded, and loaded asymmetrically.
The carrier also needs to accommodate real hunting rifles rather than a single idealized shape. Differences include:
Traditional straight stocks
Adjustable chassis stocks
Wide target-style fore-ends
Large elevation turrets
Bipods
Suppressors
Muzzle brakes
Extended magazines
Bolt handles
Slings already fitted to the rifle
Protective scope caps
A system that works with a compact unscoped rifle may fail with a long-barreled rifle carrying a large optic and bipod. The opening, internal circumference, strap position, and protective padding should therefore be defined around a firearm envelope rather than only overall rifle length.
Eberlestock’s Gunslinger II, for example, lists a scabbard measuring 34 inches long, 10 inches wide, and 3 inches deep, with a 26-inch circumference opening. The company states that its cover allows enclosed carry of firearms up to 60 inches and that the wider scabbard is intended to accommodate larger cross-sections and bulky optics. These product-specific dimensions illustrate why width, depthnce matter as much as length. citeturn774932search4
A custom system should therefore define at least five dimensional limits:
Maximum overall rifle length
Maximum width across the scope and action
Maximum stock or chassis width
Maximum depth around optic, bolt, and magazine
Minimum and maximum distance between retention points
These dimensions should be confirmed with physical rifles, accurate templates, or three-dimensional mock-ups before the pattern is approved.
How Does It Hold a Rifle?
A rifle carry system holds the firearm by controlling vertical drop, lateral rotation, forward-and-back movement, and separation from the backpack.
Vertical support usually comes from a buttstock cup, scabbard bottom, lower sling, or shaped pocket. The lower component carries most of the rifle’s weight.
Lateral control comes from a barrel strap, fore-end strap, scabbard sidewall, or compression panel. This prevents the rifle from rotating as the hunter walks.
Forward-and-back control comes from the relationship between the rifle and the pack frame. The closer the rifle sits to the bag’s stable structure, the less leverage it creates. A rifle positioned far behind the pack can pull backward, increase shoulder pressure, and swing during changes of direction.
Separation control ensures that the rifle cannot bounce away from the pack when the hunter jumps, bends, crawls, or descends steep terrain.
A stable system normally controls the rifle at two separated points.
| Retention layout | Stability | Access speed | Protection | Best application |
|---|---|---|---|---|
| Lower cup plus upper strap | Medium-high | Fast | Low-medium | Lightweight mountain packs |
| Full integrated scabbard | High | Medium | High | Dense brush and longer carry |
| Partial scabbard plus strap | High | Medium-fast | Medium-high | General hunting backpack |
| Side sling plus compression strap | Medium-high | Fast | Low-medium | Modular and ultralight systems |
| Center carrier between bag and frame | Very high | Medium | High | Heavy loads and stable transport |
| External cradle with multiple straps | High | Slow | Medium | Long transport without rapid access |
The lower cup should match the stock shape closely enough to prevent sliding but not so tightly that the user must pull aggressively to release it.
A soft cup made from reinforced fabric can conform to different stocks. A rigid molded cup provides more precise support but may create noise, pressure points, and fit limitations. A hybrid design can use an internal stiffener surrounded by padded textile.
The upper strap should normally contact the barrel or fore-end in a location that does not press against the scope, adjustment turrets, bolt handle, or delicate accessories. It should not pull the firearm sideways into the bag.
Strap angle is important. A horizontal strap controls outward movement but may not stop downward sliding. An angled strap can add vertical retention, but excessive angle may tighten as the rifle settles and make release difficult.
The system should remain stable without relying on extreme strap tension. Over-tightening can compress padded surfaces, deform soft bag panels, place side pressure on optics, and slow access.
A rifle that is properly fitted should not rattle or rotate during normal walking, yet the primary release should remain easy to identify by touch.
Is Hands-Free Carry Safer?
Hands-free rifle carry can make movement more controlled because it leaves both hands available for trekking poles, climbing, maintaining balance, handling equipment, or moving through difficult terrain. However, hands-free does not automatically mean safe.
The safety of the system depends on muzzle orientation, rifle condition, secure retention, terrain, local law, and the user’s behavior.
A backpack-mounted rifle may reduce the chance of a shoulder sling slipping during a climb. It may also prevent the rifle from striking the ground when the hunter uses both hands. Stone Glacier describes its quick-release sling as securing the rifle to the pack, keeping the barrel profile behind the user and protected from brush, while ck system. citeturn774932search1turn774932search16
Still, a pack-mounted rifle introduces other risks.
The user may not see the muzzle while moving.
The rifle may extend above the head and catch branches.
A downward-facing muzzle may approach soil, snow, or debris.
The system may release unexpectedly if a buckle is not fully engaged.
Another person may stand behind or above the hunter on steep terrain.
The user may forget the extra height when entering a vehicle or shelter.
A rifle may become difficult to control if the backpack is removed carelessly.
Safe design therefore requires more than strong straps. The system should establish a predictable orientation and resist accidental movement.
The carry position should avoid pointing the muzzle toward the user’s body during normal use. It should also reduce the chance that the muzzle sweeps other people as the pack is put on, removed, lifted, or placed on the ground.
The rifle should be secured in accordance with applicable laws and safety practices. Regulations concerning whether a rifle may be loaded while carried in the field vary by jurisdiction and circumstance. Product instructions should not make a universal legal claim. They should tell users to follow local rules and established firearm-safety procedures.
Hunter education guidance stresses treating every firearm as if loaded, keeping the muzzle pointed in a safe direction, keeping the finger outside the trigger guard until ready, and unloading firearms before transport or difficult obstacle crossings. A backpack carrier should support thosn774932search14turn774932search17turn774932search29
A useful product label or instruction manual can address:
Recommended rifle orientation
Correct routing of upper and lower retention
Confirmation that buckles are fully engaged
Keeping the trigger area protected
Checking the barrel for obstruction after exposure to mud or snow
Removing the rifle before climbing certain obstacles
Following local transport and carry laws
Inspecting straps and stitching before use
The bag should also have a clear procedure for putting it on and taking it off. A rifle can shift when one shoulder strap is removed before the other. A center-mounted firearm may press against the ground when the bag is set down. A side-mounted rifle may cause the pack to roll.
These actions should be included in prototype field testing and user instructions.
How Is Rifle Weight Supported?
A rifle often weighs several kilograms once fitted with a scope, mounts, sling, bipod, suppressor, and loaded magazine where legally permitted. If that entire weight hangs from a flexible side panel, the bag twists and the hunter feels the load through one shoulder.
The system should transfer the rifle’s weight into the same load-bearing structure that carries the backpack.
A strong load path normally follows this sequence:
Rifle butt or lower cradle
Reinforced webbing or scabbard base
Pack frame or stable back panel
Shoulder harness and load lifters
Hip belt
Hunter’s pelvis and legs
The outer shell should not be expected to carry the full load by itself.
Stone Glacier’s quick-release system attaches to its frame and lower compression structure, with the brand stating that the arrangement supports the rifle’s weight through the pack while permitting fast release. Its published installation description identifies a two-part arrangement connected near the toion strap. citeturn774932search1turn774932search28
This is an important design principle: the rifle holder should connect to structural points rather than decorative or lightly loaded seams.
| Attachment location | Load capability | Likely result |
|---|---|---|
| Outer pocket fabric only | Low | Sagging, twisting, or seam damage |
| Main shell with small patch | Medium-low | Localized stress concentration |
| Wide internal reinforcement | Medium-high | Better force distribution |
| Webbing connected to frame | High | Direct structural support |
| Carrier integrated between bag and frame | Very high | Strong stability and central load control |
| Lower compression system | High when properly anchored | Adjustable support across load conditions |
The lower support should carry most of the vertical weight. The upper strap should stabilize rather than suspend the whole rifle. If the upper strap carries too much weight, it can pull the rifle backward and create uncomfortable pressure near the shoulders.
The rifle’s center of gravity should sit reasonably close to the pack. Moving it farther away creates leverage. Even a modest rifle can feel much heavier when positioned several centimetres behind the load.
A side-mounted rifle also creates asymmetric weight. The user may tighten the opposite shoulder strap to compensate, leading to uneven pressure and fatigue.
Counterbalancing with water or equipment on the opposite side may improve comfort, but the bag should not require an unnatural packing arrangement simply to remain upright. The rifle position, frame stiffness, and hip-belt control should handle most of the imbalance.
A center-mounted scabbard provides stronger symmetry. It can place the firearm closer to the spine and reduce lateral pull. The trade-off is access: a rifle positioned directly behind the back may be harder to reach without a specialized quick-release path.
The system should be tested with rifles of different weights, not only dimensions. A light hunting rifle and a heavy long-range rifle place very different loads on the same webbing and frame.
The development specification should define:
Maximum recommended rifle weight
Maximum accessory weight
Position of the rifle’s center of gravity
Expected backpack load
Maximum total carried load
Permitted side-to-side movement
Permitted vertical movement
Release force under load
Attachment strength and cycle requirement
Without these limits, a carrier can be marketed too broadly and used with combinations it was never designed to support.
How Should the System Protect the Rifle?
Retention is only half the job. The bag should also protect the firearm from impact, abrasion, weather, dirt, and pressure.
The most vulnerable areas usually include:
Scope lenses
Scope turrets
Action and bolt handle
Trigger guard
Stock finish
Muzzle opening
Suppressor or muzzle device
Bipod legs
Magazine and release controls
A deep scabbard provides more protection from brush and impact. A lightweight sling leaves more of the rifle exposed but may dry faster and weigh less.
Padding should be placed strategically. Thick foam across the entire scabbard increases bulk and can trap moisture. Thin closed-cell or hydrophobic padding around the scope and action may provide more value.
Stone Glacier’s separate quick-release scope cover uses hydrophobic foam between waterproof fabric layers to protect the scope and action from water and debris without relying on absorbent padding. Although it is an accessory rather than a complete backpack, it demonstrates how targeted protection can sensitive rifle components. citeturn774932search25
The trigger area deserves clear treatment. A scabbard may cover it completely. A sling system may leave it exposed. The product team should decide whether the carrier is intended only for unloaded transport, field-ready carry where lawful, or both, then design and instruct accordingly.
The muzzle also requires careful thought. An upward-facing muzzle avoids ground contact but may collect rain or snow if uncovered. A downward-facing muzzle may drain water but can contact mud or debris. A removable cover can protect the opening, but it must not be forgotten, jammed, or difficult to remove.
The safest design decision depends on the intended orientation, local practices, and user instructions. No cover should be presented as a substitute for checking that the barrel and action are clear before use.
Which Carry System Works Best?
The best rifle carry system depends on terrain, rifle dimensions, expected access speed, pack load, and the level of protection required. Integrated scabbards provide the strongest enclosure and rotation control. Side-mounted systems are adaptable and easier to reach. Quick-release slings minimize weight and allow access without removing the pack. Center-mounted carriers offer the best balance but require more deliberate access engineering.
There is no universally superior system. A pack designed for an open-country mountain hunt should not be judged by the same priorities as a dense-forest daypack or a heavy long-range setup.
What Is an Integrated Scabbard?
An integrated scabbard is a sewn or structured rifle compartment built into the backpack. It commonly runs behind the main bag, between the bag and frame, or through the center of the pack.
The rifle slides into the compartment from the top. Depending on its depth, the scabbard may cover the buttstock and action, most of the rifle, or nearly the complete firearm.
The major advantages are stability and protection. The scabbard surrounds the rifle, limiting rotation and shielding it from branches, rocks, and nearby equipment.
Its main disadvantages are weight, heat retention, drainage complexity, and restricted fit.
| Integrated scabbard factor | Advantage | Trade-off |
|---|---|---|
| Deep enclosure | Strong firearm protection | More fabric, weight, and moisture retention |
| Center placement | Balanced load | Harder backward reach |
| Wide opening | Fits large optics and stocks | Adds volume and may reduce bag capacity |
| Padded walls | Impact protection | Greater bulk and slower drying |
| Structured base | Stable vertical support | Can create pressure on stock or accessories |
| Removable cover | Greater muzzle or full-length protection | Additional part to manage |
| Integrated load path | Strong connection to frame | More complex pattern and sewing |
Scabbard dimensions should be based on the largest intended rifle profile. Overall length alone is not enough. A large scope, bolt handle, bipod, or chassis can become the actual limiting feature.
The internal surface should reduce abrasion on the stock and optic. Smooth lining allows the rifle to slide easily, but an overly slick surface may increase movement. A lightly padded tricot, brushed polyester, or micro-suede lining can provide quieter contact.
The lining should not shed fibers around the action or optic. It should also resist moisture and allow cleaning.
Drainage is critical. A scabbard can collect rain, snow, leaves, dust, and mud. The bottom should not become a sealed pocket unless the complete compartment is designed as a controlled waterproof case.
Drain openings need to be large enough to function but small enough to prevent stones and debris from entering. They should be reinforced because a cut hole in a loaded scabbard can become a tear point.
A full scabbard is often well suited to:
Dense vegetation
Long approaches
Rifles with sensitive optics
Trips involving repeated pack removal
Heavy packs with strong frames
Situations where maximum retention matters more than minimum weight
An integrated scabbard may be less suitable for hunters who frequently alternate between carrying the rifle and holding it ready. Even with a quick-release feature, drawing a long rifle vertically from behind the body can require clearance that is not available under trees or inside confined cover.
How Does Side Carry Work?
Side carry positions the rifle along the left or right side of the backpack. The buttstock sits in a lower cup or sling, while an upper strap secures the barrel or fore-end.
Its biggest advantage is accessibility. The user can often reach the upper release and guide the rifle forward without removing the backpack.
Side carry is also modular. A carrier can be added to different bag sizes or moved between frames. It requires less fabric than a full scabbard and exposes the rifle to more airflow.
The disadvantages are uneven weight and increased width. The rifle may catch vegetation, strike rocks, or interfere with arm movement.
Side carry works best when the firearm sits close to the pack rather than hanging outside full pockets. The lower cup should be connected near the frame or hip-belt structure, and the upper strap should pull the rifle inward.
| Side-carry position | Access | Balance | Brush exposure | Suitable use |
|---|---|---|---|---|
| High vertical side | Medium-fast | Medium | High above shoulder | Open terrain |
| Low vertical side | Fast | Medium | Higher near legs and rocks | Short rifles |
| Angled side carry | Fast | Medium | Moderate | Mobile hunting |
| Side carry against frame | Medium-fast | High | Lower | Heavy-load systems |
| Side carry outside full pocket | Fast | Low-medium | High | Light daypacks only |
The rifle should not interfere with the hip belt. If the stock sits too low, it may strike the back of the leg or ground when the user squats. If it sits too high, the barrel extends farther above the head.
The preferred side may depend on the user’s dominant hand and shooting style. A right-handed hunter may prefer a position that allows the dominant hand to control the rifle while the other hand releases the strap. However, terrain, existing pockets, tripod storage, and water-bottle placement may influence the decision.
A custom pack can offer ambidextrous attachment points. This increases versatility but also adds webbing, loops, and sewing operations. Unused components should remain low-profile so they do not catch vegetation.
The side-carry system should be tested while the main bag is empty and full. A large side pocket can push the rifle outward. A compression strap may become unavailable because it is already controlling the backpack load.
The product should have a dedicated rifle attachment rather than relying on whichever compression straps happen to be free.
What Is a Quick-Release Sling?
A quick-release sling is a lightweight carrier that supports the rifle at the lower stock and secures the upper section with a strap or tether designed for rapid release.
It offers a middle ground between a shoulder sling and a full scabbard. The rifle’s weight is supported by the backpack, leaving the hunter’s hands free, but the firearm remains accessible.
Stone Glacier describes its quick-release sling as a frame-compatible system that secures the rifle, keeps the barrel profile behind the user, and releases through one pull of the upper tether without requiring pack removal. The com1.4 ounces. citeturn774932search1turn774932search5
The light weight is attractive, but successful quick release requires careful control of several variables:
The upper tether must be easy to identify by touch.
The release should not be hidden under other straps.
The lower cup must retain the rifle after the upper strap opens.
The rifle must move along a clear extraction path.
The system should resist accidental release.
The user should not need extreme shoulder flexibility.
The release should remain usable with gloves.
A release that works smoothly in a standing showroom test may fail when the bag is heavily loaded and the hunter is leaning forward.
The operating force should be measured in several conditions:
Bag empty
Bag fully loaded
Rifle lightly tensioned
Rifle heavily tensioned
Cold conditions
Wet conditions
With gloves
After contamination with dust or mud
The release should not open because a branch pulls the tether. Cord length, pull-tab shape, and parking position are important.
A brightly colored internal pull may be easier to identify, but exposed bright colors may be undesirable in the field. Texture can distinguish the release without relying only on sight.
Is Center Carry More Stable?
Center carry usually provides the strongest balance because the rifle sits close to the hunter’s spine and near the pack’s central load line. It reduces the left-right pull associated with side carry and can integrate efficiently with the frame.
The rifle may sit in a central scabbard, between the bag and frame, or within a dedicated channel.
Center carry is particularly useful for heavy rifles and long approaches. The load can be transferred evenly into both shoulder straps and the hip belt.
The main challenge is access. Most users cannot reach far enough behind their backs to remove a deeply seated rifle without a release mechanism or partial pack removal.
VORN’s backpack concept addresses this challenge through a patented quick rifle release system that allows the rifle to be released from a secure position on the back. The company describes the system as ee backpack. citeturn774932search2turn774932search6
A center system needs a guided extraction path. Once released, the rifle should move in a predictable direction and should not catch on the main bag, frame, straps, or clothing.
| Center-carry characteristic | Performance |
|---|---|
| Left-right balance | Excellent |
| Rifle protection | High with enclosed construction |
| Heavy-rifle support | High |
| Access without engineered release | Low |
| Access with dedicated release | Medium-high |
| Pack-pattern complexity | High |
| Compatibility with load shelf | Must be carefully coordinated |
| Compatibility with tall optics | Depends on channel width and depth |
A center scabbard can compete for space with a meat shelf or expandable load area. When the main bag separates from the frame to carry meat, the rifle channel may become compressed or blocked.
The design should show exactly how the rifle carrier operates before, during, and after the load shelf is opened.
A central system can also alter ventilation against the back. Added layers, foam, and structure may reduce airflow or change the frame profile.
Which System Offers Faster Access?
Quick-release side slings and purpose-built release backpacks usually offer faster access than deep conventional scabbards. However, speed should be measured through a complete, controlled sequence rather than estimated from the number of buckles.
A realistic access test starts with the bag worn and loaded. The user identifies the release, opens the retention, controls the rifle, brings it forward, and establishes safe handling.
Important measurements include:
Time to locate the release
Time to disengage retention
Number of hands required
Movement of the user’s shoulders and torso
Whether the rifle catches on the bag
Whether the muzzle remains controlled
Whether the rifle can be returned securely
Performance while wearing gloves
The fastest system is not automatically the best. A carrier that releases in one second but allows the rifle to fall backward after opening is not controlled. A system that is slightly slower but keeps the firearm supported throughout the draw may be more practical.
| Carry system | Likely access speed | Retention | Protection | Weight |
|---|---|---|---|---|
| Open side quick-release sling | Very fast | Medium-high | Low | Very low |
| Guided quick-release backpack | Fast | High | Medium-high | Medium-high |
| Partial scabbard with release strap | Medium-fast | High | High | Medium |
| Full integrated scabbard | Medium-slow | Very high | Very high | High |
| Multi-strap external carrier | Slow | Very high | Medium | Medium |
| Standard shoulder sling | Fast | Low-medium | Low | Very low |
These rankings are design tendencies, not universal results. A well-engineered scabbard may release more smoothly than a poorly placed side sling.
Access also depends on the surrounding environment. A vertical draw may be fast in open terrain but difficult under branches. An angled side draw may work better in cover but require more lateral space.
The bag should be tested in the terrain it is intended to serve.
A mountain system should be tested on slopes while using trekking poles.
A forest system should be tested under low branches and through narrow vegetation.
A tree-stand pack should be tested while climbing and while positioned near a tree.
A heavy-load system should be tested before and after opening its meat shelf.
The correct design is not the system with the most impressive isolated feature. It is the system that secures the rifle during hours of movement and still provides controlled access during the few seconds when access matters.
How Should a Rifle Fit?
A rifle should fit a hunting bag securely enough to prevent sliding, rotation, and impact, yet loosely enough to be inserted and removed without excessive force. Correct fit depends on more than total rifle length. The bag must accommodate the scope, stock shape, action width, bolt handle, magazine, bipod, sling, muzzle device, and any suppressor fitted to the rifle.
A carry system designed around only one sample rifle may perform well during development but fail with other common configurations. A larger elevation turret can catch on the scabbard opening. A wide chassis stock can become trapped in a narrow lower pocket. A folded bipod can create a hard pressure point against the bag. A suppressor can extend the rifle beyond the upper retention zone and change its center of gravity.
The most reliable approach is to define a three-dimensional compatibility envelope. This specifies the maximum and minimum rifle dimensions that the carrier can support, the positions where retention may contact the firearm, and the clearances required for accessories.
A good fit should achieve four things at the same time:
The rifle remains stable during movement.
The scope and controls are not compressed.
The firearm can be removed along a clear path.
The retention system accommodates reasonable dimensional variation.
How Is Rifle Length Measured?
Rifle length should be measured from the rear of the buttstock to the furthest forward point of the muzzle assembly. When a suppressor, muzzle brake, thread protector, or other permanent accessory will be carried, it should be included in the overall length.
The measurement should be taken with adjustable stocks in the intended carry position. A collapsible stock measured at its shortest setting may create a misleading result if the user normally carries it extended.
Length affects more than whether the rifle physically fits inside a scabbard. It determines:
How far the muzzle extends above or below the pack
Whether the stock contacts the hunter’s legs
The distance between lower and upper retention points
The amount of leverage placed on the upper strap
Whether the rifle can be drawn under branches
How the pack can be placed on the ground
A rifle that is too short for a deep scabbard may sit below the opening and become difficult to reach. A rifle that is too long may leave the muzzle exposed far above the user’s head.
The carrier should therefore define a usable length range rather than only a maximum length.
| Measurement | Why It Matters | Common Error |
|---|---|---|
| Overall rifle length | Determines scabbard depth and muzzle position | Measuring without fitted muzzle accessories |
| Buttstock-to-scope distance | Affects scope placement inside the carrier | Assuming all scopes sit in the same position |
| Buttstock-to-fore-end strap position | Determines upper retention location | Strap placed over the scope or controls |
| Muzzle extension above pack | Influences branch clearance | Evaluated only while standing upright |
| Stock extension below pack | Influences leg and ground contact | Tested only with an empty backpack |
| Rifle center of gravity | Affects stability and load transfer | Estimated from length rather than measured with accessories |
For product development, rifle length can be grouped into several design classes.
| Rifle Class | Approximate Design Character | Carry-System Consideration |
|---|---|---|
| Compact rifle | Short barrel and compact stock | May sit too deeply in long scabbards |
| Standard hunting rifle | Conventional stock and barrel length | Suitable for most general systems |
| Long-range rifle | Longer barrel, larger scope, heavier stock | Needs stronger retention and wider clearance |
| Suppressed rifle | Extended muzzle length | Needs adjustable upper support |
| Chassis rifle | Wide, angular stock geometry | Needs larger opening and protected contact points |
| Folding-stock rifle | Variable carry length | Must be tested in both folded and extended forms |
These categories should not replace exact measurements. They simply help organize compatibility during early development.
A rifle template can be used when physical samples are unavailable. A two-dimensional cardboard outline is useful for checking overall length and side profile, but it cannot reveal width problems around the scope, action, magazine, or stock. A foam or three-dimensional mock-up provides more realistic fit information.
The final prototype should be tested with several rifles located near the minimum, middle, and maximum dimensions of the claimed fit range. Testing only the largest rifle can also be misleading. A smaller rifle may move excessively inside an oversized carrier.
Does Scope Size Affect Fit?
Scope size has a major effect on fit because it often creates the widest and most sensitive part of the rifle. The objective bell, elevation turret, windage turret, mounting rings, and protective caps can all interfere with the carrier.
A narrow scabbard may accept the stock and barrel but stop at the scope. A top opening may look wide enough until the rifle is inserted at an angle. A compression strap may sit directly across the turret and apply pressure during walking.
The design should record the scope’s maximum width, height above the rifle, and position along the action.
| Scope Feature | Fit Risk | Design Response |
|---|---|---|
| Large objective lens | Catches at narrow opening | Widen or shape the scabbard entrance |
| Tall elevation turret | Presses against side panel | Add clearance channel or padded recess |
| Wide windage turret | Creates lateral pressure | Increase internal width locally |
| Flip-up lens caps | Increase diameter and snag risk | Test with caps fitted |
| Sunshade | Extends scope length | Protect against bending and impact |
| Large mounting rings | Create hard contact points | Add controlled padding around action |
| Offset accessories | Create asymmetrical profile | Use adjustable retention rather than fixed channel |
Scope protection should prevent direct impact without tightly squeezing the optic. Constant side pressure may not immediately damage a quality scope, but it can create wear, adjustment interference, and difficulty during removal.
Padding should be placed around likely impact zones rather than compressed directly against the lenses or turrets. A shaped foam channel can keep the scope away from the scabbard wall while allowing the stock and fore-end to carry the main contact load.
The lining should remain clean and low-lint. Loose fleece fibers, sand, plant fragments, and dried mud can scratch scope finishes and lens caps.
A removable or washable liner around the lower scabbard can help manage contamination. The scope area may benefit from a separate protective sleeve that is easier to inspect and clean.
Access should be tested with cold hands and gloves. The user may not lift the rifle perfectly vertically. The scope must be able to pass the opening during a natural backward and upward movement.
The bag should also allow the rifle to be returned to the carrier without requiring precise visual alignment. A flared, semi-rigid opening can guide the scope into place while maintaining a soft inner surface.
Can It Hold Suppressed Rifles?
A rifle carry system can hold suppressed rifles when it provides sufficient length, muzzle clearance, upper retention adjustment, and heat-aware material selection. A suppressor changes both the dimensions and balance of the firearm.
The added length may cause the rifle to extend higher above the backpack, increasing the chance of catching branches. The additional weight at the muzzle moves the center of gravity forward, which can increase rotation and pressure on the upper retention strap.
A suppressor may also remain hot after firing. A rifle should not be placed immediately into a carrier made from ordinary synthetic fabric if the suppressor temperature could damage the textile, coating, foam, or lining.
A standard polyester, nylon, PU-coated fabric, foam, or elastic component is not automatically suitable for contact with a hot suppressor. Heat-resistant requirements must be addressed separately if the carrier is intended to receive the rifle soon after firing.
The safest product instructions should require the suppressor and barrel to cool before enclosed storage unless a specially tested heat-resistant section is provided.
| Suppressed-Rifle Issue | Possible Result | Design Consideration |
|---|---|---|
| Increased total length | Excessive muzzle projection | Extendable or adjustable scabbard |
| Forward weight shift | More rifle rotation | Stronger upper stabilization |
| Larger muzzle diameter | Poor fit in narrow channel | Wider or adjustable muzzle area |
| Residual heat | Fabric, coating, or foam damage | Cooling instructions or heat-resistant insert |
| Added momentum | Higher stress during sudden movement | Reinforced lower support and frame connection |
| Moisture around suppressor | Corrosion and trapped condensation | Drainage and breathable storage strategy |
A modular extension can help accommodate suppressed rifles. This may use a removable upper sleeve, adjustable barrel strap, or extendable scabbard cover.
The extension should not become a loose tube that flaps or catches vegetation. It needs enough structure to remain aligned with the main carrier.
A full-length muzzle cover can protect against rain and snow, but it can also trap moisture around a warm suppressor. The design should clarify whether the cover is intended for weather protection during cold carry, not immediate enclosure after firing.
The rifle’s new center of gravity should be measured with the suppressor fitted. The upper retention point may need to move forward or upward to prevent the firearm from leaning away from the pack.
A suppressed rifle should be included in field testing if the product claims compatibility. Merely increasing the scabbard length does not prove that the carrier remains stable.
How Are Wide Stocks Supported?
Wide stocks and chassis systems need broader lower support, more adaptable sidewalls, and careful protection around angular components. Traditional buttstock cups are often shaped for conventional hunting stocks and may not accept wider precision-rifle designs.
A chassis may include:
Adjustable cheek riser
Wide pistol grip
Folding mechanism
Adjustable butt pad
Rear monopod
Bag rider
Thumb rest
Protruding fasteners
These features can catch on a soft carrier or concentrate force into a small area.
A wide lower cradle should support the rifle from beneath without applying pressure to adjustment levers or folding mechanisms.
Several lower-support designs are possible.
| Lower Support Design | Compatibility | Stability | Main Limitation |
|---|---|---|---|
| Fixed narrow cup | Low-medium | High for matching stocks | Poor for wide or irregular stocks |
| Wide fabric bucket | High | Medium-high | May allow small rifles to move |
| Adjustable webbing cradle | Very high | Medium | More straps and slower setup |
| Semi-rigid molded cup | Medium | Very high | Limited shape flexibility |
| Elastic-sided pocket | High | Medium-high | Elastic durability and wet performance |
| Interchangeable insert | Very high | High | More parts and manufacturing complexity |
An adjustable cradle can support multiple stock shapes, but adjustment should not be required every time the rifle is inserted. The user should set the carrier once, then operate it consistently.
A wide universal cup may need internal compression straps or removable inserts to support narrower rifles. Without these, a traditional stock can move laterally inside the oversized pocket.
Angular chassis components can wear through unprotected fabric. High-abrasion contact areas may require a compact woven reinforcement beneath a softer lining.
The reinforcement should remain smooth. Exposed seams, binding edges, and hardware inside the cradle can scratch the firearm or interfere with removal.
A folding stock creates another design question: should the rifle be carried folded or extended? Carrying it folded reduces length but changes the firearm’s side profile and center of gravity. The folded stock may protrude sideways and require a wider channel.
The product specification should state which configuration has been tested.
Is the Muzzle Fully Protected?
Full muzzle protection is useful in rain, snow, dust, mud, and dense vegetation, but protection must not create a false sense of safety. The user must still confirm that the barrel and muzzle are unobstructed before use.
A scabbard may position the muzzle upward, downward, or within an enclosed extension. Each orientation has advantages and limitations.
| Muzzle Orientation | Advantage | Risk |
|---|---|---|
| Upward and exposed | Reduced ground contact | Rain, snow, and branches can enter or strike |
| Upward with cover | Better weather protection | Cover must be removed and moisture may be trapped |
| Downward and exposed | Water can drain | Mud, snow, and ground contact risk |
| Downward in closed cup | Physical protection | Debris and moisture may collect in the cup |
| Fully enclosed | Maximum environmental protection | More weight, moisture retention, and access steps |
A muzzle cover can use water-resistant fabric, elastic retention, a drawcord, or a quick-release tab. It should remain secure during movement but be easy to remove with gloves.
The cover should not create a hard closure that strikes the barrel. Soft textile and controlled elastic are generally quieter than rigid plastic caps attached to the bag.
Drainage and ventilation should be considered. A fully enclosed rifle carried through rain may introduce water into the carrier through the stock, scope, sling, or barrel surface. A waterproof scabbard can still trap this moisture internally.
A small drain opening at the lowest point can reduce standing water. Breathable lining or removable inserts can improve drying after use.
The muzzle area should use abrasion-resistant material because it receives concentrated contact from the barrel or suppressor. A durable woven reinforcement can be placed outside or beneath a softer inner lining.
For rifles with muzzle brakes, the wider and angular device may catch on a narrow sleeve. The cover should be tested around the actual device rather than a plain barrel.
How Much Clearance Is Needed?
Clearance should be sufficient for smooth insertion and removal but not so large that the rifle rotates or rattles. The correct allowance depends on the carrier type.
A full scabbard needs clearance around the widest rifle profile.
A lower cup needs enough space around the stock to prevent binding.
An upper strap needs adjustable length rather than a fixed opening.
A padded channel needs compression allowance for foam and lining.
The clearance should be measured after the bag is loaded because packed contents can reduce the scabbard’s internal space.
A carrier placed between the bag and frame may become narrower when the main compartment is overfilled. Compression straps can also squeeze the rifle channel.
| Fit Condition | Too Tight | Too Loose |
|---|---|---|
| Scabbard opening | Scope catches during insertion | Rifle rotates and impacts sidewalls |
| Lower cup | Stock becomes difficult to release | Stock lifts or swings during movement |
| Upper strap | Excessive pressure on barrel or scope | Barrel separates from pack |
| Padded channel | Foam creates drag | Padding provides little control |
| Muzzle sleeve | Device cannot pass | Sleeve flaps or collects debris |
| Scope recess | Turret remains compressed | Scope can strike surrounding panel |
Fit should be evaluated after manufacturing tolerances are considered. Fabric thickness, foam compression, seam allowance, binding, and hand assembly can change the usable internal dimensions.
The product specification should therefore define both finished dimensions and functional gauge checks. A physical rifle-shaped gauge can verify that production units maintain the minimum opening and channel size.
How Is Rifle Access Improved?
Rifle access is improved by reducing the number of deliberate actions, placing the release within natural reach, maintaining a clear extraction path, and ensuring the rifle remains controlled during the transition from backpack to hand. A fast system should not depend on loose retention or accidental release.
The user should be able to understand the system by touch. When attention is focused on terrain or an animal, searching behind the shoulder for several similar straps creates delay and unnecessary movement.
The access sequence should be designed in a fixed order:
Locate the release.
Disengage upper retention.
Control the rifle.
Lift or slide it from the lower support.
Bring it forward while maintaining safe muzzle control.
A system that requires the user to remember different strap routes depending on pack load is too complicated.
Can the Rifle Be Drawn Quickly?
A rifle can be drawn quickly when the release is accessible, the carrier opening is unobstructed, and the rifle moves through a predictable path. Draw speed should be evaluated together with control, not as an isolated competition.
The quickest systems usually use one primary release. Secondary retention may remain in place during long transport but should be removed before entering an area where quicker access is expected, provided this can be done safely and lawfully.
A deep scabbard generally requires a longer extraction movement than a shallow sling. However, the scabbard can guide the rifle and prevent it from falling when the upper retention is opened.
A side-mounted carrier often allows a shorter movement. The user reaches back, releases the upper strap, lifts the rifle slightly from the lower cup, and rotates it forward.
A center-mounted system needs a more engineered release path because the rifle sits directly behind the body.
| Access Factor | Faster Result | Slower Result |
|---|---|---|
| Number of primary releases | One clear release | Multiple buckles and compression straps |
| Release position | Within natural shoulder reach | Hidden near center of back |
| Pull-tab shape | Large, textured, glove-friendly | Small smooth cord |
| Scabbard opening | Flared and structured | Collapsed or compressed |
| Rifle contact | Controlled low-friction lining | High-friction or snagging surface |
| Surrounding straps | Separated and retained | Similar loose straps crossing the path |
| Pack loading | Carrier remains open | Main compartment compresses the channel |
| Rifle accessories | Protected clearance | Scope, bipod, or bolt catches |
The draw should be tested in realistic body positions:
Standing upright
Crouching
Kneeling
Leaning forward on a slope
Wearing a heavy jacket
Wearing gloves
Using trekking poles
Carrying a partially loaded pack
Carrying a fully loaded pack
A system that works only while standing upright on flat ground has not been adequately evaluated.
The hunter’s arm length and shoulder mobility vary. A release location suitable for a tall user may be difficult for a smaller user. Adjustable shoulder harness height can also change the relationship between the body and the release.
The best design uses a generous pull area located near a consistent anatomical reference point, such as just behind or below the shoulder.
Is One-Handed Release Possible?
One-handed release is possible when the upper retention mechanism can be found and opened with a single controlled pull. The lower support should continue holding the rifle until the user deliberately lifts it free.
This is important because the other hand may be holding a trekking pole, maintaining balance, moving vegetation, or controlling another piece of equipment.
The release should not require two opposing actions, such as pressing two small tabs while pulling the strap backward. Fine movements become difficult with cold hands and gloves.
Suitable one-handed mechanisms include:
Large pull tether
Guided side-release buckle
Magnetic-assisted flap with mechanical backup
Cam-release strap
Gated hook with fabric pull
Pre-positioned quick-release loop
Each mechanism has trade-offs.
| Mechanism | One-Hand Use | Accidental Release Risk | Glove Performance | Noise |
|---|---|---|---|---|
| Large pull tether | Excellent | Medium if exposed | Excellent | Low |
| Side-release buckle | Good | Low | Medium | Moderate click |
| Magnetic flap | Excellent | Medium without backup | Excellent | Low when padded |
| Cam buckle | Good | Low | Good | Low-medium |
| Gated hook | Medium | Low | Medium | Potential hard contact |
| Elastic retention loop | Good | Medium | Good | Very low |
| Hook-and-loop strap | Good | Low | Good | High opening noise |
A pull tether should have a distinct shape and texture. The user should be able to identify it without seeing it.
It should also be parked close to the bag so vegetation cannot catch and release it. A shallow fabric channel, elastic keeper, or magnetic parking tab can hold the pull in a predictable location.
The release force needs balance. Too little force increases accidental opening. Too much force pulls the pack sideways or forces the user to make a sudden motion.
The required force should be tested after cold conditioning, wetting, contamination, and repeated cycling. Elastic, webbing, buckles, and magnets can behave differently after use.
The lower support is critical during one-handed release. Once the upper strap opens, the rifle should remain upright until the user grips it. If the lower cup is too shallow, the rifle may lean or fall away.
How Do Release Straps Work?
Release straps stabilize the upper portion of the rifle and open through a planned pulling direction. The strap may wrap around the barrel, fore-end, or a protected point near the stock.
The strap should never be positioned where it applies pressure to the trigger, safety, bolt handle, magazine release, or scope adjustment controls.
A simple upper strap usually contains:
Structural anchor
Adjustable webbing
Soft contact surface
Release hardware
Pull extension
Loose-end keeper
The structural anchor connects the strap to the pack frame or reinforced panel. The adjustment accommodates different rifle diameters and positions. The contact surface protects the firearm and reduces movement. The release opens the loop. The pull extension allows access. The keeper prevents loose components from flapping.
The routing should be visually obvious. A strap twisted during use can reduce contact area and increase pressure.
| Strap Design Detail | Recommended Direction |
|---|---|
| Contact width | Wide enough to distribute pressure |
| Inner surface | Soft, high-friction, and non-abrasive |
| Adjustment | Set once, then remain stable |
| Release direction | Natural pull toward the user |
| Pull extension | Distinct and controlled |
| Loose webbing | Fully retained |
| Anchor position | Connected to reinforced load path |
| Hardware contact | Isolated from rifle and other buckles |
A wider strap can control the rifle with less pressure, but it may be slower to move around accessories. A narrow strap is lighter but can dig into the rifle finish and twist more easily.
A rubberized or silicone-printed inner surface can increase grip, although it should be tested for marks, temperature behavior, and long-term adhesion.
The strap should release under expected load. If the rifle leans away from the pack, tension may pinch the buckle or cam mechanism. The user should not need to first push the rifle inward before the release operates.
Release testing should include deliberate off-axis loads. Real movement is rarely perfectly vertical.
Can Access Remain Quiet?
Access can remain quiet when the system avoids loose metal, hard buckle impact, noisy hook-and-loop closures, stiff fabric folding, and uncontrolled rifle contact. Quiet access is especially important in close-range hunting, where the sound of opening the carrier may be more noticeable than normal walking noise.
Common access noises include:
Buckle click
Webbing scraping through an adjuster
Zipper pull tapping against the rifle
Scabbard fabric crackling
Stock rubbing against a coated lining
Scope striking a stiff edge
Elastic snapping back
Loose pull tether hitting the bag
A quiet release often uses a soft textile pull and a covered mechanism. The contact between the rifle and carrier should be padded or lined with compact brushed fabric.
The opening should remain structured enough that the scope and stock do not scrape against the edges.
| Noise Source | Practical Correction |
|---|---|
| Hard buckle click | Cover with fabric or use quieter mechanism |
| Metal hook impact | Replace or isolate with soft material |
| Hook-and-loop tearing | Use magnet, tuck tab, or buckle |
| Strap sliding noise | Set adjustment before the hunt |
| Rifle scraping lining | Use compact brushed lining |
| Scope contacting opening | Widen and pad critical area |
| Elastic snapping | Control return length |
| Loose cord hitting pack | Add keeper or parking point |
Noise testing should be performed in a quiet environment with the user wearing the pack. The same access sequence should be repeated several times.
A system may sound quiet during slow demonstration but become much louder when used quickly. Both slow and urgent movements should be evaluated.
Cold temperature can increase sound by stiffening the carrier and release components. Wet surfaces can squeak or increase friction. Dirt can make webbing movement rough.
The finished product should be tested after exposure to these conditions.
Quietness must not weaken retention. Replacing a secure buckle with a weak magnet simply to reduce sound is not a professional solution. A hybrid closure can combine a quiet magnetic alignment feature with a mechanical retention element.
Does the Pack Need Removal?
The pack should not need to be removed for routine rifle access when fast availability is one of the product’s main functions. However, pack removal may still be appropriate for secure transport, major adjustments, difficult obstacles, or situations where safe handling requires more control.
A system that allows access while worn offers clear advantages:
Less movement
Faster transition
No need to place the bag on wet ground
Better control on steep terrain
Reduced risk of equipment spilling
The challenge is ensuring that the user can reach and control the rifle from behind the body.
A deep central scabbard may provide excellent stability but require the pack to be loosened or removed. A side sling usually offers easier worn access. A dedicated release backpack can combine central carry with a guided opening mechanism.
The product description should be precise. “Access without removing the pack” should only be claimed when the process has been tested across different user sizes, clothing layers, pack loads, and rifle dimensions.
The pack may still need partial loosening. For example, the user may release one shoulder strap to rotate the pack slightly. This is not the same as true no-removal access.
| Access Method | Movement Required | Main Advantage | Main Limitation |
|---|---|---|---|
| Full no-removal release | Minimal | Fastest and least disruptive | More complex design |
| Shoulder-loosened access | Moderate | Easier to engineer | Pack becomes less stable |
| One-strap removal | High | Works with deeper carriers | More movement and control risk |
| Full pack removal | Very high | Maximum access and visibility | Slow and inconvenient |
| Removable rifle module | Variable | Flexible system | Additional setup and parts |
Return access is just as important as removal. The hunter should be able to re-secure the rifle without taking off the pack, or the product should clearly state that reattachment requires removal.
Many quick-release systems focus on drawing the rifle but give less attention to putting it back. After the immediate need has passed, the user may need both hands free again.
A flared lower cup, guided opening, and easy-to-find upper strap can improve one-person reattachment.
How Is Accidental Release Prevented?
Accidental release is prevented through protected pull placement, sufficient operating force, stable hardware, redundant retention where appropriate, and testing against vegetation and abnormal movement.
A quick-release system should open easily when intentionally operated but resist:
Branch pulls
Strap snagging
Bag compression
Crawling
Falling
Vehicle loading
Contact with other equipment
Reverse loading
Partial buckle engagement
The release pull should not hang far outside the pack profile. It should remain accessible to the user but protected from direct environmental contact.
A secondary transport lock can be useful during long approaches. This may be a simple keeper that prevents the primary release from opening accidentally. The lock should be disengaged before quick access is required.
The system should indicate whether it is fully engaged. A buckle may look connected while only one side is latched. Magnets can align a flap while the mechanical closure remains open.
Tactile or audible confirmation can help, though excessive click noise should be avoided.
| Accidental-Release Test | Purpose |
|---|---|
| Pull from multiple directions | Determines snag sensitivity |
| Brush-drag simulation | Checks vegetation interaction |
| Loaded walking and running | Reveals dynamic loosening |
| Pack drop test | Checks release under impact |
| Crawl test | Checks ground contact |
| Compression test | Evaluates interaction with bag contents |
| Cold and wet cycling | Checks hardware consistency |
| Repeated operation | Reveals wear and reduced holding force |
A release system should be inspected before each use. Webbing cuts, damaged stitching, cracked buckles, weakened elastic, and loose magnets can reduce retention.
How Should Access Time Be Evaluated?
Access time should be measured from the user’s normal movement position to the point where the rifle is safely controlled in both hands. Merely timing how fast a buckle opens gives an incomplete result.
The test should include:
Locating the release
Opening retention
Gripping the rifle
Clearing the lower support
Bringing the rifle forward
Establishing controlled handling
Time should be recorded across multiple repetitions and users. The first attempt often takes longer than later attempts because the user learns the mechanism. Both first-use intuitiveness and trained performance are important.
A useful testing group includes different heights, arm lengths, shoulder mobility, clothing thicknesses, and dominant hands.
| Evaluation Metric | Why It Matters |
|---|---|
| First-attempt time | Shows intuitiveness |
| Average trained time | Shows practical speed |
| Slowest successful time | Reveals difficult conditions |
| Failed-release rate | Shows reliability |
| Number of actions | Indicates complexity |
| Muzzle-control score | Evaluates safe handling |
| Noise score | Evaluates close-range suitability |
| Reattachment time | Shows complete field practicality |
Access should be tested with realistic rifle weight. A lightweight mock-up may be easier to control than the final firearm.
The pack should also be loaded to the intended capacity. A heavy load changes posture, shoulder movement, and scabbard pressure.
A professional rifle-carry backpack should not be judged by one dramatic product demonstration. It should perform consistently through dozens or hundreds of controlled access cycles under realistic conditions.
Szoneier can develop rifle-fit samples around defined firearm envelopes, including standard hunting rifles, long-range configurations, wide chassis stocks, larger scopes, bipods, and suppressed setups. Scabbard dimensions, lower cradles, release straps, padding, linings, reinforcement points, and access paths can be adjusted before the final hunting bag structure is approved.
How Is Carry Stability Controlled?
Rifle-carry stability is controlled by supporting the firearm at separated points, connecting those points to the backpack’s structural load path, and keeping the rifle close to the user’s center of mass. The system must prevent vertical drop, side-to-side rotation, outward swing, and impact against the pack without placing damaging pressure on the scope, action, stock, or muzzle device.
A rifle that moves only a few centimetres with every step can become exhausting during a long approach. Its weight repeatedly pulls against the upper strap, twists the backpack, and changes the pressure on the hunter’s shoulders and hip belt. The movement may also create noise as the stock rubs against the lower cradle or the barrel strikes a buckle.
Effective stability does not come from simply tightening every strap. Excessive compression can slow access, deform soft bag panels, place lateral force on the optic, and make the system difficult to operate with gloves. The better approach is to create a defined rifle position and use each component for a specific purpose.
The lower carrier supports weight.
The upper retention controls rotation.
The frame transfers the load.
Compression straps manage the relationship between the rifle, bag contents, and pack body.
Padding prevents hard contact.
The pattern and reinforcement keep the system aligned as the backpack changes shape.
Current commercial systems illustrate this structural approach. Eberlestock’s Spectre uses a padded scabbard with a reinforced bottom, a weapon-retention strap, an internal frame, and separate compression systems for the scabbard and the main pack. Stone Glacier’s R3 frame incorporates an adjustable rifle-carry system directly into the frame rather than relying only on an outer pocket. These examples show why stability depends on the carrier’s connection to the load-bearing structure, not merely the strength of the visible fabric.
How Is Rifle Movement Prevented?
Rifle movement is prevented by controlling four directions independently: downward movement, upward movement, lateral rotation, and outward separation from the pack.
Downward movement is normally stopped by a buttstock cup, scabbard bottom, lower sling, or shaped cradle. This lower component should carry most of the rifle’s vertical weight.
Upward movement can occur when the hunter jumps, climbs, or lowers the pack abruptly. A deep cup, shaped scabbard, or secondary retention loop can prevent the rifle from bouncing out of the lower support.
Lateral rotation occurs when the rifle pivots around the lower cup. The upper strap should control this motion without pressing against sensitive components.
Outward movement occurs when the rifle separates from the backpack during leaning, running, or changing direction. A stable upper connection and close carrier position reduce this swing.
| Movement Direction | Main Control Component | Poor Design Result |
|---|---|---|
| Downward slide | Buttstock cup or scabbard bottom | Rifle settles deeper and becomes difficult to access |
| Upward bounce | Cup depth or secondary retention | Stock lifts out during jumping or climbing |
| Side rotation | Upper barrel or fore-end strap | Rifle swings and strikes branches or the bag |
| Outward separation | Compression geometry and frame connection | Rifle pulls backward and destabilizes the pack |
| Forward movement | Shaped cradle and bag contact | Scope or action strikes the pack |
| Twisting | Two-point retention with stable spacing | Rifle rotates around its long axis |
The distance between the lower and upper retention points has a major effect on control. Two points placed close together allow the rifle to behave like a long lever. Increasing the distance between them generally improves rotational stability.
However, the upper strap should not be placed so high that the user cannot reach it or so low that the barrel remains uncontrolled. The ideal position depends on the rifle length, pack height, and access method.
The lower support must also fit the stock geometry. A conventional hunting stock can sit securely in a tapered cup, while a wide chassis stock may require an adjustable bucket or cradle.
A universal carrier needs a way to remove excess space. Possible solutions include:
Adjustable side webbing
Elastic compression panels
Removable foam inserts
Interchangeable lower cups
Fold-over retention flaps
A wide cup without adjustment may hold a large chassis rifle but allow a smaller hunting rifle to move. A narrow cup creates the opposite problem.
The upper strap should use a contact surface that grips without scratching. A compact brushed polyester, soft synthetic suede, neoprene-faced webbing, or silicone-patterned textile can reduce sliding.
The grip material must be tested for:
Color transfer
Surface marking
Low-temperature hardness
Water absorption
Long-term delamination
Contamination by dust and mud
The strap should hold the rifle through geometry rather than extreme friction alone. Mud, rain, frost, and wear can reduce grip.
A third retention point may be useful for high-impact movement or vehicle transport. It can secure the rifle more completely during climbing, running, or long-distance carrying. However, it should be clearly differentiated from the quick-release control so the user understands which retention must be opened before rapid access.
A practical system can have two modes.
Travel mode uses primary and secondary retention for maximum security.
Ready-access mode uses the lower support and one accessible upper release.
The product instructions should explain when each configuration is appropriate.
Movement should be tested with the bag at different fill levels. A scabbard or side carrier may feel stable when the main compartment is full, because the contents support the surrounding panel. When the bag is half empty, the same area may collapse and allow the rifle to lean outward.
A well-designed carrier remains aligned independently of the contents.
Where Should the Rifle Sit?
The rifle should sit as close as practical to the backpack’s frame and near the user’s central load line. Keeping the firearm close reduces leverage, limits swing, and makes its weight easier to transfer into the hip belt.
A rifle positioned several centimetres behind the main bag creates a longer moment arm. The hunter experiences the load as a backward pull even though the rifle itself has not become heavier.
The ideal location depends on the carry style.
| Carry Position | Stability | Accessibility | Main Design Concern |
|---|---|---|---|
| Center behind the spine | Very high | Medium-low | Requires engineered release path |
| Between bag and frame | Very high | Medium | Can conflict with load shelf |
| Close side carry | High | High | Creates some left-right imbalance |
| Outer side carry | Medium | Very high | More swing and brush exposure |
| Angled rear carry | Medium-high | High | Stock and muzzle clearance |
| External rear cradle | Medium | Medium | Increased backward leverage |
Center carry offers the best left-right balance. It is well suited to heavier rifles and long approaches, but the user may have difficulty reaching the rifle without a dedicated release mechanism.
Side carry is easier to access but shifts weight toward one side. The effect becomes more noticeable when the rifle is heavy or the backpack is lightly loaded.
The rifle should not sit so low that the stock strikes the hunter’s leg, catches behind the knee, or hits the ground when crouching. It should not sit so high that the muzzle catches every overhead branch.
The correct vertical position depends on:
Rifle length
Pack torso length
Hunter height
Stock dimensions
Suppressor length
Terrain
Expected body movement
The system should be tested while standing, crouching, kneeling, stepping over logs, climbing, and sitting.
A position that appears correct while standing can become problematic when the hunter leans forward. The upper portion of the rifle moves closer to overhead vegetation, while the stock may separate from the pack.
The rifle should also remain clear of the hunter’s head and neck. A scope turret, bolt handle, or stock edge should not contact the user when looking upward or turning the head.
A side carrier must not interfere with arm swing. The rifle and its upper strap should stay behind the elbow’s normal movement path.
A suppressed rifle may need a lower position to control total height, but moving it lower can increase leg contact. An adjustable carrier allows the position to be tuned for different rifle lengths.
Adjustment points should remain simple. If moving the carrier requires rerouting several webbing straps through hidden loops, users may accept a poor fit rather than adjust it correctly.
Clear markings or indexed webbing positions can make repeated setup easier.
How Do Compression Straps Help?
Compression straps stabilize both the backpack contents and the rifle-carry system. They reduce empty space, prevent the main bag from expanding into the rifle channel, and pull the load closer to the frame.
A rifle carrier should ideally have dedicated compression rather than relying entirely on the straps that control other equipment.
When one strap is expected to hold a tripod, compress the main bag, and stabilize the rifle, the functions compete. Releasing the rifle may loosen the backpack contents. Tightening the tripod may press the rifle outward.
Independent controls are more predictable. Eberlestock’s current Spectre design lists separate scabbard and pack compression straps, which illustrates how the rifle channel and main storage volume can be managed as distinct systems.
Compression straps can perform several jobs:
Pull the rifle inward
Stabilize the upper barrel section
Prevent bag contents from pushing into a scabbard
Control wide or irregular rifle profiles
Secure the firearm during high-impact movement
Reduce panel flapping
Support accessory covers
The strap path matters. A strap pulling directly across the scope can place pressure on turrets or lens caps. A strap crossing a bipod may loosen as the bipod shifts.
The preferred contact zone is usually the barrel or fore-end, provided it does not affect accessories or safe operation.
| Compression Detail | Good Practice | Common Problem |
|---|---|---|
| Strap anchor | Connect to frame or reinforced panel | Sewn only to outer shell |
| Pull direction | Draw rifle toward structural center | Pull rifle sideways across bag |
| Strap width | Wide enough to spread pressure | Narrow strap cuts into finish |
| Adjustment | Easy before movement | Requires frequent field adjustment |
| Loose end | Retained with elastic keeper | Flaps and catches vegetation |
| Buckle placement | Reachable but protected | Presses against scope or body |
| Strap independence | Dedicated to rifle | Shared with tripod or main load |
| Contact surface | Soft and non-slip | Hard webbing rubs firearm finish |
Compression should not be used to compensate for an incorrectly sized carrier. If the rifle fits only when the straps are pulled extremely tight, the lower cup or scabbard geometry may be wrong.
The bag should remain stable with reasonable strap tension. The retention should then provide additional control rather than create the entire fit.
Straps must also stay functional when wet or dirty. Some smooth webbing slips through adjusters after contamination. Other combinations become difficult to release when grit enters the buckle.
Webbing and hardware should be tested as a matched system. Width alone does not guarantee compatibility.
Compression straps should be cycled under load. Repeated tightening and releasing can polish the webbing surface, wear the buckle teeth, and reduce holding power.
A production inspection can check for:
Correct webbing type
Correct routing
Buckle orientation
Secure bar tacks
Adequate loose-end length
Functional strap keepers
Absence of twists
The strap should not be trimmed so short that a larger rifle cannot be fitted. It should not be so long that a large tail remains after adjustment.
Does Carry Position Affect Balance?
Carry position strongly affects balance because the rifle is a long object with weight distributed unevenly across its length. A scoped rifle may have much of its mass around the action, while a suppressor or heavy barrel moves the center of gravity forward.
Center carry places the weight near the spine and normally creates the least lateral imbalance.
Side carry introduces asymmetric loading. The hip belt and frame can control part of this effect, but the hunter may still feel greater pressure on one side.
Rearward carry creates backward leverage. The shoulder straps may feel tighter while the hip belt pulls away from the lower back.
The effect becomes more pronounced as rifle weight increases.
A lightweight hunting rifle on the side of a fully loaded pack may cause little discomfort. A heavy precision rifle on a nearly empty daypack may dominate the entire balance.
| Carry Condition | Likely Balance Effect | Corrective Direction |
|---|---|---|
| Heavy rifle on side of light pack | Strong lateral pull | Move carrier closer to frame or center |
| Rifle far behind full pack | Backward leverage | Reduce spacing and improve compression |
| Long suppressor above pack | High rotational leverage | Lower rifle position or strengthen upper support |
| Low stock near hip | Leg contact and pendulum movement | Raise lower cup |
| High stock position | Better leg clearance | Check overhead muzzle height |
| Heavy accessory on opposite side | Possible counterbalance | Avoid dependence on fixed packing arrangement |
The pack’s frame stiffness is important. A flexible daypack may twist under side-mounted rifle weight. A stronger frame resists this deformation and distributes the force into the hip belt.
Stone Glacier’s R3 product places an adjustable rifle carrier on a load-bearing frame rather than adding it only to a soft bag. The manufacturer also describes the frame as the backbone of the pack system, reinforcing the broader principle that heavy or asymmetric equipment should connect to structural components.
A rifle carrier should not be evaluated only while walking on flat ground. Side slopes expose balance problems quickly.
When traversing a slope, a rifle on the downhill side may pull the hunter outward. A rifle on the uphill side may contact the terrain or restrict arm movement.
Testing should include:
Uphill travel
Downhill travel
Side-hill travel in both directions
Stepping over obstacles
Turning quickly
Using trekking poles
Crawling
Sitting
Removing the pack
The hip belt should remain centered. If the bag gradually rotates toward the rifle side, the carrier position or frame control is insufficient.
A sternum strap can stabilize the shoulder harness but should not be expected to correct major pack imbalance.
Load lifters should also be adjusted with the rifle fitted. Adding the firearm can change the top load angle and shoulder pressure.
Balance testing should compare several backpack loads. The correct rifle position for a fully loaded expedition pack may not feel the same on a day hunt with minimal equipment.
How Is Scope Impact Reduced?
Scope impact is reduced by creating clearance around the optic, using controlled padding, preventing rifle rotation, and keeping hard hardware away from the scope body and adjustment controls.
The scope should not be the main bearing point inside the carrier. The stock, fore-end, or other stronger areas should carry most contact loads.
A scabbard that is too narrow may squeeze the scope between its walls. A side carrier may allow the scope to strike the bag during each step.
The first protection method is therefore correct fit. Padding cannot solve a channel that is fundamentally too small.
The second method is strategic foam placement. Foam can be positioned beside the objective bell, around the action area, or along the outer side of the scabbard.
The foam should create a protective zone without pressing continuously against the turrets.
| Scope Risk | Protection Method |
|---|---|
| Side impact against pack | Padded spacer between rifle and bag |
| Turret pressure | Shaped clearance recess |
| Objective bell contact | Wider opening with soft edge |
| Abrasion during insertion | Low-friction brushed lining |
| Impact from zipper slider | Covered zipper or internal guard |
| Rotation inside scabbard | Better lower cup and upper retention |
| Rain and debris | Removable scope cover or protected compartment |
| Compression from bag contents | Independent rifle channel |
Closed-cell foam is useful where moisture resistance and shape retention matter. Softer open-cell foam offers good cushioning but may retain water.
A layered construction can use thin closed-cell foam for structure and a brushed lining for surface protection.
Foam density is as important as thickness. A thick, soft foam may compress completely under rifle weight. A very firm foam may transmit impact rather than absorb it.
The scope-protection section should be tested with the largest claimed optic and with common accessories fitted, including lens caps and sunshades.
Hardware must be isolated from the optic. Zipper sliders, buckles, webbing adjusters, snaps, and rivets should not sit where the scope can strike them.
When a zipper is used to open the scabbard, an internal fabric guard can separate the rifle from the zipper chain and slider.
Repeated impact testing should include walking, controlled drops, and pack placement. The objective is not to abuse the firearm but to reveal whether the optic contacts any hard component during normal handling.
A soft lining should be inspected for contamination. Sand trapped in fleece can become more abrasive than a smooth, clean fabric. Removable liners or access for cleaning improve long-term protection.
Which Materials Should Be Used?
Rifle-carry hunting bags should use a zoned material system rather than one fabric throughout the product. High-abrasion woven fabric belongs at the scabbard bottom, lower cradle, attachment points, and external contact zones. Softer textiles belong around the rifle finish, scope, shoulder-contact areas, and quiet-access components. Foam provides impact control, webbing transfers load, and waterproof layers manage rain and contamination.
The strongest-looking fabric is not automatically the best choice. A very heavy ballistic weave may resist abrasion but create excess weight, stiffness, and noise. A soft brushed fabric may protect the rifle finish but lack the tear strength required at a load-bearing anchor.
Every layer should have a defined role.
The outer textile resists the environment.
The structural backing controls shape.
The lining protects the firearm.
The foam absorbs impact.
The webbing transfers force.
The coating or liner controls moisture.
Reinforcement spreads concentrated loads.
Which Fabrics Resist Abrasion?
High-tenacity nylon and durable textured polyester are common choices for abrasion-prone hunting bag areas. Fabric performance depends on yarn strength, denier, weave, density, coating, and finishing rather than fiber name alone.
Dense nylon fabrics generally offer strong tear and abrasion performance for their weight. Textured polyester can provide better printability, lower sheen, and stable camouflage presentation.
CORDURA’s official fabric ranges illustrate these distinctions. Its Classic fabric uses high-tenacity, air-textured filament yarn and is offered in 330D, 500D, 700D, and 1000D constructions. Its Ballistic fabric uses densely woven high-tenacity nylon 6,6 and is intended for demanding products including backpacks and luggage. Its HP polyester fabric is designed for printing while providing resistance to tears, scuffs, and abrasion. These are branded material examples rather than universal performance guarantees, but they show how yarn type and construction can be selected around different pack functions.
A rifle-carry pack may use several fabric weights.
| Bag Area | Suggested Material Direction | Reason |
|---|---|---|
| Main backpack body | 300D–500D textured polyester or nylon | Balance of weight and durability |
| Scabbard exterior | 400D–600D ripstop or high-tenacity woven | Repeated brush and firearm contact |
| Scabbard bottom | 500D–1000D reinforced woven | Concentrated stock and ground abrasion |
| Lower rifle cup | Heavy woven with internal stabilizer | Supports repeated vertical load |
| Upper contact flap | Brushed polyester or soft-faced laminate | Quiet, non-abrasive contact |
| Internal scabbard wall | Smooth tricot or compact micro-suede | Protects stock and optic |
| Frame sleeve | Dense smooth nylon | Resists internal hard-component wear |
| Rain cover | Lightweight coated nylon or polyester | Low bulk and weather protection |
Current product specifications also demonstrate mixed-fabric construction. Eberlestock’s Spectre lists 500D and 400D ripstop materials, along with a padded and reinforced scabbard. This type of combination allows heavier material to be used where needed without making every panel identical.
The main abrasion questions are not limited to when the fabric develops a hole. The design team should examine:
Surface polishing
Yarn pull
Coating exposure
Camouflage wear
Pilling
Edge fraying
Noise change
Water-repellency loss
A fabric can remain structurally strong while looking worn or becoming louder.
The scabbard bottom deserves the most attention because the buttstock repeatedly presses into the same area. If the pack is placed on the ground, this section may also contact rock, dirt, and moisture.
A double-layer bottom can use a replaceable inner insert or a hidden polymer reinforcement between textile layers. The hard insert should not directly touch the rifle.
The outermost layer should remain repairable where possible. A complicated laminate may be difficult to patch after field damage.
How Does Padding Protect Rifles?
Padding protects the rifle by absorbing impact, separating it from hard pack components, and distributing pressure across a larger area. It should be concentrated around vulnerable areas rather than added uniformly without purpose.
Too much padding increases weight, bulk, and drying time. It can also reduce internal clearance and make access slower.
The main padded zones normally include:
Scope and action area
Scabbard opening
Lower stock cup
Side facing away from the user
Edges near zipper chains
Weapon cradle
Muzzle-device contact area
Different foams serve different functions.
| Padding Material | Main Strength | Main Limitation |
|---|---|---|
| EVA foam | Shape retention and impact protection | Can become stiff when thick |
| PE foam | Lightweight and water resistant | May feel firm and noisy |
| PU foam | Soft cushioning | Can absorb moisture |
| Neoprene or SBR composite | Grip and flexible protection | Adds weight and may retain odor |
| Polyester felt | Quiet and flexible | Lower structural protection |
| 3D spacer mesh | Airflow and soft separation | Limited resistance to sharp pressure |
A combination often performs better than one foam. Thin EVA can maintain shape while soft polyester felt or brushed lining protects the rifle surface.
Padding should not cover drainage paths. A saturated foam layer inside a scabbard can keep moisture against the stock and metal components.
Hydrophobic or closed-cell padding is preferable in areas likely to become wet. Open-cell foam can be used in protected sections when superior softness is needed, but drying access should be considered.
Foam should remain fixed. A loose pad can fold, expose a hard edge, or block the rifle during insertion.
Full-surface lamination secures foam but may stiffen the panel. Perimeter stitching, pocketed inserts, or partial bonding can preserve flexibility.
The foam should not collapse permanently during packaging. Long-term carton compression can create thin spots that no longer protect the scope.
A packed-storage recovery test should measure the panel before compression, immediately after unpacking, and after a recovery period.
Are Waterproof Linings Necessary?
Waterproof linings are necessary when the carry system must protect the rifle from sustained rain, wet snow, mud, or contaminated equipment. They are less necessary when the carrier is an open sling designed for airflow and minimum weight.
A waterproof lining should not be confused with a waterproof rifle case. Water can enter through the top opening, drainage holes, seams, zipper chains, and the wet rifle itself.
A fully coated interior may prevent external water from passing through the fabric while trapping moisture introduced from inside.
The correct strategy depends on the product.
| Carrier Type | Recommended Moisture Strategy |
|---|---|
| Open quick-release sling | Water-repellent outer materials and fast drying |
| Partial scabbard | Coated lower section with drainage |
| Full scabbard | Water-resistant shell, protected seams, drainage and ventilation |
| Removable rifle sleeve | Waterproof or highly water-resistant construction |
| Meat-hauling pack with carrier | Separate rifle and contamination barriers |
| Snow-oriented pack | Muzzle protection and low-water-uptake lining |
A PU-coated woven backing can improve water resistance without exposing a slick surface directly to the rifle. TPU film can provide a more continuous barrier in selected compartments.
The lining should remain flexible in cold conditions. A stiff coating can crackle and make the rifle difficult to remove.
The lower cup should allow water to escape. Drain holes can be reinforced with stitched eyelets, welded openings, or durable mesh sections.
The material around the drain must resist tearing because the rifle’s weight is concentrated nearby.
A removable inner sleeve can simplify cleaning and drying. It can also be replaced after heavy wear without replacing the entire bag.
Waterproof linings should be tested for hydrolysis resistance, coating adhesion, flex durability, and odor. The pack may remain stored in a humid vehicle or closed equipment room for long periods.
Which Webbing Handles Heavy Loads?
Load-bearing rifle carriers should use stable woven webbing with sufficient tensile strength, controlled elongation, and reliable compatibility with the selected buckles and adjusters.
Nylon webbing generally offers high strength and abrasion resistance but can absorb some moisture and may stretch under wet load.
Polyester webbing usually absorbs less water, maintains dimensions well, and offers good ultraviolet resistance.
Polypropylene webbing is lightweight and moisture resistant but is usually less suitable for the most heavily loaded structural attachments unless the grade and construction are specifically validated.
The material name alone does not determine performance. Webbing width, thickness, weave density, yarn quality, edge construction, and finishing all matter.
| Webbing Function | Typical Design Priority |
|---|---|
| Lower rifle support | High tensile strength and low elongation |
| Upper retention | Controlled flexibility and secure adjustment |
| Frame attachment | Maximum load transfer |
| Compression strap | Buckle compatibility and abrasion resistance |
| Pull tether | Soft hand and easy identification |
| Strap keeper | Elastic recovery |
| Handle reinforcement | High strength and stable stitching |
Webbing should be wide enough to distribute pressure. A narrow strap can cut into the stock finish or concentrate force at the sewing line.
Load-bearing webbing should extend into the bag structure rather than end immediately behind the visible attachment. Wrapping it around a frame connection or distributing it across a large internal patch reduces stress concentration.
Bar tacks, box stitches, and multi-row patterns can secure the webbing, but stitch quantity alone does not guarantee strength. Excessive stitching can perforate the fabric and create a tear line.
The stitching method should be validated through component testing.
Hardware must match the webbing. A ladder lock designed for thick webbing may slip on a thinner tape. A buckle opening that is too tight may make field adjustment difficult.
YKK lists polyacetal hardware for outdoor gear, backpacks, luggage, and accessories, illustrating the use of engineered polymer buckles in these applications. The final buckle still needs to be selected and tested for the specific load, temperature, and safety requirements of the rifle carrier.
Wet, cold, dirty, and worn webbing should be tested in the same hardware. Initial holding power on a clean sample is not enough.
How Are Contact Panels Reinforced?
Contact panels are reinforced by placing stronger woven layers, foam, webbing, or thin structural inserts behind the visible surface. The reinforcement should spread pressure without creating a hard edge against the firearm.
Critical contact panels include:
Scabbard bottom
Scope-facing wall
Lower stock cradle
Barrel-strap anchor
Frame connection
Zipper opening
Muzzle-extension base
Side panel facing rock or vegetation
A reinforcement stack may contain:
Soft lining
Impact foam
High-tenacity woven patch
Structural sheet
Outer abrasion fabric
Each layer should perform a separate job.
| Layer | Function |
|---|---|
| Brushed lining | Prevents scratches and reduces noise |
| Foam | Absorbs impact and distributes pressure |
| Woven reinforcement | Resists tearing and seam pull-out |
| Polymer insert | Controls shape and puncture |
| Coated outer textile | Resists water and abrasion |
The edges of the reinforcement should be tapered or rounded. Sharp corners create stress concentrations and can become visible through the outer fabric.
A rigid insert should not float loosely inside the panel. Movement can create tapping and wear.
The panel can use a removable insert sleeve, but the sleeve must fit closely and close securely.
The scabbard bottom may need a cup-shaped reinforcement rather than a flat patch. The rifle stock pushes downward and outward, so the structure should wrap around the contact area.
Attachment seams should avoid direct contact with the rifle. Binding, thread ridges, and seam allowances can mark the stock over time.
A soft protective facing can cover these edges.
The reinforced panel must also remain sewable. Excessive layer thickness can produce skipped stitches, broken needles, uneven feeding, and compressed foam.
Szoneier can compare several reinforcement stacks during sampling. One prototype might use a 500D woven exterior with EVA support and brushed lining. Another might use a lighter ripstop face with a high-tenacity hidden patch and removable base insert.
The correct solution can then be selected according to rifle weight, target bag weight, weather exposure, access speed, and expected service life.
The final goal is not to create the thickest carrier. It is to place strength exactly where the rifle transfers force and softness exactly where the firearm needs protection.
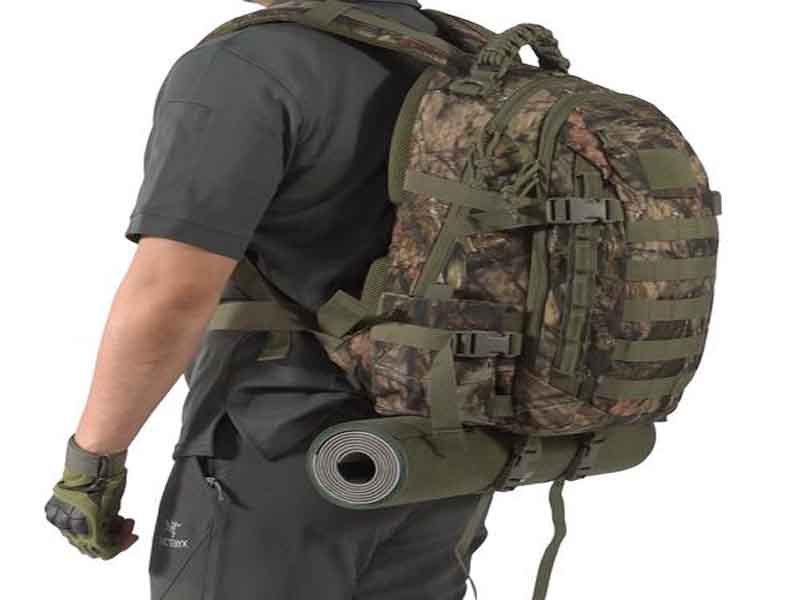

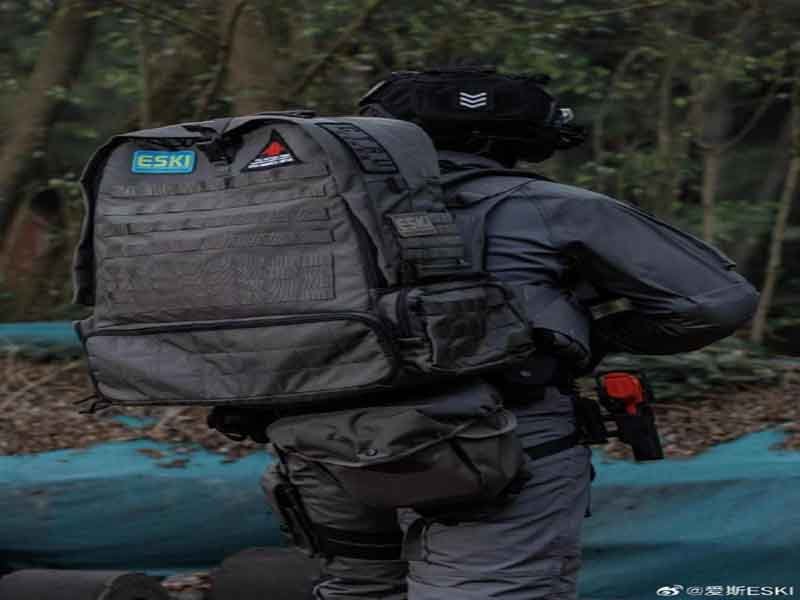
Can't find the answers?
No worries, please contact us and we will answer all the questions you have during the whole process of bag customization.
Make A Sample First?
If you have your own artwork, logo design files, or just an idea,please provide details about your project requirements, including preferred fabric, color, and customization options,we’re excited to assist you in bringing your bespoke bag designs to life through our sample production process.