Skip to content
A tactical bag often looks impressive before a single piece of gear goes inside it. Rows of webbing, compression straps, reinforced panels, oversized buckles, and military-inspired colors create an immediate sense of strength. Yet outdoor survival does not reward appearance. It rewards access, balance, durability, weather resistance, and the ability to carry the right equipment without exhausting the person wearing it.
A poorly chosen bag can make a sensible survival kit harder to use. A pack that is too large encourages overpacking. A pack that is too small forces important items onto the outside, where they may snag, become wet, or fall off. A heavily reinforced bag may survive years of abrasion but become unnecessarily tiring on a long trail. A lightweight pack may feel comfortable in a shop but fail when sharp tools, cooking equipment, water, and emergency supplies begin pressing against its seams.
The best tactical bag for outdoor survival gear is a pack whose capacity, structure, material, carrying system, and internal organization match the duration and conditions of the intended mission. A 20–30-liter pack is generally suitable for short outings and compact emergency kits. A 30–45-liter pack offers more room for overnight gear and changing weather. A 45–60-liter pack can support extended or 72-hour use, provided that the load remains realistic for the user’s strength and travel distance. MOLLE webbing, hydration access, reinforced stress points, reliable closures, and a stable harness can improve function, but each feature should solve a real problem rather than simply add weight.
That direct answer sounds simple. In practice, choosing the right pack requires a series of trade-offs. The bag must be tough but not painfully heavy, organized but not divided into dozens of unusable pockets, weather resistant but still practical to clean, and expandable without becoming unstable.
Imagine leaving a trailhead just before sunrise. The weather report promises a dry afternoon, but the sky is already darker than expected. Your water filter is buried under a jacket, the first-aid pouch is attached where you cannot reach it, and the shoulder straps begin rubbing after the first hour. Nothing has technically failed, yet the entire system is working against you. That is the difference between owning a tactical-looking bag and carrying a survival pack designed around real outdoor use.
What Is a Tactical Survival Bag?

A tactical survival bag is a load-carrying system designed to organize, protect, and provide controlled access to equipment used during outdoor travel, emergencies, evacuation, camping, rescue support, or self-reliant field activity. Compared with an ordinary school or commuter backpack, it commonly uses stronger fabrics, reinforced seams, modular attachment points, compression straps, durable hardware, and compartment layouts intended for tools, water, medical supplies, clothing, food, and shelter components.
The word tactical does not automatically mean military, combat-ready, or indestructible. In product design, it usually describes a practical combination of durability, modularity, access, and load control. A genuine tactical survival bag should help the user carry essential gear efficiently. If a feature does not improve carrying comfort, organization, protection, or access, it may be decorative rather than functional.
What Makes a Bag Tactical?
A bag becomes tactical through the way its components work together, not through color or appearance alone. Black, olive, coyote brown, and camouflage fabrics are common, but a conventional backpack made in those colors does not necessarily become a tactical pack.
The most recognizable feature is often modular webbing. MOLLE-compatible platforms use rows of stitched webbing that allow users to attach compatible pouches, tool holders, bottle carriers, medical kits, and other accessories. This modularity lets one base pack serve different activities. A user may attach a compact first-aid pouch for a day hike, add utility pouches for an overnight trip, or remove external accessories when traveling through crowded areas.
However, webbing is only useful when it is accurately spaced, securely sewn, and positioned where attached weight will remain stable. Decorative webbing that stretches, tears, or is stitched into weak shell fabric can create a false sense of capability. Every added pouch also shifts the center of gravity. A pack covered in accessories may hold more items, but it can become wider, less balanced, and more likely to catch on branches.
Reinforcement is another defining element. Tactical bags often use bar tacks, box-and-cross stitching, doubled fabric layers, binding tape, and reinforced attachment panels around shoulder straps, grab handles, compression straps, and webbing. These locations receive repeated tension rather than simple surface abrasion. A fabric may have excellent tear strength, but the bag can still fail if the stitching pattern concentrates force in a small area.
Access design also matters. Many tactical backpacks use clamshell or panel-loading openings rather than a single narrow top opening. A clamshell opening allows the front panel to unzip widely, giving the user a clearer view of the contents. This can be valuable when locating a medical item, repair tool, fire-starting kit, or dry layer quickly.
The following comparison shows how functional tactical features differ from purely visual ones.
| Feature | Functional Purpose | Weak or Decorative Version | What to Inspect |
|---|---|---|---|
| MOLLE-style webbing | Adds modular pouches and tools | Loose rows with inconsistent spacing | Stitch density, spacing, base reinforcement |
| Compression straps | Stabilize partial loads | Thin straps placed only for appearance | Buckle strength and useful adjustment range |
| Reinforced handle | Supports lifting a loaded pack | Single fabric strip without backing | Box stitching and internal reinforcement |
| Panel opening | Improves gear visibility and access | Large opening with weak zipper support | Zipper gauge, corner stress and seam binding |
| Hydration sleeve | Separates and secures a water reservoir | Flat pocket without hanger or hose port | Reservoir support, drainage and hose routing |
| Internal hook-and-loop | Secures removable organizers | Small patch with limited usable area | Placement, holding strength and accessibility |
A tactical bag should still work when it is only partly full. Compression straps should reduce movement. Internal pockets should prevent dense objects from collecting at the bottom. The shoulder harness should remain stable when the user walks quickly, climbs, or bends.
A practical way to judge tactical design is to remove the military styling mentally. Picture the bag in plain gray fabric with no visible webbing. Would its opening, harness, pocket layout, reinforcement, and load control still make sense? When the answer is yes, the tactical function is probably real.
How Is It Used Outdoors?
Outdoors, a tactical bag acts as more than storage. It becomes a mobile organization system. The user may need to walk over uneven ground, pass through vegetation, work in rain, manage equipment with cold hands, or retrieve a specific item without emptying the entire pack.
The arrangement of equipment should reflect urgency and frequency. Water, rain protection, navigation tools, gloves, and basic first aid usually need faster access than spare clothing or backup food. Fire-starting supplies may need moisture protection. Sharp tools should not press directly against the outer shell. Batteries and electronic devices should be separated from wet equipment. Dense objects should remain close to the back rather than hanging away from the body.
Different outdoor scenarios create different design priorities.
| Outdoor Scenario | Main Bag Priority | Useful Features | Common Packing Mistake |
|---|---|---|---|
| Day hiking | Low weight and quick access | 20–30L capacity, bottle pockets, rain layer pocket | Carrying too many backup items |
| Overnight camping | Balanced storage | 30–45L capacity, compression straps, sleeping gear attachment | Placing heavy cookware far from the back |
| Emergency evacuation | Rapid departure and clear organization | Pre-packed modules, identification labels, medical access | Filling every pocket without an inventory |
| Bushcraft | Tool carriage and abrasion resistance | Reinforced panels, axe or tool attachment, repairable hardware | Leaving cutting tools unprotected |
| Wet-weather travel | Water management | Coated fabric, rain cover, drainage, protected zippers | Assuming coated fabric makes every seam waterproof |
| Search or field support | Repeated access | Panel opening, removable pouches, visible organizers | Burying frequently used equipment |
A tactical bag is especially useful when gear categories need to remain separated. One compartment might hold shelter and insulation, another food and cooking items, while removable pouches manage medical supplies, lighting, navigation, or repair tools. This modular approach reduces search time and makes it easier to move one category of equipment between packs.
Still, more compartments do not always mean better organization. Small pockets consume internal space and may force bulky items into awkward shapes. A main compartment with a few purposeful dividers can be more useful than a pack containing twenty narrow pockets.
Outdoor use also exposes weaknesses that are difficult to notice during normal retail inspection. Fine dust can enter zipper tracks. Mud can clog hook-and-loop panels. Wet webbing can retain water. Metal hardware may become cold and uncomfortable to handle. Plastic buckles can become brittle in low temperatures if the wrong material is used. Long loose straps can catch on branches or machinery.
For that reason, a survival bag should be evaluated as a system under movement. It should be packed with realistic weight, lifted by the handle, carried up and down stairs, placed on rough ground, opened while wearing gloves, and compressed at different load levels. A bag that performs well while empty tells very little about how it will behave with 10 or 15 kilograms inside.
Is It Only for Military Use?
Tactical bags are not limited to military use. Their practical features are relevant to hikers, campers, emergency volunteers, medical teams, photographers, field technicians, hunters, overland travelers, rescue personnel, utility workers, and families preparing evacuation kits.
Military equipment influenced many tactical design principles, particularly modular attachment, load distribution, abrasion resistance, and standardized pouch systems. Civilian users, however, often have different priorities. A civilian outdoor traveler may value lower weight, less conspicuous styling, easier cleaning, better laptop protection, or access through public transportation. A medical user may need high-visibility internal panels and infection-control considerations. A photographer may need padded dividers rather than ammunition-style compartments.
The intended environment should shape the design language. Highly visible camouflage and extensive external webbing may be appropriate for certain field activities but less suitable for urban evacuation or international travel. A discreet pack can attract less attention and move more easily through airports, railway stations, hotels, or crowded shelters.
There is also a practical social consideration. A military-looking bag can communicate preparedness to one observer and aggression to another. Users should think about where the pack will be carried, not only what it can hold.
A more useful classification is to separate bags by function.
| Functional Category | Primary User | Main Design Focus | Suitable Appearance |
|---|---|---|---|
| Military field pack | Service and training personnel | Standardized attachments and heavy-duty use | Mission-specific colors |
| Outdoor tactical pack | Hikers, campers, bushcraft users | Durability, hydration and tool organization | Earth tones or high-visibility options |
| Emergency response bag | Medics, volunteers, rescue teams | Fast identification and rapid access | Red, orange, blue or labeled panels |
| Urban readiness bag | Commuters and families | Discretion, mobility and organized essentials | Neutral, low-profile styling |
| Technical field bag | Engineers, technicians and photographers | Equipment protection and configurable storage | Professional neutral colors |
The strongest civilian tactical products borrow useful concepts from military gear without copying every military feature. A lighter harness, cleaner exterior, removable webbing panel, hidden hydration routing, or reflective emergency detail may make more sense for everyday outdoor use.
This is where product customization becomes valuable. The same basic pack platform can be adjusted through fabric weight, color, webbing layout, pocket arrangement, logo treatment, lining, hardware, and internal modules. A bag intended for a forestry team should not be built exactly like one intended for an urban emergency kit.
Who Needs a Tactical Bag?
A tactical bag makes sense for users who carry multiple equipment categories, need dependable access, operate in rough conditions, or want a pack that can be adapted to different tasks.
A casual walker carrying a phone, water bottle, and light jacket may not benefit from a tactical pack. The additional fabric, webbing, hardware, and reinforcement could simply add unnecessary weight. A technical outdoor user carrying navigation tools, first aid, water treatment, shelter, lighting, repair items, and food has a stronger reason to choose a structured tactical system.
The decision can be based on five questions.
Do you carry tools or equipment that need secure attachment?
Do you need to reach important items without unpacking the main compartment?
Will the bag regularly contact rock, soil, wood, metal, or rough vehicle surfaces?
Does the load change enough to benefit from removable pouches or compression?
Would a failure in the shoulder straps, zippers, or handle create a meaningful safety problem?
When several answers are yes, a tactical bag may offer real value. When most answers are no, a simpler hiking or travel pack may be lighter and more comfortable.
The user’s physical condition also matters. Tactical bags are often associated with heavy loads, but a survival system should never be planned around an unrealistic carrying capacity. Fitness, age, body size, injuries, temperature, elevation, terrain, and distance all affect how much weight a person can manage.
A common planning error is to calculate what fits in the bag rather than what the user can carry. Thirty liters of dense tools, water, and canned food can weigh more than a loosely filled 50-liter pack containing clothing and sleeping insulation. Volume and weight must therefore be evaluated together.
For organizations developing tactical bags, the target user should be defined in physical and behavioral terms rather than with a broad label such as outdoor enthusiast. Useful design questions include whether the user wears gloves, carries body armor, travels by motorcycle, needs one-handed access, uses a hydration reservoir, works in rain, or attaches the bag inside a vehicle.
A bag designed for everyone usually ends up optimized for no one. The clearer the user scenario, the more accurately materials, capacity, pocket geometry, and load-bearing components can be selected.
Which Tactical Bag Type Fits Your Needs?
The right tactical bag type depends primarily on trip duration, required equipment, travel method, access needs, and realistic carrying weight. Compact day packs work best for short excursions and lightweight emergency supplies. Medium packs suit overnight trips and flexible field use. Larger 72-hour packs support shelter, food, water treatment, insulation, and backup equipment, but they require a better harness and stricter control of packed weight. Sling bags and modular pouches are useful for quick access, although they should supplement rather than replace a balanced two-shoulder pack when loads become heavy.
Capacity is an important starting point, but liters alone do not describe usability. Two 35-liter bags may feel completely different. One may have a tall, narrow main compartment designed for balanced carrying. The other may use bulky external pockets that pull weight away from the back. Internal padding, curved panels, thick dividers, and hidden compartments can also reduce usable space.
The most reliable way to choose a type is to begin with an equipment list, group the items by access priority, estimate their combined weight, and then select the smallest bag that carries them without excessive compression.
Which Bag Works for Day Trips?
For most day trips, a 20–30-liter tactical backpack provides enough space for water, food, a basic first-aid kit, an extra layer, rain protection, navigation tools, lighting, a compact emergency shelter, and personal items.
A smaller pack encourages discipline. Users are less likely to add duplicate equipment or bulky items that do not match the trip. It is also easier to move through forests, rocky paths, vehicles, and crowded areas with a compact silhouette.
A day pack should not simply be a scaled-down large tactical bag. Proportions matter. Thick hip belts can feel unnecessary on a light 20-liter load, while narrow shoulder straps may become uncomfortable if the bag is used to carry dense equipment. The back panel should support airflow without creating hard pressure points.
Practical day-pack features include a wide main opening, one fast-access pocket, internal organization for small equipment, side compression, a hydration sleeve, and secure bottle storage. External webbing should be limited to locations where users are likely to attach something useful.
A representative day-trip load might look like this.
| Gear Category | Example Contents | Approximate Weight Range |
|---|---|---|
| Water | 1.5–2 liters | 1.5–2.0 kg |
| Clothing | Rain shell and insulating layer | 0.6–1.2 kg |
| Food | Snacks and one meal | 0.4–0.8 kg |
| Safety | First aid, light and whistle | 0.3–0.7 kg |
| Navigation | Map, compass, phone or GPS | 0.2–0.5 kg |
| Emergency gear | Fire kit, blanket, cord and repair items | 0.4–0.9 kg |
| Pack itself | Structured tactical day pack | 0.9–1.6 kg |
The total can easily reach 4.3–7.7 kilograms before optional tools, cameras, or specialized equipment are added. This is why the empty weight of a day pack matters. A bag weighing nearly 2 kilograms may be reasonable for demanding professional use but excessive for casual hiking.
Water access is especially important. Side bottle pockets are convenient, but bottles can fall out when the user bends unless the pockets have adequate depth, elastic retention, or an upper securing strap. Hydration reservoirs distribute water close to the back, although they can be harder to refill and inspect.
A day pack should also be easy to unload. Emergency equipment is often transferred between vehicles, closets, and larger packs. Removable organizers or clearly labeled pouches reduce the chance that an important item will be left behind.
Which Pack Suits Overnight Camping?
An overnight tactical pack commonly falls in the 30–45-liter range, depending on climate, shelter system, food, and the size of sleeping equipment. Warm-weather camping with compact gear may fit comfortably in 30–35 liters. Colder conditions or bulky equipment may require 40–45 liters.
Overnight packs introduce a more difficult load-distribution problem. Sleeping equipment takes significant volume but may weigh relatively little. Water, food, cookware, tools, and batteries are dense. The goal is to place heavier items close to the back and around the middle of the pack while using lighter items to fill outer or lower areas.
A sleeping bag strapped far below the pack can swing and catch on vegetation. A tent attached high above the shoulders can make the load feel unstable. External attachment is useful, but it should not become an excuse for choosing an undersized main compartment.
A medium tactical pack benefits from a supportive frame sheet or internal stay, a functional hip belt, load lifters, and side compression. The hip belt should transfer part of the weight to the pelvis rather than simply wrap around the waist for appearance. Small pockets on the belt can hold snacks, gloves, a compact light, or navigation tools, but overly large pockets may interfere with arm movement.
Ventilation deserves attention, although it always involves compromise. A suspended mesh back can create airflow but may move the load farther away from the body. A close-fitting padded panel offers better load control but can retain heat. For overnight survival-oriented use, stability often matters more than maximum ventilation.
The user should also consider how the bag behaves inside a tent. Packs with long external straps, rigid attachments, or muddy webbing can be awkward in a confined shelter. A removable outer tool panel or bottom compartment may keep dirty equipment separated from clean clothing and sleeping gear.
Weather protection should be planned in layers. A coated outer fabric slows water entry. Covered or water-resistant zippers protect openings. A rain cover reduces direct exposure. Internal dry bags or waterproof liners protect critical equipment even if the outer pack becomes saturated. Depending on only one layer creates a single point of failure.
What Is a 72-Hour Bag?
A 72-hour bag is an emergency pack prepared to support one person for approximately three days during evacuation, service disruption, severe weather, disaster response, or another temporary crisis. It usually includes water or water-treatment equipment, food, clothing, shelter, lighting, communication tools, first aid, hygiene supplies, documents, and location-specific necessities.
The term does not mean that every person needs exactly the same three-day kit. Climate, health, family responsibilities, local hazards, transportation, and access to public support all change the contents.
A 45–60-liter backpack is commonly considered for 72-hour use, but capacity should never be treated as a target that must be completely filled. A half-empty 50-liter bag with compression may be safer than an overloaded 35-liter bag with equipment hanging from every side.
Water creates the greatest weight challenge. One liter of water weighs approximately one kilogram before the bottle is included. Carrying nine liters for three days would already add about nine kilograms. Most mobile emergency kits therefore combine a limited carried supply with filtration, purification, or plans for replenishment. The correct approach depends on the reliability of local water sources and the emergency scenario.
A 72-hour pack should be organized around layers of urgency.
| Access Level | Typical Contents | Recommended Location |
|---|---|---|
| Immediate | Identification, phone, light, gloves, mask and basic first aid | Top or external quick-access pocket |
| Frequent | Water, food, map, rain shell and hygiene items | Side pockets or upper main compartment |
| Situational | Repair tools, fire kit, communication equipment | Labeled internal pouches |
| Camp setup | Shelter, sleep system and spare clothing | Main compartment |
| Protected | Documents, medication and electronics | Waterproof inner pouch close to the back |
Emergency bags also require maintenance. Food expires. Batteries discharge. Clothing may no longer fit. Contact information changes. Medications require review. A well-designed pack can improve inspection by using removable modules, clear internal pockets, date labels, and inventory cards.
For family use, several moderate packs may be safer than one extremely heavy pack carried by a single adult. Shared equipment can be distributed while each person carries personal essentials suited to age and physical ability.
Are Tactical Sling Bags Practical?
Tactical sling bags are practical for light loads, rapid access, short movements, vehicle-based use, and situations where the wearer needs to rotate the bag from back to chest without removing it.
They are commonly used for first aid, communication equipment, compact camera systems, navigation tools, repair kits, or personal emergency supplies. Their smaller size helps control clutter, and the single strap can make frequent access convenient.
The disadvantage is asymmetrical load. Weight is concentrated on one shoulder and may pull across the neck and upper back. As load or walking distance increases, fatigue develops faster than with a properly fitted two-shoulder backpack.
A sling bag is therefore best treated as a specialized access platform rather than a general survival pack. For many users, 5–12 liters is a practical range. Larger sling bags may hold more, but the carrying system does not become more balanced simply because the compartment is bigger.
A stabilizer strap can reduce movement during cycling, climbing, or rapid walking. The main shoulder strap should be wide enough to distribute pressure without cutting into the neck. Reversible strap attachment can serve right- and left-handed users, although the pocket and zipper layout must also support both orientations.
Sling bags work particularly well as vehicle kits. They can hold a light, gloves, compact medical pouch, power bank, water, basic tools, and documents. In a larger system, the sling may serve as a detachable module that is removed from a main backpack for short tasks.
The critical question is whether the user values access more than long-distance comfort. When the answer is yes and the load remains controlled, a sling bag can be extremely practical. When the load includes shelter, several liters of water, heavy tools, or overnight equipment, a backpack is usually the better choice.
When Do Modular Pouches Help?
Modular pouches help when equipment needs to be grouped by task, moved between bags, identified quickly, or accessed without opening the main compartment. They are particularly useful for medical items, fire kits, water treatment, electronics, repair tools, hygiene supplies, and small navigation equipment.
Their main advantage is consistency. A user can remove one complete module instead of searching for individual items. A first-aid pouch can move from a backpack to a vehicle. A cooking pouch can be taken to a campsite while the main pack stays inside a shelter. A battery pouch can be stored separately to reduce accidental contact with moisture.
External pouches should be used carefully. Heavy accessories attached far from the back increase leverage and make the load feel heavier. Side-mounted pouches can widen the pack and affect movement through narrow spaces. Low-hanging pouches may strike the legs or interfere with the hip belt.
Internal modularity often creates a cleaner and better-balanced system. Hook-and-loop panels, removable zip pouches, color-coded organizers, and lightweight mesh bags can provide modular function without changing the exterior profile.
The choice between fixed and removable organization also affects manufacturing cost and complexity.
| Organization Method | Advantages | Limitations | Best Application |
|---|---|---|---|
| Fixed internal pockets | Lightweight and always available | Cannot be rearranged | General consumer packs |
| MOLLE exterior pouches | Highly configurable and easy to access | Adds weight and bulk | Field tools and mission-specific gear |
| Hook-and-loop modules | Fast repositioning and clean layout | Requires compatible backing | Medical and technical equipment |
| Removable zip organizers | Easy to transfer and label | May shift unless secured | Emergency and travel kits |
| Elastic tool panels | Clear visibility and compact storage | Limited to specific item sizes | Repair tools and electronics |
Good modular design begins with the contents. Pouch dimensions should be based on real equipment rather than arbitrary rectangular shapes. Opening direction matters. A medical pouch mounted horizontally may spill contents if its internal retention is poorly designed. A bottle pouch needs drainage. A radio pouch may need cable routing. A tool pouch may require abrasion-resistant lining.
Attachment security also deserves testing. A pouch should not detach when the user runs, climbs, drags the pack, or pulls it from a vehicle. At the same time, removal should not require excessive force or complicated threading.
Manufacturers and product developers should test a modular layout with representative equipment before finalizing the sewing pattern. Paper measurements alone do not show how gloves, cables, hard cases, irregular tools, or filled bottles interact with an opening.
The best tactical bag is not the one with the greatest number of possible attachments. It is the one that carries the required modules securely while preserving balance, movement, and access. Modularity should simplify the user’s decisions in the field, not turn the outside of the pack into a crowded equipment display.
Which Materials Work Best?

The best tactical bag material is not simply the thickest or highest-denier fabric. Material selection should match the expected abrasion, carrying weight, weather exposure, flexibility, cleaning method, and product lifespan. High-tenacity nylon is often preferred for demanding field bags because it combines strong abrasion and tear resistance with manageable weight. Polyester is a practical alternative when color stability, cost control, and resistance to prolonged sunlight are priorities. Oxford fabrics can be made from either fiber and are valued for their durable basket-like weave, while coatings and laminations determine how well the finished material resists rain, dirt, and moisture penetration.
A complete tactical bag rarely uses one material everywhere. The main body may prioritize weight and flexibility, the bottom may require heavier abrasion resistance, internal dividers may use lightweight polyester, and shoulder straps may combine shell fabric, spacer mesh, foam, binding tape, and reinforcing webbing. The most reliable construction comes from assigning each material a specific job.
Is Nylon Better Than Polyester?
Nylon is often considered the premium choice for rugged tactical applications because it generally offers strong abrasion resistance, good tear performance, and useful flexibility. It can endure repeated bending, scraping, and movement without becoming excessively rigid. This is valuable for bags that contact rock, vehicle floors, rough timber, concrete, or field equipment.
Polyester, however, is not an inferior material by default. It usually provides better resistance to ultraviolet-related color fading, absorbs less moisture than standard nylon fibers, and can offer stable dimensions in humid conditions. It is widely used in outdoor bags, tool bags, medical bags, uniforms, luggage, and protective covers.
The real decision is not nylon versus polyester in isolation. Fiber quality, yarn structure, weave density, coating, finishing, and sewing construction can matter as much as the base polymer. A tightly woven, well-coated polyester fabric may outperform a loosely woven low-grade nylon in actual bag use.
Nylon has a slightly softer and more flexible hand in many constructions. This can make a pack easier to compress and more comfortable where the shell bends around the body. Polyester may feel more structured, especially in heavier Oxford constructions, which can help a bag maintain its shape.
Water behavior is also misunderstood. Nylon can absorb a small amount of moisture into the fiber, while polyester absorbs very little. This does not mean an uncoated polyester pack is waterproof. Water can still pass through the weave, needle holes, zipper openings, and seams. Weather resistance depends on the complete material and construction system.
| Selection Factor | Nylon Fabric | Polyester Fabric | Practical Meaning |
|---|---|---|---|
| Abrasion resistance | Commonly strong in comparable constructions | Good to very strong depending on yarn and weave | Nylon is often favored for rough field contact |
| Tear behavior | Usually strong with high-tenacity yarns | Stable but varies widely by construction | Reinforcement and weave matter greatly |
| UV color stability | Can lose strength or color with extended exposure | Generally better sunlight resistance | Polyester suits prolonged outdoor display |
| Moisture absorption | Absorbs more than polyester | Very low fiber absorption | Polyester may dry slightly faster |
| Flexibility | Often softer and more pliable | Often more structured | Choice affects pack shape and handling |
| Cost | Frequently higher for premium specifications | Often more economical | Polyester can offer strong value at scale |
| Printing | Suitable with compatible processes | Excellent for sublimation in selected constructions | Polyester supports detailed custom graphics |
| Typical use | Military packs, climbing gear, premium tactical products | Outdoor packs, uniforms, tool bags and promotional gear | Both can be appropriate when correctly specified |
For a premium outdoor survival backpack expected to experience repeated dragging, heavy tools, and long service, high-tenacity nylon may be justified. For a tactical day pack used in sunlight, vehicles, travel, and general outdoor conditions, a well-engineered polyester Oxford can provide excellent performance without unnecessary cost.
A manufacturer should never choose material solely from a generic name such as 600D nylon or 600D polyester. The fabric should be reviewed through physical samples and tested for coating adhesion, tear behavior, colorfastness, abrasion, seam slippage, and hand feel.
The same material can also be modified through yarn type. Textured yarns create a softer surface and greater coverage. Filament yarns may produce a smoother, denser structure. High-tenacity yarns improve load-bearing performance but increase material cost. Solution-dyed fibers can improve color stability and reduce dyeing-related variation for selected applications.
For product developers, the better question is not “Which fiber sounds stronger?” It is “Which complete fabric specification gives the necessary performance at the correct weight, cost, and appearance?”
What Is Oxford Fabric?
Oxford fabric is a woven textile known for a visible basket-like structure created by interlacing groups of yarns. In tactical bag manufacturing, the term commonly refers to durable polyester or nylon fabrics used for shells, panels, pockets, linings, and reinforcement areas.
Oxford is a weave or commercial fabric category, not a single fiber. A product described as Oxford fabric may be polyester, nylon, cotton-blended, coated, laminated, lightweight, or extremely heavy. Its performance cannot be judged from the word Oxford alone.
The structure is popular because it provides a practical balance of durability, shape retention, flexibility, and surface texture. It can be coated with polyurethane, polyvinyl chloride, thermoplastic polyurethane, acrylic, or other systems depending on the required waterproofing, stiffness, chemical resistance, and cost.
Polyester Oxford is widely used in backpacks because it holds color well and can be produced in a broad range of deniers, finishes, and price levels. Nylon Oxford is often selected for products requiring stronger abrasion performance or a more premium technical character.
Oxford fabrics also accept many post-processing methods. These may include water-repellent finishing, flame-retardant treatment, anti-mildew treatment, antibacterial finishing, ultraviolet resistance, infrared-related treatments for specialized applications, printing, embossing, bonding, and lamination.
Not every treatment should be added automatically. Each finish changes cost, hand feel, environmental considerations, manufacturing complexity, and sometimes fabric strength. A water-repellent finish may help water bead on the surface, but it does not replace a waterproof coating. A heavy PVC layer may provide strong moisture resistance but increase weight and stiffness. A soft PU coating may preserve flexibility but require more careful control of hydrolysis and coating adhesion.
| Oxford Specification | Typical Character | Suitable Applications | Main Caution |
|---|---|---|---|
| Lightweight polyester Oxford | Flexible and economical | Linings, organizers, light day packs | Limited abrasion resistance |
| 420D nylon Oxford | Balanced weight and strength | Technical day packs, pouches and upper panels | Requires suitable coating for weather use |
| 600D polyester Oxford | Structured and widely available | Tactical packs, tool bags and general outdoor gear | Quality varies greatly between mills |
| 900D polyester Oxford | Heavier and more abrasion resistant | Reinforced shells and equipment bags | Added weight and reduced flexibility |
| 1000D nylon Oxford | Rugged and durable | Heavy field packs and high-wear panels | Can be excessive for lightweight products |
| Laminated Oxford | Enhanced water barrier | Wet-weather bags and protective cases | Seam construction remains critical |
Oxford fabric performs well when the weave density is sufficient to resist yarn movement around stitches. If the weave is too loose, stress around shoulder strap anchors or webbing may cause seam slippage even when the yarn itself is strong.
The surface must also suit the intended branding process. Embroidery can create attractive, durable logos but adds needle holes and backing materials. Screen printing works well on many coated surfaces when the ink system is compatible. Heat transfer can reproduce fine details but requires controlled temperature and pressure to avoid damaging the coating.
A tactical bag may combine several Oxford constructions. A 600D body can reduce overall weight, while a heavier bottom panel protects against ground abrasion. Lightweight lining makes internal compartments easier to see and reduces unnecessary bulk. This mixed-material strategy usually produces a better product than using the heaviest fabric throughout.
Which Denier Is Strong Enough?
Denier measures the linear density of yarn. One denier represents one gram per 9,000 meters of yarn. A higher-denier number generally indicates a thicker or heavier yarn, but it does not directly measure finished fabric strength.
This distinction is essential. A 1000D fabric is not automatically twice as strong as a 500D fabric. The actual performance depends on fiber type, yarn tenacity, weave, yarn count per unit area, coating, finishing, and fabric weight. A dense 500D high-tenacity nylon can provide excellent resistance while weighing less than a poorly constructed 900D polyester.
For most tactical bag applications, the following ranges provide a useful starting point rather than a universal rule.
| Denier Range | General Use | Advantages | Limitations |
|---|---|---|---|
| 200D–300D | Linings, internal pockets and ultralight panels | Low weight and easy folding | Not ideal for exposed high-wear zones |
| 400D–500D | Premium lightweight tactical packs | Strong weight-to-performance balance | May need reinforcement under concentrated loads |
| 600D | General tactical and outdoor bags | Practical cost, structure and durability | Performance differs widely by yarn and coating |
| 800D–900D | Equipment bags and reinforced panels | Improved stiffness and abrasion resistance | Heavier and less compressible |
| 1000D–1200D | Severe-duty field and tool applications | High durability and robust appearance | May be unnecessarily heavy for mobile packs |
| 1600D and above | Specialized protective or industrial bags | Very heavy-duty shell construction | Bulk, stiffness and sewing difficulty increase |
A survival day pack may perform well with 420D or 500D nylon, especially when the base and strap anchors are reinforced. A general-purpose tactical backpack often uses 600D polyester because it balances cost, availability, printability, and structural appearance. A heavy equipment bag may justify 900D or 1000D material in areas that contact hard surfaces.
The total bag weight matters. Heavy shell fabric is only one component. Webbing, buckles, zippers, lining, foam, frame sheets, reinforcement panels, hook-and-loop, and thread all add mass. A designer who increases every component “for durability” may create a bag that users avoid carrying.
Strength should be concentrated where it is needed. Bottom panels, tool sleeves, corner guards, shoulder anchors, drag handles, and external attachment platforms experience greater stress than flat upper body panels. Strategic reinforcement saves weight while protecting the highest-risk zones.
Denier also affects needle and thread selection. Heavier fabrics may require stronger needles, larger thread, adjusted stitch length, and more powerful sewing equipment. Too small a needle can deflect or break. Too large a needle creates oversized holes and may damage coatings. Excessively short stitches can perforate the fabric like a tear line, particularly around tight curves.
A reliable bag specification should therefore state more than the denier. It may include fiber, yarn type, weave, fabric weight, coating type and thickness, color standard, required testing, and approved reference sample.
Are Coated Fabrics Waterproof?
Coated fabrics can provide strong water resistance, but a coated tactical bag is not automatically waterproof. Water may still enter through seams, needle holes, zipper tracks, binding edges, hose ports, drainage openings, and poorly designed panel intersections.
The word waterproof should be used carefully. A fully waterproof dry bag normally relies on impermeable material and welded or sealed construction. A sewn tactical backpack is more commonly weather resistant because conventional stitching creates thousands of small perforations.
PU coating is widely used because it can provide a flexible moisture barrier with a relatively soft hand. Different formulations and coating weights produce very different results. A light PU coating may resist short rain exposure, while a heavier system offers a stronger barrier but may reduce breathability and increase stiffness.
PVC coating creates a robust, economical barrier and gives fabric a more structured feel. It is common in tool bags, covers, equipment cases, and products requiring easy cleaning. However, it adds weight and may become stiff in cold conditions depending on formulation.
TPU lamination can support high-performance waterproof products and may provide better flexibility or environmental positioning than traditional PVC in selected applications. It generally costs more and requires controlled bonding and manufacturing processes.
A surface durable water-repellent treatment serves a different purpose. It helps droplets bead and roll off rather than immediately wetting the fabric face. It does not make the fabric itself impermeable. Over time, dirt, abrasion, washing, and oil can reduce this effect.
| Water-Control Method | What It Does | What It Does Not Do | Best Use |
|---|---|---|---|
| Surface water-repellent finish | Reduces surface wetting | Does not seal the weave or seams | Light rain and easier drying |
| PU coating | Creates a flexible internal barrier | Does not seal needle holes | Backpacks and general outdoor bags |
| PVC coating | Adds a durable moisture barrier and structure | Can increase weight and stiffness | Tool bags and heavy equipment products |
| TPU lamination | Supports high water resistance and flexibility | Requires controlled fabrication | Premium wet-weather applications |
| Seam tape | Covers selected internal seam lines | May not adhere to every fabric or complex curve | Rain-resistant technical packs |
| Welded seams | Joins compatible materials without conventional sewing holes | Limits design and material choices | Dry bags and waterproof compartments |
| Rain cover | Shields the outer pack from direct rain | Leaves the back panel and underside vulnerable | Extended rain protection |
| Internal liner | Protects critical contents even if shell gets wet | Does not keep the pack itself dry | Survival and expedition systems |
For outdoor survival equipment, layered protection is the safest approach. The pack shell slows water entry. Critical items are placed inside sealed pouches or dry bags. A rain cover may protect the overall load during prolonged exposure. Drainage openings prevent water from collecting in bottle or tool pockets.
Zippers are a common weak point. Water-resistant reversed-coil zippers with coated tape reduce entry but are not equivalent to submersible closures. Zipper garages at the top ends can protect small gaps. Storm flaps provide additional coverage, although they may slow access.
Internal seam tape can improve weather performance, but the fabric coating, seam geometry, and tape adhesive must be compatible. Complex junctions, bound seams, thick reinforcement stacks, and curved panels are difficult to tape consistently.
The desired protection level should therefore be defined through realistic use. Does the pack need to survive ten minutes of rain, hours of heavy weather, wet vehicle storage, or temporary immersion? Each condition requires a different construction strategy.
Where Are Reinforcements Needed?
Reinforcements belong at locations where loads concentrate, surfaces repeatedly abrade, or components pull against the shell. The most important zones usually include shoulder strap anchors, top handles, hip-belt connections, compression strap bases, MOLLE platforms, zipper ends, bottom corners, tool attachment points, and the lower back panel.
Adding another layer of fabric everywhere is inefficient. Reinforcement should spread stress from a narrow component into a wider area. For example, a shoulder strap should not terminate against one short seam. Its load should transfer through backing fabric, webbing extensions, or a reinforced yoke.
Box-and-cross stitching is commonly used where webbing or straps connect to panels. Bar tacks can secure webbing ends and reinforce high-tension points. Multiple rows of stitching distribute force, but more stitches do not always create greater strength. Stitching too close together can perforate the fabric.
The direction of force matters. A handle pulled vertically needs a different reinforcement layout from a compression strap pulling horizontally. Designers should examine how the user lifts, drags, carries, tightens, and opens the bag.
Bottom reinforcement protects against abrasion and puncture. It may use heavier fabric, a double layer, coated material, a removable insert, or an external protective panel. The bottom should also curve or join the body without creating exposed seams directly on the ground.
Zipper ends require reinforcement because users often pull forcefully at the beginning and end of the track. Small fabric tabs, zipper garages, or backed end points prevent the slider force from distorting the surrounding panel.
MOLLE webbing must be supported by a stable base. When a loaded pouch pulls on one row, the force should spread across the panel. Lightweight shell fabric may require an internal backing layer or integrated structural panel.
A prototype should be filled with realistic weight and tested through repeated lifting, strap tightening, opening, dragging, and carrying. Early signs of failure include whitening around needle holes, yarn separation, puckering, coating cracks, distorted webbing rows, and loose bar tacks.
Reinforcement is successful when users barely notice it. The bag feels stable, attachment points remain flat, and high-load components do not distort the shell.
What Features Matter Most?
The most important tactical bag features are a stable carrying system, useful compartment access, secure closures, controlled modularity, hydration compatibility, reliable compression, and reinforced load points. Features should be selected according to actual outdoor tasks. MOLLE webbing is valuable when equipment must be reconfigured. Multiple compartments help when they correspond to real gear categories. Hydration routing improves access to water, and dependable zippers and buckles prevent small component failures from disabling the entire bag.
A feature has value only when it works with the rest of the pack. A strong buckle attached to weak webbing does not create a strong compression system. A large hydration sleeve is not useful if the reservoir collapses, leaks into the main compartment, or has no practical hose route. An extensive MOLLE platform can reduce comfort if loaded pouches pull the bag away from the user’s center of gravity.
The best feature set is usually simpler than the longest feature list. Each component should answer a specific question: What will it hold? How often will it be used? Can the user operate it with gloves? Does it add meaningful weight? What happens if it fails?
How Does MOLLE Webbing Work?
MOLLE stands for Modular Lightweight Load-carrying Equipment. The visible part of the system is commonly based on PALS-style horizontal webbing rows stitched at regular intervals. Compatible pouch straps weave through alternating rows on the bag and the pouch, creating a stable connection.
Proper weaving is essential. Simply sliding a pouch strap behind one row may allow the pouch to swing. Interlacing the attachment through both platforms distributes force and holds the pouch closer to the bag.
Traditional MOLLE uses sewn nylon webbing. Laser-cut platforms use slots cut into laminated fabric. Traditional webbing is familiar, repairable, and durable. Laser-cut systems create a cleaner appearance and may reduce weight, but their performance depends on laminate quality, slot shape, edge stability, and base fabric strength.
| MOLLE System | Advantages | Limitations | Best Application |
|---|---|---|---|
| Sewn webbing | Durable, familiar and repairable | Adds material and visual bulk | Heavy field packs and equipment bags |
| Laser-cut laminate | Clean profile and lower potential weight | Requires high-quality laminate | Modern tactical and urban packs |
| Removable panel | Can change the exterior configuration | Adds attachment hardware | Multi-purpose outdoor products |
| Internal MOLLE panel | Keeps modules protected and discreet | Reduces open internal space | Medical and technical organization |
| Partial MOLLE zones | Limits weight and clutter | Fewer attachment positions | General outdoor survival packs |
Webbing spacing should be consistent enough for standard pouches. Uneven rows create difficult attachment and concentrate stress. Stitching at each interval must penetrate a stable panel, and thread tension should avoid puckering.
The location of MOLLE rows should reflect balance. Side panels are useful for narrow bottle or utility pouches. The front panel can hold lightweight equipment or a medical pouch. Heavy tools attached far from the back create leverage and increase fatigue.
Pouches should not block the main zipper, compression straps, bottle access, or arm movement. A fully loaded front pouch may also prevent a clamshell opening from lying flat.
Laser-cut MOLLE deserves special attention. A slot that is too narrow makes attachment difficult. A slot that is too wide allows movement. Cut edges must resist delamination and tearing. Repeated pouch removal can fatigue the slot, especially when heavy equipment is carried.
Modularity also affects user behavior. Empty attachment space invites people to add equipment. A responsible product design can limit unnecessary expansion by placing webbing only where attachments remain balanced.
Are Multiple Compartments Useful?
Multiple compartments are useful when they separate equipment by access, cleanliness, weight, safety, or function. They are less useful when they divide the bag into spaces too small or oddly shaped for real gear.
A tactical pack usually benefits from one primary compartment, one secondary organizational area, and one or two quick-access zones. Additional pockets should support a clearly defined purpose.
The main compartment holds bulky items such as clothing, shelter components, food, and larger pouches. A secondary compartment can manage maps, cables, notebooks, repair items, or flat equipment. A top or front pocket gives fast access to gloves, lighting, snacks, and personal items.
The compartment opening matters as much as its volume. A deep pocket with a short zipper may hide items below the opening. A clamshell compartment displays everything but can spill contents if opened vertically. A top-loading compartment compresses well but makes bottom items harder to reach.
Internal visibility is another design consideration. Black lining creates a uniform tactical appearance but makes small dark objects difficult to locate. Gray, tan, orange, or another contrasting lining improves visibility. High-visibility removable medical panels can speed identification during stress.
| Compartment Type | Main Benefit | Main Risk | Suitable Contents |
|---|---|---|---|
| Full clamshell main compartment | Excellent visibility and packing access | Contents may fall when opened upright | Clothing, modular pouches and shelter gear |
| Top-loading compartment | Good compression and simple construction | Bottom items are difficult to reach | Bulky expedition loads |
| Front admin pocket | Organizes small flat items | Can become overcrowded and front-heavy | Maps, pens, cables and documents |
| Side pocket | Fast bottle or tool access | May widen the pack | Water, poles and narrow tools |
| Bottom compartment | Separates dirty or wet equipment | Adds seams and zipper weight | Footwear, rain gear and sleeping equipment |
| Hidden back pocket | Protects valuables and documents | Limited capacity and slower access | Identification, cash and flat electronics |
| Removable organizer | Transfers equipment between bags | Can shift without secure attachment | First aid, repairs and electronics |
Pocket geometry should be developed around actual objects. An elastic loop designed for a pen may not hold a thick marker. A radio pocket may not fit an antenna. A mesh pouch may snag sharp tools. A padded compartment may consume too much volume for users who do not carry electronics.
Drainage is important in exterior pockets. Bottle sleeves and wet-equipment zones should allow water to escape. A sealed pocket with an open top can become a small reservoir during rain.
Compartments also affect manufacturing complexity. Every zipper, divider, binding operation, pocket, and seam adds labor and potential failure points. Simplifying internal architecture can improve reliability and leave more usable space.
A good test is to pack the same equipment three times. If items naturally return to the same logical locations, the compartment system is working. If users constantly move equipment because pockets are inconvenient, the design needs revision.
Is Hydration Compatibility Necessary?
Hydration compatibility is valuable for hiking, patrol, cycling, climbing, fieldwork, and any activity where users need to drink without stopping or removing the pack. It is less important for compact urban kits or situations where rigid bottles are easier to refill and monitor.
A hydration-compatible pack normally includes a reservoir sleeve, hanging point, hose outlet, and shoulder-strap routing. The reservoir should remain close to the user’s back to reduce movement and preserve balance.
The sleeve should be sized for the intended reservoir, commonly around 1.5 to 3 liters. It should prevent the filled bladder from collapsing into the main compartment. A hanging loop supports the reservoir vertically and reduces folding.
Water weighs one kilogram per liter. A three-liter bladder adds roughly three kilograms close to the upper back. The pack structure must control this weight. If the sleeve is loose, the reservoir may swing or slump as water is consumed.
Hose routing should work on either shoulder when possible. Elastic retainers or clips keep the tube from flapping. The outlet must be large enough for the hose fitting without creating a large rain-entry point.
Hydration systems also introduce leakage risk. The sleeve should use material that is easy to wipe clean and ideally provides some separation from clothing, electronics, and documents. A drainage eyelet can prevent leaked water from collecting, although its location should not allow water to enter from outside.
Rigid bottles still have advantages. They are easier to inspect, refill from some sources, share with another person, and use for measuring water. A transparent bottle makes remaining volume visible. Reservoir users may drink more consistently, but they may not notice how quickly the supply is decreasing.
For survival use, a hybrid arrangement is often strongest. A reservoir supports drinking while moving, while a bottle provides backup storage and easier water-treatment handling.
Hydration compatibility should never be added as a checkbox feature without testing. Fill the reservoir, pack the bag, route the hose, walk, bend, and remove the bladder. Check whether the opening is wide enough, whether the tube kinks, and whether the sleeve interferes with a frame sheet or laptop compartment.
Which Zippers and Buckles Last?
Zippers and buckles last when their size, material, geometry, and installation match the load and environment. Brand reputation can be useful, but even a high-quality component fails when it is undersized, badly sewn, or exposed to forces it was not designed to handle.
Coil zippers are common in backpacks because they flex around curves and can self-correct minor tooth misalignment. Molded-tooth zippers provide a robust appearance and resist some forms of contamination, but they are stiffer around tight curves. Water-resistant zippers usually use coated tape and a reversed coil to reduce water entry.
Main compartments need larger, stronger zippers than small internal pockets. Two-way sliders improve access and allow the opening position to be adjusted. Locking sliders can reduce accidental opening, while cord pulls make the zipper easier to operate with gloves.
Zipper path design affects durability. Sharp curves increase slider resistance. Thick seam stacks can distort the track. Long unsupported zipper sections may separate under a bulging load. Compression straps can reduce stress by controlling the pack before the zipper is closed.
Buckles are commonly made from engineering plastics such as acetal or nylon formulations. Material choice influences strength, flexibility, temperature behavior, and chemical resistance. A side-release buckle should operate smoothly but resist accidental release.
| Component | Good Design Practice | Common Failure Cause | Inspection Point |
|---|---|---|---|
| Main zipper | Adequate gauge with smooth curved path | Overpacking and sharp corner tension | Slider movement and track alignment |
| Zipper pull | Cord or molded pull sized for gloves | Small weak attachment | Repeated pulling and knot security |
| Side-release buckle | Proper size for webbing load | Brittle plastic or poor molding | Release force and cold-condition behavior |
| Adjustment buckle | Holds webbing without slipping | Incorrect webbing thickness | Loaded strap slippage |
| Compression buckle | Positioned away from abrasion | Side impact against hard surfaces | Cracks and deformation |
| Hook-and-loop closure | Sufficient area and compatible materials | Dirt contamination and edge peeling | Holding force after repeated cycles |
| Snap fastener | Reinforced installation zone | Pull-through from weak fabric | Base reinforcement and alignment |
Hardware should also be replaceable where practical. Split-bar buckles allow field replacement without opening sewn seams. This is useful for repair-oriented outdoor products, although the component must remain secure during normal use.
Cold, heat, sand, salt, and mud affect hardware. Fine grit increases zipper wear. Saltwater can corrode metal sliders. Very low temperatures may reduce the impact resistance of unsuitable plastics. Product tests should reflect the intended environment rather than only room-temperature operation.
A strong zipper cannot compensate for poor packing habits. Users should not pull sliders together by force when the bag is overfilled. Compression straps should be loosened before opening and tightened after closing. Clear use instructions can reduce preventable damage.
What Gear Needs Quick Access?
Quick-access gear includes items required frequently, suddenly, or under changing weather and safety conditions. Typical examples are water, navigation tools, a light, basic first aid, gloves, rain protection, communication devices, and emergency identification.
Not every important item belongs outside the pack. Importance, access frequency, security, and weather sensitivity must be considered together. A passport may be critical but should remain protected in a hidden waterproof compartment. A first-aid kit should be accessible but securely attached. A knife may need quick access but must comply with local laws and safe-carry practices.
A useful access system can be divided into four levels.
| Access Priority | Response Time | Examples | Suggested Location |
|---|---|---|---|
| Immediate | Seconds | Light, whistle, gloves and basic bleeding control | Shoulder strap, belt or secured outer pocket |
| Frequent | Under one minute | Water, map, snacks and rain shell | Side, top or front compartment |
| Situational | A few minutes | Repair kit, water filter and fire kit | Labeled internal module |
| Camp or rest | After stopping | Shelter, cooking kit and spare clothing | Main compartment |
The first-aid system deserves special planning. A small trauma-focused module may be placed externally for immediate access, while general medical supplies remain inside. The location should be recognizable to other people, especially when the pack is used by a team.
Rain protection should be reachable before the storm begins. A rain shell buried beneath sleeping equipment is not functionally accessible. The same applies to warm gloves, a headlamp, and navigation tools.
Shoulder-strap pockets are convenient for small equipment but can interfere with arm movement or pack removal. Hip-belt pockets provide easy access but may be difficult to use with thick clothing. Top pockets are flexible but can become overloaded and make the pack top-heavy.
External tools should have secondary retention. Elastic pockets alone may not secure a bottle during crawling, climbing, or vehicle movement. Compression straps, cords, flaps, or locking clips provide backup.
Quick access should also work in darkness. Tactile differences between zipper pulls, contrasting internal colors, organized pouch positions, and simple layouts reduce searching. Reflective pull cords can help, although they may be undesirable in low-visibility tactical settings.
The ultimate test is not whether a pocket looks convenient in a product photograph. The test is whether the intended user can retrieve the required item while wearing the pack, possibly with gloves, reduced visibility, stress, rain, or fatigue.
Szoneier can develop tactical bags around these real access requirements rather than relying on a standard shell with decorative pockets. Material combinations, zipper paths, modular panels, hydration systems, internal organizers, reinforced tool zones, and customized branding can all be adjusted according to the final outdoor application.
How Much Capacity Do You Need?

The right tactical bag capacity is the smallest volume that can carry the necessary equipment safely, comfortably, and in an organized way. For most users, 20–30 liters is suitable for day trips, 30–45 liters works for overnight or short field use, and 45–60 liters can support a carefully planned 72-hour kit. Larger capacity does not automatically improve preparedness. It often encourages users to add duplicate tools, excessive clothing, heavy food, and equipment that does not justify its weight.
Capacity should always be considered together with packed weight, body size, climate, terrain, travel distance, and access to water or resupply. A 35-liter pack filled with dense tools and bottled water can be far harder to carry than a 50-liter pack containing lightweight insulation and shelter materials.
Manufacturers usually describe backpack capacity in liters, but this figure can be misleading when comparing products. Some measurements include exterior pockets, while others refer only to the main compartment. Thick padding, curved back panels, internal dividers, concealed pockets, and compression zones can reduce the space available for actual equipment. Two packs advertised at the same capacity may therefore offer very different usable volume.
The safest method is to assemble the intended gear first, remove unnecessary items, estimate the combined weight, and then test the load inside a prototype or reference bag. The bag should close without forcing the zipper, remain stable when partly filled, and leave enough access space to retrieve important items.
Is 20–30L Enough for a Day?
A 20–30-liter tactical bag is usually enough for a full day outdoors when the user carries water, food, rain protection, an insulating layer, navigation tools, basic first aid, lighting, emergency shelter, fire-starting supplies, and a compact repair kit.
A 20-liter pack suits warm-weather walking, short patrols, vehicle support, urban emergency use, and activities where shelter or technical equipment is not required. A 25-liter pack gives more flexibility for changing weather. A 30-liter pack can hold extra clothing, a larger medical module, camera equipment, or specialized field tools without immediately becoming bulky.
The difference between 20 and 30 liters is more significant than the numbers suggest. A 30-liter pack offers 50 percent more nominal volume than a 20-liter pack. That additional space can be useful, but it also tempts the user to add “just in case” items.
A carefully built day kit might include the following:
| Gear Category | Typical Items | Suggested Volume | Approximate Weight |
|---|---|---|---|
| Hydration | 1.5–2L water and filter | 2–3L | 1.7–2.3 kg |
| Clothing | Rain shell, fleece or insulated layer | 4–7L | 0.6–1.3 kg |
| Food | Snacks and one meal | 1–2L | 0.4–0.8 kg |
| Safety | First aid, emergency blanket and whistle | 1–2L | 0.3–0.7 kg |
| Navigation | Map, compass, phone or GPS | Less than 1L | 0.2–0.5 kg |
| Lighting | Headlamp and spare batteries | Less than 1L | 0.1–0.3 kg |
| Tools | Multi-tool, cord and repair kit | 1–2L | 0.4–1.0 kg |
| Personal items | Wallet, keys, hygiene and documents | 1–2L | 0.2–0.6 kg |
The equipment itself may use only 12–20 liters, but the remaining space is not wasted. It allows clothing to retain loft, prevents food from crushing, and makes important items easier to access. A bag packed so tightly that every object must be removed to reach the first-aid kit is too small for practical use.
For day trips, the empty bag weight should be kept under control. A heavily reinforced 30-liter tactical pack may weigh 1.5–2 kilograms before any equipment is added. That can be acceptable for professional tools or severe field use, but it may be inefficient for recreational hiking.
The carrying system should match the expected weight. A simple webbing waist strap may stabilize a light pack, while a padded hip belt becomes more useful as the load approaches 8–10 kilograms. Shoulder straps need enough foam to spread pressure without becoming thick and hot.
A day pack should also remain compact when carrying less than its maximum capacity. Side compression straps reduce internal movement and keep the load close to the back. Without compression, water bottles, tools, and hard cases can shift with every step.
The ideal 20–30-liter pack feels almost boring when packed correctly. Nothing swings, nothing rattles, and nothing requires a wrestling match to retrieve.
Which Size Fits Overnight Gear?
A 30–45-liter tactical backpack is generally appropriate for one night outdoors, although the correct size depends heavily on temperature, shelter type, sleeping equipment, food, and the amount of water carried.
Warm-weather equipment can be surprisingly compact. A lightweight shelter, summer sleeping bag, inflatable mat, compact stove, food, and clothing may fit into 30–35 liters. Cold-weather insulation occupies much more space, even when it does not weigh heavily. A winter sleeping bag alone may consume 15–20 liters unless it is compressed.
The user should distinguish between compressible and non-compressible gear. Sleeping bags and clothing can change shape. Cookware, water bottles, fuel canisters, tools, and electronic cases cannot. A pack with an awkward internal layout may offer enough measured volume but still fail to hold rigid equipment efficiently.
| Overnight Condition | Likely Capacity | Main Volume Driver | Main Weight Driver |
|---|---|---|---|
| Warm and dry | 30–35L | Sleeping system | Water and food |
| Mild and changeable | 35–40L | Rainwear and insulation | Water, food and cookware |
| Cold conditions | 40–50L | Bulky sleeping bag and clothing | Fuel, food and extra equipment |
| Technical fieldwork | 40–55L | Protective cases and tools | Batteries, hardware and equipment |
| Wet environment | 40–50L | Dry bags and spare layers | Water-resistant equipment and shelter |
An overnight pack needs better structure than a light day pack. The added volume can create leverage if equipment sits too far from the body. A frame sheet, aluminum stay, semi-rigid back panel, or carefully shaped foam system helps maintain vertical structure.
The heaviest items should sit close to the back, generally between the shoulder blades and the lower rib area. In stable terrain, placing dense items slightly higher can support an upright posture. On uneven or technical ground, a slightly lower center of gravity may improve balance.
The sleeping system often fits near the bottom because it is light and usually not required until camp. Rain protection should remain near the top or in an external pocket. Food should be organized to avoid leaks and odor contamination. Cooking fuel must be stored according to the container manufacturer’s instructions and separated from vulnerable materials.
External attachment can increase effective capacity, but it should be selective. A sleeping mat secured firmly to the outside may be reasonable. Loose shoes, cookware, bottles, and clothing hanging from clips can destabilize the bag and advertise poor planning.
For overnight products, bottom straps should be tested with realistic loads. Thin straps may cut into foam mats or compression sacks. Buckles can strike rocks when the pack is placed down. Long strap tails need elastic keepers or rolled retention to prevent snagging.
Access also becomes more important. A full clamshell opening helps organize camp equipment, but a separate lower compartment may provide faster access to a sleeping bag. The added zipper and divider increase weight, so the benefit must justify the complexity.
Is 45–60L Right for 72 Hours?
A 45–60-liter tactical pack is often suitable for a mobile 72-hour emergency kit, but only when the equipment list is disciplined and the user can carry the resulting weight. The objective is not to become completely independent under every possible condition. It is to support safe movement, basic shelter, hydration, food, communication, first aid, and personal needs during a temporary disruption.
Many 72-hour lists fail because they are designed as shopping lists rather than carrying systems. Each recommendation sounds reasonable alone, but together the items may create a 20–30-kilogram load.
Water is the largest challenge. Carrying three liters provides only a limited supply but already adds about three kilograms. Nine liters, sometimes proposed as three days of minimal drinking water, adds approximately nine kilograms before bottles are counted. A mobile kit normally combines carried water with filtration, purification, or a known resupply plan.
Food should prioritize energy density, preparation simplicity, shelf life, and digestive familiarity. Heavy cans may be convenient for storage but inefficient to carry. Foods requiring large amounts of water or fuel may create hidden resource demands.
A realistic 72-hour load can be estimated as follows:
| Load Group | Approximate Weight Range | Notes |
|---|---|---|
| Backpack | 1.5–2.5 kg | Depends on fabric, frame and hardware |
| Water | 2–4 kg | Carried supply plus treatment equipment |
| Food | 1.5–3 kg | High-energy, familiar and easy to prepare |
| Shelter | 1–3 kg | Tarp, tent, bivy or emergency shelter |
| Sleep system | 1.5–4 kg | Highly dependent on temperature |
| Clothing | 1.5–3 kg | Layers rather than excessive changes |
| First aid and hygiene | 0.8–2 kg | Personal medication can change total |
| Tools and lighting | 1–3 kg | Frequently overpacked category |
| Electronics and communication | 0.5–2 kg | Phone, radio, batteries and power bank |
| Documents and personal items | 0.3–1 kg | Waterproof storage recommended |
The total can range from roughly 12 to more than 24 kilograms. For many users, the upper end is not practical. Equipment must therefore be prioritized according to location and risk.
A 60-liter pack should not be selected merely because it can hold everything. Larger packs create a longer lever behind the body and may interfere with head movement, vehicles, doorways, or dense vegetation. They also require a more substantial frame and hip belt.
A 45–50-liter pack can be sufficient for users with compact equipment, mild weather, reliable water treatment, and a clear route. A 55–60-liter pack may be justified for cold weather, family support equipment, medical supplies, or specialized tools.
Compression is essential. A 60-liter bag may sometimes carry only 40 liters of equipment. Side and front compression straps prevent the load from collapsing away from the back. Internal compression can stabilize dense equipment without placing excessive pressure on the main zipper.
An emergency pack should also fit its storage environment. A bag kept in a vehicle may face heat, vibration, dust, and limited space. A pack stored at home should be easy to inspect and positioned where it can be reached quickly. Oversized bags often become buried because they are inconvenient to store.
How Much Weight Should You Carry?
There is no universal safe carrying percentage for every person. Pack weight must be adjusted for body size, fitness, age, injury history, terrain, temperature, altitude, pace, and distance.
General outdoor guidance often uses percentages of body weight, but these should be treated as rough planning references rather than strict rules. A fit, trained adult carrying a well-fitted pack over level ground may manage a heavier percentage than an untrained person moving through heat, snow, steep slopes, or unstable terrain.
| Load Level | Approximate Body-Weight Range | Typical Use | Main Concern |
|---|---|---|---|
| Light | 5–10% | Day trips and urban readiness | Usually easy to manage |
| Moderate | 10–15% | Overnight travel and field use | Fit and footwear become important |
| Heavy | 15–20% | Extended trips and specialized equipment | Fatigue and joint stress increase |
| Very heavy | Above 20% | Trained or operational use | Requires conditioning and strong load system |
A 70-kilogram person carrying 15 percent of body weight has a pack of about 10.5 kilograms. At 20 percent, the load reaches 14 kilograms. These numbers include the bag itself.
Terrain changes everything. Ten kilograms on a smooth path may feel manageable. The same load becomes demanding on steep, muddy, rocky, or snow-covered ground. Heat increases water needs and fatigue. Cold increases clothing volume and energy requirements.
Pack fit can make a moderate load feel lighter, but it cannot make excessive weight safe. Shoulder straps should follow the body without creating gaps or pinching the neck. The hip belt should wrap the pelvis, not the soft waist. Load lifters should draw the upper pack toward the body without lifting the shoulder straps completely away.
The user should test the pack before depending on it. Load it with the intended equipment and walk for at least an hour. Climb stairs, bend, step over obstacles, and adjust the harness. Notice numbness, shoulder pressure, hip-belt slipping, lower-back strain, and load movement.
A useful rule is to remove equipment before trying to solve every discomfort through more padding. Additional foam, frames, and hardware also increase weight.
Organizations ordering custom tactical packs should define the target load range clearly. A bag intended for 8 kilograms does not need the same frame, strap foam, webbing width, buckle size, or reinforcement as a pack designed for 20 kilograms. Load targets affect almost every manufacturing decision.
How Should You Pack Survival Gear?
Survival gear should be packed according to weight distribution, access priority, moisture sensitivity, safety, and frequency of use. Heavy items belong close to the back, lighter bulky items fill the bottom and outer zones, emergency equipment remains quickly accessible, and wet or contaminated items should be separated. Small tools work best in labeled modules, while critical clothing, documents, fire-starting supplies, and electronics need independent water protection.
Good packing does more than make equipment fit. It reduces energy use, protects the user’s balance, shortens retrieval time, and prevents damage. A poorly packed bag may pull backward, sway from side to side, create pressure points, or force the user to unpack everything during rain.
The most effective organization is simple enough to remember under stress. Users should know where water, medical supplies, lighting, navigation, rain protection, and shelter equipment are stored without searching.
What Survival Items Are Essential?
Essential survival items support basic physiological needs and the user’s ability to navigate, communicate, manage injuries, and adapt to changing conditions. They generally include water, water treatment, food, shelter, insulation, first aid, lighting, navigation, fire-starting tools where appropriate, communication equipment, repair supplies, and personal medication.
The exact list depends on environment. A desert kit prioritizes water carriage and sun protection. A cold-weather kit needs insulation, fire support, and protection from wind. An urban evacuation bag may require identification, cash, chargers, masks, and transportation information.
A useful packing framework is to organize equipment by need rather than by product category.
| Need | Essential Function | Example Equipment |
|---|---|---|
| Hydration | Carry and make water safer | Bottles, reservoir, filter and purification tablets |
| Shelter | Reduce exposure to wind and rain | Tarp, bivy, tent, cord and stakes |
| Temperature control | Preserve body heat or manage sun | Layers, hat, gloves and emergency blanket |
| Nutrition | Maintain energy | Compact food and preparation tools |
| Medical | Manage minor injuries and urgent problems | First-aid kit and personal medication |
| Navigation | Maintain direction and route awareness | Map, compass and GPS |
| Communication | Request help and receive information | Phone, radio, whistle and power bank |
| Lighting | Work and move after dark | Headlamp, backup light and batteries |
| Repair | Restore equipment function | Tape, cord, sewing kit and multi-tool |
| Documentation | Confirm identity and plans | Copies, contacts, cash and waterproof notes |
Redundancy should be selective. Carrying two methods of making fire can be sensible in cold conditions. Carrying four large knives usually is not. A headlamp and a small backup light provide useful redundancy because lighting failure can stop safe movement.
Tools are one of the most commonly overpacked categories. People often add equipment because it feels capable, not because it supports a defined task. Every tool should answer three questions: What exact problem does it solve? Is another item already capable of solving that problem? Is the benefit worth the weight?
Personal needs should never be treated as optional. Prescription medication, allergy information, mobility aids, corrective lenses, menstrual supplies, infant items, and culturally appropriate food may be more important than generic survival accessories.
The equipment list should be reviewed at least seasonally. Cold-weather gear, water needs, and daylight hours change. Batteries, food, medication, and purification products may expire. Children outgrow clothing quickly.
Where Should Heavy Gear Go?
Heavy gear should be positioned close to the spine so the weight remains near the body’s natural center of gravity. It is generally placed in the middle third of the pack, above the sleeping system and below the shoulders.
When heavy items sit far from the back, they pull the user backward. The body compensates by leaning forward, increasing fatigue in the shoulders, neck, and lower back. Side-to-side imbalance creates uneven pressure and can affect footing.
Water reservoirs are naturally positioned close to the back. Food bags, cooking equipment, batteries, tools, and dense pouches should also remain near the centerline whenever possible.
The precise vertical position depends on terrain. On smoother ground, dense items can sit slightly higher to support an upright posture. On steep, uneven, or technical ground, placing them slightly lower can improve stability.
| Pack Zone | Best Contents | Reason |
|---|---|---|
| Bottom | Sleeping bag, insulated clothing and soft shelter components | Light, bulky items form a protective base |
| Middle, close to back | Water, food, cookware, tools and batteries | Keeps dense weight near center of gravity |
| Middle, away from back | Clothing and soft equipment | Cushions hard items and fills space |
| Top | Rainwear, first aid, food and warm layer | Fast access without unpacking |
| Side pockets | Water, poles and narrow tools | Convenient but must remain balanced |
| Front pocket | Maps, gloves, lighting and small modules | Useful for frequent access |
| Hip belt | Snacks, compass and compact light | Available while moving |
Hard objects should not press directly against the user’s back. A frame sheet, internal divider, or padded sleeve prevents pressure points. Sharp tools require sheaths or rigid protection.
The left and right sides should have similar weight. A two-liter bottle on one side and a light rain shell on the other will create imbalance. The user may compensate unconsciously, causing fatigue over distance.
Compression straps should be tightened after packing. They draw equipment inward and reduce movement. Straps should be snug rather than crushed to the point that zippers or fragile gear are damaged.
The pack should stand reasonably upright when placed on the ground. A bag that immediately falls backward may be excessively front-heavy. One that tips sideways may have uneven load distribution.
How Do You Organize Small Tools?
Small tools should be grouped by task and secured in removable, clearly identifiable modules. Loose items migrate to the bottom, create noise, damage fabric, and become difficult to find under stress.
A repair module might contain tape, cord, cable ties, needles, thread, patches, and a compact multi-tool. A fire module may include ignition sources, tinder, and weather protection. An electronics module can hold cables, adapters, spare batteries, and a power bank.
Color coding can improve recognition. Red may indicate medical supplies, blue water treatment, orange fire equipment, and gray repair tools. Labels should remain readable in low light and after abrasion.
Transparent or mesh pockets allow visual identification, but sharp items may snag mesh. Solid pouches provide better protection but require labeling. Elastic loops hold tools in place and make missing items obvious.
Pouch weight should remain reasonable. One dense organizer filled with metal tools may create a hard lump and affect balance. Splitting equipment into two task-specific modules can improve packing.
The opening direction matters. A pouch attached vertically should not release all its contents when unzipped. Internal retention straps, elastic loops, and mesh covers prevent spills.
Frequently used tools belong near the upper or outer area. Backup repair materials can remain deeper in the pack. Hazardous items, fuels, blades, and medications need secure storage appropriate to their risk.
For custom tactical bag development, internal organization should be tested with real item dimensions. Generic elastic rows often look impressive but fit few actual products. Loop width, panel depth, zipper clearance, and finger access should reflect the final contents.
What Belongs in External Pouches?
External pouches should hold items that are frequently used, wet, dirty, or required quickly. Suitable examples include water bottles, rain gear, gloves, a compact first-aid module, navigation tools, and selected field equipment.
Heavy equipment should generally remain inside and close to the back. External placement increases leverage, exposes contents to impact, and can make the pack wider.
A first-aid pouch may justify external placement because access time matters. It should use secure attachment and recognizable marking. Sensitive medical items still require weather protection.
Wet rainwear can be stored in an expandable front pocket to prevent moisture from entering the main compartment. Drainage and ventilation reduce odor and standing water.
Bottle pockets need adequate depth, side compression, or upper retention. An unsecured bottle can fall out when the wearer bends or climbs.
| External Position | Suitable Gear | Main Risk | Needed Retention |
|---|---|---|---|
| Side pocket | Water bottle or trekking pole | Falling or snagging | Elastic edge plus compression strap |
| Front pouch | Rainwear, gloves or map | Front-heavy load | Lightweight contents only |
| MOLLE medical pouch | Immediate first aid | Detachment or weather exposure | Fully woven straps and protected closure |
| Bottom straps | Sleeping mat or compact shelter | Ground contact and swinging | Two-point compression |
| Top pocket | Snacks, light and personal items | Overloading raises center of gravity | Internal organization |
| Shoulder strap | Radio, whistle or small light | Interference with movement | Secure clip and secondary tether |
Carabiners are often overused. Hanging cups, shoes, bottles, and tools create noise and unstable movement. A carabiner is useful as a secondary attachment point, but it should not replace a purpose-built retention system.
External pouches can also affect the bag’s appearance and social context. A low-profile pack may be more suitable for public transportation or urban evacuation than one covered in visible equipment.
How Do You Keep Gear Dry?
Gear stays dry through layered protection rather than dependence on one waterproof claim. The outer shell should slow water penetration, openings should be protected, critical equipment should be placed in waterproof inner bags, and the user should carry a rain cover when prolonged exposure is expected.
A PU- or TPU-coated shell provides a first barrier, but conventional stitching leaves needle holes. Water-resistant zippers reduce entry but are not usually submersible. Storm flaps help protect zipper tracks.
A waterproof pack liner is one of the most efficient solutions. It creates a large protected compartment inside the bag without requiring every outer seam to be sealed. Individual dry bags then protect sleeping equipment, clothing, electronics, documents, and fire supplies.
| Protection Layer | Main Role | Best Protected Items |
|---|---|---|
| Water-repellent surface | Slows face-fabric saturation | Entire pack exterior |
| Coated shell fabric | Reduces water penetration | General contents |
| Storm flaps and zipper garages | Protect opening points | Main and outer compartments |
| Rain cover | Reduces prolonged direct exposure | Whole backpack |
| Internal liner | Creates secondary waterproof barrier | Main equipment load |
| Individual dry pouch | Isolates critical contents | Clothing, sleep system and electronics |
| Waterproof hard case | Protects against impact and moisture | Sensitive devices and documents |
Dry bags should be selected according to contents. A sleeping bag benefits from a lightweight roll-top sack. Electronics may require a more durable pouch. Documents can fit inside a flat waterproof sleeve.
Items that must remain dry should not be placed in exterior pockets simply for convenience. Fire-starting supplies, spare clothing, batteries, and medical materials can become unusable when wet.
Wet gear should be isolated rather than sealed permanently inside the main compartment. An external mesh pocket, drainage panel, or separate coated pouch can hold a rain shell until it can be dried.
Moisture also develops from inside. Sweaty clothing, leaking reservoirs, condensation, and damp food packaging can affect equipment even without rain. Hydration sleeves should be inspected for leakage, and wet items should be removed after each trip.
After exposure, the backpack should be emptied and dried in a ventilated area away from excessive heat. Direct high heat can damage coatings, foam, elastic, adhesives, and laminated fabrics. Mud should be removed before it dries deeply into zipper tracks and webbing.
For custom outdoor survival bags, Szoneier can engineer layered moisture protection through coated nylon or polyester Oxford fabrics, waterproof liners, protected zipper structures, drainage pockets, rain covers, and separate dry-storage modules. The final solution can be matched to light rain, prolonged outdoor exposure, wet equipment handling, or more demanding weather conditions without making the bag unnecessarily heavy or rigid.
Are Tactical Bags Better Than Hiking Packs?
Tactical bags are not automatically better than hiking packs, and hiking packs are not automatically better for survival. Tactical packs usually provide stronger external organization, modular attachment, structured access, and reinforced construction. Hiking packs often provide lower weight, better ventilation, more advanced suspension systems, and greater comfort over long distances. The better choice depends on whether the user values equipment access and rugged modularity more than low weight and efficient movement.
A tactical backpack may be ideal for carrying medical modules, tools, radios, cameras, repair equipment, or organized emergency supplies. A hiking pack may be better when the user must walk for many hours over steep terrain while carrying shelter, food, water, and clothing.
The most useful comparison is not based on appearance. It is based on how the bag performs during the intended activity.
| Selection Factor | Tactical Bag | Hiking Pack | Better Choice Depends On |
|---|---|---|---|
| Empty weight | Usually heavier | Usually lighter | Walking distance and equipment load |
| External organization | Strong, modular and visible | Usually limited and streamlined | Need for rapid tool access |
| Carrying comfort | Varies widely | Often highly developed | Duration and terrain |
| Abrasion resistance | Commonly strong | Moderate to strong | Contact with rough surfaces |
| Ventilation | Often limited | Usually better | Climate and exertion level |
| Load transfer | Good on quality models | Often excellent | Total packed weight |
| Urban use | Can appear conspicuous | Often neutral | Social environment |
| Field repair | Webbing and modular parts may be easier to repair | Lightweight components can be more specialized | Expected service conditions |
| Weather protection | Often uses heavy coated materials | Often relies on lighter fabrics and covers | Exposure duration |
| Internal access | Panel opening is common | Top loading is common | Gear retrieval frequency |
The strongest survival setup may combine ideas from both categories. A pack can use tactical organization and reinforcement while adopting the shaped harness, load lifters, frame structure, and lightweight material mapping found in hiking equipment.
Which Bag Is More Durable?
Tactical bags are often more durable in high-abrasion and equipment-heavy conditions because they commonly use heavier fabrics, reinforced attachment points, larger zippers, wider webbing, and stronger stitching. However, durability must be defined according to the type of stress.
A bag can be durable against abrasion but uncomfortable under load. It can resist tearing while its coating begins to peel. It can survive dragging but fail at a plastic buckle. It can use strong 1000D fabric while the shoulder strap anchor is poorly reinforced.
Hiking packs often use lighter materials because every gram matters over distance. High-quality hiking fabrics may still offer excellent tear and abrasion resistance through advanced yarns, ripstop construction, laminates, and carefully placed reinforcement.
The correct comparison should examine several forms of durability.
| Durability Category | What It Measures | Tactical Pack Strength | Hiking Pack Strength |
|---|---|---|---|
| Surface abrasion | Resistance to scraping and rubbing | Often excellent | Good with strategic reinforcement |
| Tear resistance | Ability to stop damage from spreading | Strong with high-tenacity fabrics | Strong in technical ripstop materials |
| Seam strength | Ability of seams to resist load | Strong when properly reinforced | Strong but optimized for lower weight |
| Hardware life | Buckles, sliders and adjusters | Often larger and easier to replace | Often lighter and more specialized |
| Coating life | Resistance to peeling and hydrolysis | Depends on coating quality | Depends on laminate or coating system |
| Shape stability | Ability to remain structured | Usually high | Often flexible and compression-focused |
| Repairability | Ease of field repair | Webbing and simple panels can be repairable | Lightweight complex structures may be harder to repair |
A tactical pack used by a forestry worker may be placed on wet soil, dragged across vehicle beds, and loaded with hard tools. A reinforced 600D, 900D, or high-tenacity nylon construction may be appropriate.
A hiking pack used for a multi-day mountain route may contact fewer hard surfaces but endure thousands of repeated steps, constant strap movement, sweat, rain, and compression. In this situation, low weight and suspension efficiency may contribute more to useful service life than an extremely heavy shell.
Durability should therefore include the user. A pack that causes excessive fatigue may be physically strong but operationally poor. The longest-lasting product is not always the one with the thickest fabric. It is the one whose components are balanced so that no single weak point fails early.
The base fabric, thread, webbing, zipper, buckle, reinforcement, and sewing pattern should have compatible strength. Overspecifying one component while ignoring another adds cost without improving the complete product.
Which Pack Is More Comfortable?
Hiking packs are usually more comfortable for long-distance walking because their carrying systems are designed around continuous movement. They often use shaped shoulder straps, adjustable torso lengths, ventilated back panels, contoured hip belts, load lifters, frame stays, and lightweight compression systems.
Tactical packs vary much more. Some use sophisticated suspension systems, while others rely on flat shoulder straps, thick foam, and a basic waist belt. Thick padding can feel comfortable during the first few minutes but may trap heat and create pressure when the load becomes heavy.
Comfort depends on fit, not softness alone.
The shoulder straps should follow the curve from the upper back across the shoulders without pressing against the neck. The hip belt should wrap the pelvic area and transfer weight rather than merely prevent the bag from swinging. The sternum strap should stabilize the shoulder straps without restricting breathing.
Torso length is critical. A pack designed for one fixed torso range may fit some users well and others poorly. Adjustable systems improve fit but add components, sewing operations, and weight.
Back-panel ventilation also involves compromise. Raised foam channels allow some airflow but may still hold heat. Suspended mesh creates more ventilation but pushes the load farther from the body. A close-fitting panel improves stability but can become warm during strenuous movement.
| Comfort Element | Poor Design Result | Effective Design Result |
|---|---|---|
| Shoulder strap shape | Neck pressure and outer-shoulder slipping | Even contact and stable movement |
| Foam density | Bottoming out or excessive bulk | Controlled cushioning under load |
| Hip-belt angle | Belt rides upward or creates pressure points | Wraps the pelvis and transfers weight |
| Torso length | Shoulder gap or overloaded hips | Balanced contact across back and hips |
| Load lifters | No effect or excessive shoulder lift | Draw upper pack closer to body |
| Back ventilation | Heat buildup or unstable load | Appropriate airflow without excessive separation |
| Sternum strap | Chest restriction | Controlled shoulder-strap positioning |
| Compression | Load shifts and pulls backward | Stable center of gravity |
A tactical pack may feel comfortable during short, stop-and-start tasks because equipment remains organized and accessible. A hiking pack may feel better after several hours because it reduces empty weight and transfers the load more efficiently.
The user should test comfort with realistic weight, not with paper filling or an empty display sample. A pack that feels excellent at three kilograms may become painful at twelve kilograms.
Testing should include walking uphill and downhill, climbing stairs, bending, stepping over obstacles, and reaching overhead. These movements reveal strap slip, belt movement, and pressure points that are not noticeable while standing still.
Clothing also changes fit. A harness adjusted over a thin shirt may feel different over a winter jacket. Tactical users may wear protective equipment or utility belts, so the pack should be tested with the complete clothing system.
Are Tactical Packs Too Heavy?
Some tactical packs are too heavy for their intended use because durability features are added without a clear performance target. Heavy fabric, oversized zippers, multiple compartments, thick foam, full lining, extensive MOLLE webbing, large buckles, and internal frames can create a pack weighing two to three kilograms before equipment is added.
That weight may be justified for a bag carrying medical supplies, hard tools, radio systems, or operational equipment. It is harder to justify for a short hike carrying water, food, clothing, and basic emergency items.
The concept of weight efficiency is more useful than asking whether a pack is simply heavy. Weight efficiency compares the pack’s empty weight with the load it can comfortably and reliably carry.
A 2.5-kilogram pack designed to support 25 kilograms may be efficient for specialized use. A 2-kilogram day pack designed for only 7 kilograms may not be.
| Pack Category | Typical Empty Weight | Practical Load Range | Weight Concern |
|---|---|---|---|
| Lightweight day pack | 0.5–1.0 kg | 3–8 kg | May need limited reinforcement |
| Tactical day pack | 1.0–1.8 kg | 5–12 kg | Feature weight can accumulate |
| Medium hiking pack | 1.0–1.8 kg | 8–18 kg | Suspension quality is critical |
| Medium tactical pack | 1.6–2.5 kg | 10–20 kg | Heavy shell may reduce mobility |
| Large expedition pack | 1.8–3.0 kg | 15–30 kg | Frame and harness justify some weight |
| Heavy field pack | 2.5–4.0 kg | 20 kg and above | Suitable only for trained or specialized users |
Weight can be reduced without sacrificing important durability. The main body can use a lighter fabric while the base and tool zones use heavier reinforcement. Laser-cut attachment panels may replace full webbing in selected areas. Internal dividers can use lightweight ripstop. Foam thickness can be optimized according to load rather than appearance.
The number of compartments should also be controlled. Every pocket adds fabric, zipper tape, sliders, binding, thread, and labor. Removing one unnecessary full-width compartment may save more weight than changing several buckles.
Hardware should be sized according to load. A 25-millimeter buckle may be suitable for a day pack compression strap, while a 38- or 50-millimeter component may be needed for a heavy hip belt or primary closure. Using the largest component everywhere creates a rugged appearance but poor efficiency.
A useful design process sets an empty-weight target early. Without a target, every department may add “a little more strength,” and the final product becomes much heavier than planned.
Users should also remember that lighter gear creates flexibility. Saving one kilogram in the pack itself may allow the user to carry more water, warmer clothing, or medical equipment without increasing total load.
Do Tactical Colors Attract Attention?
Tactical colors can attract attention depending on the environment. Camouflage, black, coyote brown, ranger green, and visible MOLLE webbing may appear normal in outdoor or field settings but stand out in airports, public transportation, schools, offices, or emergency shelters.
A tactical appearance can communicate capability, preparedness, professional use, or outdoor experience. It can also create unwanted assumptions. During urban travel or evacuation, a low-profile pack may help the user blend into the environment and avoid drawing attention to potentially valuable equipment.
Black is often considered discreet, but a large black pack covered in webbing can still look distinctly tactical. Gray, navy, dark green, muted brown, and neutral two-tone combinations may appear more like ordinary outdoor luggage.
High-visibility colors can be beneficial in rescue, medical, hunting-safety, roadside, and disaster-response contexts. Orange, red, yellow, and reflective details improve identification. The right color is therefore determined by whether visibility is a benefit or a risk.
| Environment | Suitable Color Strategy | Main Reason |
|---|---|---|
| Forest and bushcraft | Green, brown or muted earth tones | Blends with natural surroundings |
| Urban evacuation | Gray, navy, black or understated colors | Reduces visual attention |
| Medical response | Red, blue or high-visibility panels | Supports rapid identification |
| Roadside emergency | Bright colors and reflective details | Improves visibility to vehicles |
| Hunting support | Blaze orange sections where required | Reduces mistaken identification |
| Travel and commuting | Neutral, clean exterior | Fits public and professional settings |
| Search and rescue | High-visibility color blocking | Helps team recognition |
Color performance also affects manufacturing. Solution-dyed fabrics may provide strong colorfastness and consistency for some specifications. Piece-dyed fabrics offer broader flexibility but require color-control standards.
Dark colors can absorb more solar heat. A black bag left in direct sun may become significantly warmer than a light-colored one, affecting food, batteries, medication, adhesives, and electronic devices.
Camouflage printing requires pattern registration, color approval, and production consistency. The print may also affect coating or finishing choices. For organizations developing branded products, custom colors should be approved under controlled lighting and compared against physical standards rather than screen images alone.
Branding should follow the same logic. Large contrasting logos attract attention. Tonal embroidery, rubber patches, woven labels, or removable branding can provide a more discreet appearance.
Which Pack Fits Long-Distance Travel?
A hiking-style pack usually fits long-distance travel better because it prioritizes weight reduction, torso fit, ventilation, load transfer, and walking efficiency. A tactical pack becomes suitable when it includes a quality suspension system and the user genuinely needs reinforced organization or external modules.
For long-distance use, every feature must justify the energy needed to carry it. Full exterior webbing may not be necessary. Numerous admin pockets may have little value. Heavy coated fabric may provide more durability than the route requires.
A travel pack should maintain a narrow profile. Wide side pouches interfere with arm swing and catch on vegetation, doors, and transportation interiors. The load should remain close to the spine.
The hip belt becomes increasingly important as distance and weight increase. It should be stiff enough to transfer load but flexible enough to wrap the body. Replaceable or adjustable belts may improve fit across different users.
Access should match travel style. Top-loading designs compress well and reduce zipper length. Panel-loading designs make organization easier during frequent stops. A hybrid opening can combine both, but it increases complexity.
Long-distance travelers should also consider repairability. Buckles, compression straps, zipper sliders, and cord systems may need replacement. Standard component sizes and accessible construction simplify repairs.
The pack should be tested over the expected duration. A one-hour walk cannot fully predict performance during an eight-hour day. Heat buildup, rubbing, pressure, and strap movement become more obvious over time.
A strong long-distance tactical design usually uses selective rather than maximum reinforcement. Durable materials protect the bottom, front contact zones, and attachment points, while lighter fabrics reduce weight elsewhere.
How Do You Test and Maintain a Tactical Bag?
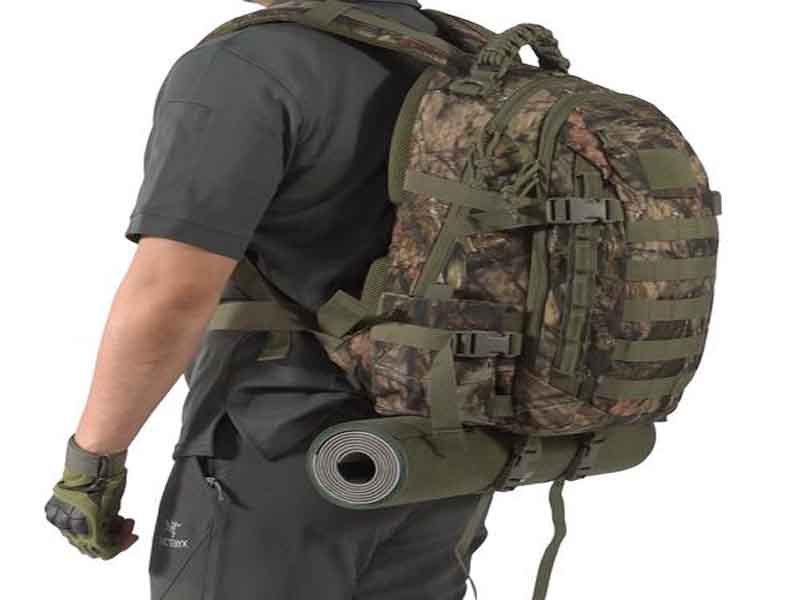
A tactical bag should be tested through material inspection, seam-strength evaluation, loaded carrying trials, hardware cycling, abrasion exposure, water testing, and repeated opening and adjustment. Maintenance should include regular cleaning, drying, zipper care, seam inspection, coating checks, and timely replacement of damaged hardware. A bag is ready for serious outdoor use only when the complete system has been evaluated under realistic load and movement.
Laboratory data is valuable, but field testing remains essential. Fabric tests do not reveal whether a zipper is difficult to reach, a buckle presses against the body, or a pocket spills its contents. Field use does not always reveal hidden coating weakness or inconsistent seam strength. The strongest quality program combines both.
Testing should begin before mass production. Material samples, development prototypes, pre-production samples, and finished production units should each be checked at the correct stage.
How Do You Inspect the Stitching?
Stitching should be inspected for consistency, alignment, tension, reinforcement, seam allowance, thread damage, skipped stitches, loose ends, and fabric distortion.
The first inspection is visual. Stitch lines should run evenly without wandering close to the fabric edge. Webbing should remain flat rather than twisted. Bar tacks should cover the intended load area. Corners should not show exposed raw edges.
Thread tension should lock the stitch within the material layers. If the upper thread lies straight across the surface, tension may be unbalanced. If the seam puckers, tension may be excessive or the feeding system may be unsuitable.
Seam allowance is critical. A strong stitch positioned too close to the edge can pull out under load. Internal binding tape should fully cover raw edges without missing sections.
High-load locations deserve special attention.
| Inspection Zone | What to Check | Warning Sign |
|---|---|---|
| Shoulder anchors | Backing, stitch pattern and load distribution | Fabric whitening or distortion |
| Top handle | Reinforcement width and connection to body | Handle pulls away from shell |
| MOLLE rows | Spacing and interval stitching | Loose rows or inconsistent gaps |
| Zipper ends | Backing and corner construction | Track distortion under pulling |
| Hip-belt connection | Multiple layers and seam security | Movement between belt and body |
| Compression straps | Webbing insertion depth | Strap begins slipping from seam |
| Bottom corners | Seam protection and abrasion exposure | Frayed thread or open binding |
The bag should be loaded before final inspection. Some defects appear only when panels are under tension. Zippers may curve, seams may open, and strap anchors may distort.
A controlled pull test can be used on attachment points. The required force should be defined according to intended load and safety margin. Testing must be consistent rather than relying on one operator pulling by hand.
Stitch density should suit the material. Too few stitches may reduce seam security. Too many can perforate coated fabric. Curves and thick intersections require careful control because needle deflection can create skipped stitches.
Thread choice matters. Bonded nylon or polyester threads are common in bag manufacturing. Polyester offers strong UV resistance, while nylon provides excellent toughness and elasticity. Thread size should match the fabric, needle, seam type, and expected load.
How Are Straps and Hardware Tested?
Straps and hardware should be tested through static loading, repeated cycling, impact, adjustment, temperature exposure, and real-use movement.
A static load test checks whether a handle, shoulder strap, buckle, or webbing anchor can support a defined force for a set period. A cycle test repeats loading many times to simulate long-term use.
Buckles should open and close repeatedly without cracking, loosening, or changing release force. Adjustment hardware should hold webbing under tension without gradual slipping.
| Test Type | Purpose | Example Failure |
|---|---|---|
| Static load | Checks maximum holding strength | Strap anchor pulls from panel |
| Cyclic load | Simulates repeated use | Stitching loosens over time |
| Drop test | Evaluates impact with packed weight | Buckle breaks or seam opens |
| Buckle cycling | Checks repeated operation | Release arms fatigue |
| Strap-slippage test | Confirms adjuster grip | Shoulder strap length changes |
| Cold test | Evaluates low-temperature behavior | Plastic becomes brittle |
| Heat exposure | Checks deformation and coating stability | Buckle warps or laminate separates |
| Abrasion test | Measures rubbing resistance | Webbing surface wears through |
A loaded drop test should represent realistic handling rather than uncontrolled destruction. The bag may be dropped on its base, side, front, and handle zones. Hard internal objects should be packed safely to avoid creating an unrealistic puncture test unless puncture resistance is being evaluated.
Shoulder straps should be cycled in the direction of real force. Pulling them straight outward may not represent how they behave on the body.
Webbing should be checked for thickness, weave stability, edge quality, colorfastness, and compatibility with the buckle. A buckle designed for thin webbing may slip when used with a thicker, smoother strap.
Hardware should also be checked after contamination. Mud, dust, sand, and salt can affect zipper sliders and buckles. A component that works perfectly in a clean room may become difficult to operate outdoors.
How Do You Clean Coated Fabric?
Coated tactical fabric should usually be cleaned with cool or lukewarm water, mild soap, a soft cloth, and a soft brush. Strong detergents, bleach, solvents, machine washing, high heat, and aggressive scrubbing can damage coatings, laminates, adhesives, foam, and water-repellent finishes.
The bag should be emptied completely. Removable frames, boards, pouches, and belts should be taken out where possible. Pockets should be opened and shaken to remove sand and debris.
Dry soil should be brushed away before water is added. Rubbing wet grit into the fabric can increase abrasion.
A small amount of mild soap can be applied to stained areas. The cleaner should be tested in a hidden location first, particularly on printed, laminated, or specially treated fabric.
Zipper tracks should be cleaned with a soft brush. Fine particles should be removed rather than forced deeper into the slider.
The bag should be rinsed carefully and dried in a ventilated, shaded area. It should not be placed on a radiator, in a tumble dryer, or under strong direct heat. High temperature can soften adhesives, shrink foam, deform plastic, and accelerate coating failure.
| Cleaning Action | Recommended | Avoid |
|---|---|---|
| Remove dry debris | Soft brush or vacuum at low power | Hard scraping |
| Wash shell | Mild soap and cool water | Bleach and strong solvents |
| Clean zippers | Soft brush and fresh water | Oily products that attract grit |
| Dry bag | Shade and airflow | Dryer, heater or intense sun |
| Treat odor | Full drying and gentle cleaning | Masking odor while moisture remains |
| Store bag | Clean, dry and uncompressed | Sealed damp storage |
Saltwater exposure requires prompt rinsing with fresh water. Salt crystals can damage metal components and increase abrasion in zipper tracks.
Blood, medical contamination, fuel, oils, and chemicals require application-specific cleaning procedures. A general outdoor cleaning method may not be sufficient for professional medical or industrial bags.
Surface water repellency can reduce over time. A compatible treatment may be reapplied after cleaning, but it must match the fabric and coating. Applying the wrong product can change color, hand feel, print adhesion, or breathability.
When Should Parts Be Replaced?
Parts should be replaced when damage affects load security, access, weather protection, or user safety. A cracked buckle, slipping adjuster, separated shoulder anchor, damaged main zipper, or delaminating structural panel should not be ignored.
Cosmetic wear does not always require replacement. Surface scuffs, faded color, and minor coating marks may not affect function. The decision should focus on whether the component still performs reliably.
| Damage | Continue Using? | Recommended Action |
|---|---|---|
| Light surface abrasion | Usually yes | Monitor and clean |
| Loose thread end | Possibly | Trim carefully and inspect seam |
| Skipped stitches at load point | No | Repair before use |
| Cracked buckle | No | Replace immediately |
| Zipper slider no longer closes track | No | Replace slider or zipper |
| Minor coating wear | Possibly | Add inner protection and monitor |
| Large coating delamination | Limited use only | Repair or replace panel |
| Shoulder strap distortion | No | Professional repair or replacement |
| Webbing edge fuzzing | Often yes | Monitor for deeper wear |
| Webbing cut or melted section | No | Replace damaged component |
| Compressed foam | Depends on comfort | Replace pad or harness if possible |
Split-bar buckles make field replacement easier. Standard zipper sliders, removable frames, replaceable shock cord, and modular pouches can extend product life.
Repair should not create a new weak point. Sewing through coated fabric requires suitable needles, thread, backing, and seam placement. Adhesive patches may work for small shell damage but are not appropriate for major strap anchors.
A maintenance log is useful for professional teams. The date of inspection, damage found, repair performed, and tester can be recorded. This is especially important when bags carry medical, rescue, technical, or expensive equipment.
How Can Tactical Bags Be Customized?
Tactical bags can be customized through capacity, fabric, coating, color, pocket layout, MOLLE placement, hydration systems, harness structure, zipper type, hardware, reinforcement, internal modules, logos, labels, and packaging.
Useful customization begins with the use scenario rather than the logo. The manufacturer needs to know what equipment will be carried, how much it weighs, how quickly it must be accessed, where the bag will be used, and what weather exposure is expected.
A forestry pack may need saw protection, high-visibility panels, drainage, and reinforced tool sleeves. A medical pack may need removable color-coded modules, wipe-clean lining, and rapid clamshell access. An urban emergency bag may require a discreet exterior, hidden document storage, and laptop compatibility.
| Custom Element | Available Direction | Design Question |
|---|---|---|
| Main fabric | Polyester, nylon, Oxford or laminated construction | What abrasion and weather level is required? |
| Capacity | Compact, medium or extended | What equipment must fit? |
| Opening | Top, panel, clamshell or hybrid | How quickly must contents be reached? |
| Modular system | Webbing, laser-cut or internal panels | Which pouches will be attached? |
| Harness | Basic, framed or adjustable | What load and torso range are expected? |
| Water system | Bottle, reservoir or hybrid | How will the user refill and drink? |
| Branding | Embroidery, print, patch or label | Should the appearance be bold or discreet? |
| Packaging | Polybag, carton, retail box or instruction set | How will the product be sold and shipped? |
Szoneier integrates fabric development with finished-product manufacturing, which allows the bag structure and material specification to be developed together. Cotton, canvas, polyester, nylon, neoprene, jute, linen, and Oxford fabrics can be evaluated according to the final use, while coating, lamination, printing, water-repellent finishing, reinforcement, and other post-processing options can be matched to the product.
A custom project can begin with a sketch, reference bag, equipment list, technical file, or intended use description. The design team can then develop the capacity, panel structure, pocket geometry, material combination, branding, and packaging.
Prototypes should be packed with real equipment and tested before production. This step identifies problems that drawings cannot reveal, such as difficult zipper access, unstable pouches, pressure points, incorrect elastic-loop sizes, and poorly balanced loads.
For custom tactical backpacks, survival bags, medical packs, outdoor equipment bags, MOLLE pouches, or private-label field gear, contact Szoneier with the required size, materials, expected load, equipment list, target environment, logo files, and order plan. Szoneier can support fabric selection, free design assistance, rapid sampling, custom branding, quality inspection, and coordinated manufacturing for a tactical bag built around real outdoor use rather than decorative features alone.