Skip to content
A tactical bag can have excellent fabric, strong zippers, and a comfortable harness, yet still become frustrating when its equipment cannot be organized around the job. That is the problem the MOLLE system was created to solve. Instead of forcing every user to accept the same permanent pocket layout, it turns a backpack, vest, belt, or equipment panel into a configurable platform.
At first glance, the system looks simple: rows of webbing on the bag and straps on a pouch. In reality, its performance depends on precise spacing, correct weaving, a stable backing panel, suitable materials, and sensible pouch placement. A pouch clipped casually to one webbing row may appear attached, but it can bounce, pull away from the bag, and concentrate the entire load on a small area. A properly woven pouch becomes part of the carrying platform rather than an object hanging from it.
The MOLLE system is a modular load-carrying arrangement that uses compatible pouches and accessories attached to a PALS grid. PALS is the ladder-like webbing or slot pattern sewn or cut into the bag, while MOLLE refers more broadly to the modular equipment system. Pouch straps are alternately woven through the rows on the bag and the pouch, creating an interlocked connection that controls movement and spreads force across several attachment points.
This distinction is easy to overlook because commercial products often use MOLLE and PALS as if they mean exactly the same thing. For everyday shopping, that shortcut is understandable. For product development, however, the difference matters. Asking a factory to “add MOLLE” is not a complete specification. The designer still needs to define the location, number of rows, number of columns, webbing width, stitch spacing, slot dimensions, reinforcement, expected pouch weight, and required compatibility.
MOLLE also does not mean that every available space should be filled. Each pouch adds fabric, closures, attachment straps, contents, and outward leverage. Modularity is useful only when it improves access or allows a task-based equipment group to be transferred. A bag covered with unnecessary pouches may hold more gear, but it can also become wider, heavier, noisier, and harder to use inside vehicles or narrow spaces.
Picture someone preparing a pack before an early-morning operation. A medical pouch is clipped to the front, a full bottle is hung on one side, and a utility pouch is added wherever an empty webbing row remains. Everything appears secure while the bag is on the table. Once movement begins, the bottle swings, the front pouch pulls the shell outward, and the utility pouch blocks the main zipper. The MOLLE system did not fail. The configuration did. Understanding how the system works is what separates genuine modular efficiency from a bag that merely looks tactical.
What Is the MOLLE System?
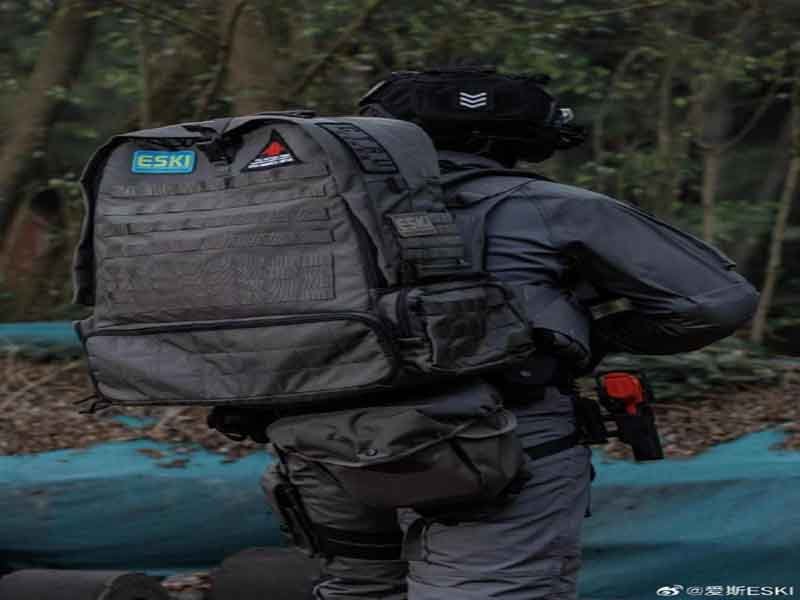
The MOLLE system is a modular method of carrying and organizing equipment through a compatible base platform and removable pouches. Tactical bags use horizontal PALS rows or laser-cut slots as the attachment foundation. Users can add medical, communication, utility, hydration, administrative, or tool pouches according to the activity without permanently changing the bag.
Its main benefit is controlled adaptability. One backpack can support several configurations, and damaged or outdated modules can be replaced independently. Equipment can be grouped according to task, moved between compatible platforms, or removed when a cleaner and lighter profile is needed.
The main limitation is that modularity can encourage overloading. The presence of an attachment point does not prove that the location can carry unlimited weight or that another pouch is operationally useful. The base panel, carrying harness, reinforcement, and total load still define the practical limits.
What Does MOLLE Mean?
MOLLE stands for Modular Lightweight Load-carrying Equipment and is commonly pronounced like the name “Molly.” It describes a family of load-carrying components developed to let users configure pouches and equipment according to their role rather than depending on one fixed arrangement.
The word modular is the most important part. A module can be added, removed, replaced, or repositioned while the base platform remains functional. A medical pouch may be fitted for one task and replaced by a utility pouch for another. A sustainment pouch may be added for extended activity and removed for a short response.
Lightweight should be interpreted carefully. The original concept aimed to improve load-carrying efficiency and flexibility, but a fully configured MOLLE bag is not always light. Every detachable pouch duplicates some material that a fixed pocket would not require, including outer fabric, lining, binding, zippers, webbing, and attachment straps.
The system is therefore weight-efficient only when its modular value justifies the additional components.
| MOLLE Principle | What It Means in Practice | Common Misunderstanding |
|---|---|---|
| Modular | Pouches can be changed independently | Every surface should carry a pouch |
| Load carrying | Attachments support organized equipment | The webbing can hold unlimited weight |
| Compatible platform | Standardized geometry supports different modules | Every commercial MOLLE product fits perfectly |
| Mission configuration | Layout changes according to use | One layout works for every user |
| Replaceable components | Worn or specialized pouches can be changed | The base bag needs no structural planning |
MOLLE replaced or improved upon older equipment arrangements that often relied on fixed pockets, hooks, or metal clips. Interwoven straps created a closer and more stable attachment, reducing the loose movement associated with a pouch hanging from one small connection point.
The system is now found well beyond military equipment. Outdoor packs, medical response bags, police patrol products, camera bags, tool packs, motorcycle luggage, emergency kits, and travel organizers may all use MOLLE-compatible attachment areas.
That expansion has made the term familiar, but it has also created inconsistent product quality. Some commercial bags use carefully spaced, reinforced webbing connected to structural seams. Others sew decorative rows onto a light outer panel without meaningful backing.
A serious MOLLE bag should be evaluated as a load path:
The equipment loads the pouch.
The pouch loads its attachment straps.
The straps load the PALS rows or slots.
The PALS panel transfers force into reinforcement.
The reinforcement transfers force into the bag body and carrying system.
Weakness at any stage can reduce the performance of the entire arrangement.
A strong webbing tape cannot compensate for weak shell fabric. A reinforced shell cannot secure a pouch whose straps are too short. A perfectly attached pouch can still make the bag uncomfortable when positioned too far from the body.
This is why MOLLE should be considered a system rather than a visible feature.
What Is PALS Webbing?
PALS stands for Pouch Attachment Ladder System. It is the repeated grid of horizontal webbing rows—or the equivalent slots in a laminated panel—that provides attachment channels for modular pouches.
In traditional construction, the grid uses horizontal strips of durable woven webbing sewn to a stable textile panel at regular vertical intervals. Common reference geometry uses webbing approximately 25 millimeters wide, rows separated by roughly 25 millimeters, and vertical stitch channels around 38 millimeters apart. Commercial products may vary, so actual compatibility should always be confirmed with physical pouches.
The vertical stitches divide each row into columns. Pouch straps pass through these columns and alternate between the base platform and corresponding attachment points on the pouch.
A panel may be described by its rows and columns. For example, a compact pouch might need two columns across and three rows vertically. A larger medical pouch may require four or six columns and several rows.
The number of columns affects more than whether the pouch fits. It determines how widely the load is distributed.
| PALS Variable | Functional Effect | Risk When Incorrect |
|---|---|---|
| Webbing width | Controls strap fit and structural surface | Straps become difficult to pass |
| Horizontal row spacing | Allows alternating weave | Pouch cannot interlock correctly |
| Vertical stitch interval | Creates attachment columns | Pouch sits crooked or loose |
| Webbing stiffness | Affects installation and retention | Too soft sags; too stiff resists weaving |
| Backing-panel strength | Carries outward pouch force | Shell distorts or tears |
| Row alignment | Keeps modules level | Pouch twists under load |
| Stitch security | Holds the grid to the bag | Webbing peels from the panel |
| Edge clearance | Protects nearby bag functions | Pouch blocks zippers or seams |
Webbing selection is part of the engineering. Nylon webbing is widely used because it combines tensile strength, flexibility, and abrasion resistance. Polyester webbing offers low moisture absorption and good resistance to sunlight. Neither fiber is automatically correct for every product.
The webbing has to work with the pouch straps. Two heavy, stiff materials can become difficult to interweave. Two very soft materials may permit too much movement. Surface texture influences whether the completed weave remains snug.
The panel underneath the webbing is equally important. PALS rows are often sewn onto nylon or polyester Oxford fabric, laminated textile, or a reinforced composite panel. Where heavy pouches are expected, a backing layer can distribute stress beyond the individual stitch line.
The strongest grid is not necessarily the one with the most visible bar tacks. Very dense stitching can perforate coated fabric. Reinforcement should spread force while preserving the integrity of the textile.
PALS placement should also be purposeful. Full webbing across the entire pack offers maximum flexibility, but it adds weight, labor, and visual bulk. Partial panels may be more practical:
A front zone for medical or administrative modules
Side zones for bottles, radios, or narrow tools
A lower zone for heavier utility pouches
Internal rows for protected equipment organization
A removable panel for mission-specific modules
The best location depends on what the modules will contain and who needs to reach them.
Are MOLLE and PALS Different?
MOLLE and PALS are related but technically different. MOLLE is the broader modular load-carrying equipment system, while PALS is the attachment grid used to secure compatible pouches and accessories.
A simple comparison is that PALS is the interface, while MOLLE is the larger ecosystem.
| Term | Precise Meaning | Common Commercial Use |
|---|---|---|
| MOLLE | Modular load-carrying equipment system | Used for almost any modular tactical gear |
| PALS | Ladder-style attachment grid | Often called MOLLE webbing |
| MOLLE pouch | Removable module with compatible straps | Any pouch advertised for tactical webbing |
| MOLLE panel | Base platform accepting modules | May be sewn webbing or laser-cut slots |
| Attachment strap | Pouch component woven through PALS | May use webbing, polymer, or hook-and-loop |
The distinction matters when writing a technical specification. “MOLLE backpack” describes the product concept but does not explain how the attachment panel should be constructed.
A production document should identify whether the panel uses:
Traditional sewn webbing
Laser-cut laminated slots
A hybrid of webbing and cut slots
Internal PALS rows
A removable PALS board
A buckle-mounted modular panel
The document should then define geometry and material.
Commercial language is less precise because users usually search for phrases such as MOLLE backpack, MOLLE pouch, or MOLLE webbing. Using those familiar terms is reasonable as long as the product is built around a genuinely compatible attachment pattern.
The difference also helps explain why a bag can be MOLLE-style without belonging to an official issued system. Civilian and commercial manufacturers frequently use PALS-compatible geometry in their own backpacks and pouches.
Not all of them follow exactly the same tolerances. Some make webbing rows too narrow to save space. Others change the stitch interval for appearance. Laser-cut systems may use nonstandard slot shapes. Attachment straps differ in thickness, width, and locking design.
A product can therefore be conceptually compatible but practically difficult to use.
Physical compatibility testing should answer:
Can the strap enter the first row without excessive force?
Can it be woven through every intended row?
Does the final tab or snap close without stretching?
Does the pouch sit flat?
Can adjacent modules use the remaining columns?
Do the slots or rows deform after loading?
Does the pouch still fit after the fabric has been coated, laminated, or sewn into a curved panel?
These details determine real compatibility more reliably than a MOLLE label in a product description.
Where Is MOLLE Used?
MOLLE is used on tactical backpacks, load-bearing vests, plate carriers, belts, patrol bags, medical packs, vehicle panels, outdoor packs, equipment cases, and removable organizer systems.
Its use differs according to the platform.
On a backpack, MOLLE expands storage and separates quick-access equipment from the main compartment.
On a vest or carrier, it positions pouches around the user’s torso.
On a belt, it supports compact modules such as medical, utility, or tool pouches.
On a vehicle panel, it organizes equipment vertically and allows modules to transfer between the vehicle and a bag.
Inside a medical bag, it can hold removable treatment categories without exposing them on the exterior.
| Platform | Typical MOLLE Use | Main Design Priority |
|---|---|---|
| Tactical backpack | Utility, medical, bottle, or admin pouches | Balance and access |
| Plate carrier | Role-specific equipment | Body movement and reach |
| Duty belt | Compact immediate-access modules | Retention and comfort |
| Patrol bag | Internal or external organizers | Vehicle accessibility |
| Medical pack | Removable categorized pouches | Fast identification |
| Vehicle panel | Shared equipment modules | Secure mounting |
| Outdoor pack | Hydration and utility expansion | Weight control |
| Tool bag | Task-specific holders | Reinforced load support |
| Camera pack | Removable accessory modules | Padding and equipment protection |
| Emergency kit | Transferable response pouches | Simple inventory control |
A modular platform is most valuable when the equipment changes or needs to transfer. A fixed pocket may be lighter and simpler when the same item always remains in the same location.
For example, a permanently sewn bottle pocket may be better for a hiking day pack used in the same configuration every weekend. A removable bottle pouch makes more sense when the bag sometimes carries hydration and sometimes needs a narrow vehicle-compatible profile.
Internal MOLLE is useful when external discretion matters. A bag can maintain a clean commuter appearance while using removable medical, electronics, or tool modules inside.
Vehicle panels make it possible to mount equipment visibly and move a complete pouch to a vest or pack when needed. The attachment needs to resist vibration and sudden braking, not only walking.
Medical systems benefit from modularity because a pouch can represent a complete treatment group. It can be removed, used beside the patient, restocked, and returned without unpacking the main bag.
Tool systems benefit when one module contains everything for a defined repair. The user can remove the tool pouch while leaving clothing, documents, or other equipment in the base pack.
The decision should always compare modular value against additional weight and complexity. MOLLE is an excellent solution when configuration, replacement, transfer, or rapid category access matters. It is unnecessary when it merely imitates a tactical appearance.
How Does MOLLE Work?
MOLLE works by interlocking a pouch with the PALS grid on the bag. The pouch’s mounting straps alternate through attachment rows on both surfaces, creating a woven connection. This connection holds the pouch close, spreads its weight over several channels, and reduces bouncing, swinging, and outward separation.
The system relies on friction, geometry, and distributed load. It does not depend on one clip carrying all the weight. Every woven pass contributes to stability, and the final closure prevents the strap from withdrawing.
Correct installation may take longer than using a hook or carabiner, but the result is much more stable. A pouch clipped to one point can rotate freely. A woven pouch behaves more like an integrated part of the panel.
How Do MOLLE Straps Attach?
MOLLE straps attach by passing alternately through the PALS rows on the bag and the attachment rows or slots on the back of the pouch.
The pouch should first be positioned empty. Its attachment columns need to align with the selected columns on the bag. The user then starts at the top and works downward.
A practical attachment sequence is:
Place the pouch against the intended panel.
Check that it does not cover a zipper, handle, compression strap, or another critical opening.
Align every pouch strap with a PALS channel.
Pass each strap behind the highest usable row on the bag.
Bring the strap back through the next row or slot on the pouch.
Continue alternating between the bag and pouch.
Remove slack after every pass.
Use all available vertical rows.
Secure the final snap, tuck tab, hook-and-loop section, or polymer lock.
Fill the pouch and test movement.
The completed pouch should sit close to the bag with minimal space behind it.
| Installation Check | Correct Condition | Common Problem |
|---|---|---|
| Pouch alignment | Vertical and level | Pouch leans to one side |
| Strap path | Alternates between both surfaces | Strap runs behind bag rows only |
| Row use | All practical rows are engaged | Lower pouch section swings |
| Strap tension | Snug without panel distortion | Loose weave creates bouncing |
| Final closure | Fully engaged | Strap end works loose |
| Main-bag access | Zippers remain clear | Pouch blocks opening |
| Loaded position | Pouch remains flat | Contents pull it outward |
The straps should generally be woven together rather than completing one strap before beginning the next. Alternating between them helps keep the pouch aligned and prevents one side from becoming tighter.
The process can be difficult with new, stiff webbing. The user can compress the bag panel slightly and feed the strap in small sections. A blunt guide may help, but sharp tools should not be used because they can cut webbing or coatings.
The final closure varies. Traditional straps may use snaps. Other designs use reinforced tuck tabs, hook-and-loop, polymer clips, or locking ends. The closure should remain flat and should not sit where it presses against the user.
After loading, the pouch should be pulled downward, upward, outward, and side to side. The goal is not absolute rigidity, because textile systems naturally flex. The goal is controlled movement without detachment, excessive bounce, or panel distortion.
The attachment should be checked again after the first period of real use. New webbing can settle, and the user may discover that the pouch is too heavy or deep for the chosen position.
Why Must Straps Be Woven?
Straps must be woven because alternating between the bag and pouch distributes force and prevents the module from hanging from one row. The woven pattern creates several connected load points, keeping the pouch close to the base panel.
A strap passed through the bag webbing only does not create the same structure. The pouch body remains separated from the panel and can swing like a pendulum.
This movement has several consequences:
The equipment feels heavier because it moves away from the body.
The upper row carries most of the force.
The pouch rubs against the shell.
The mounting straps flex repeatedly.
The user’s balance changes during turns.
The pouch is more likely to snag.
| Attachment Method | Stability | Load Distribution | Recommended Use |
|---|---|---|---|
| Fully interwoven straps | High | Several rows and columns | Loaded tactical modules |
| Partially woven straps | Moderate to poor | Concentrated near top | Temporary light use only |
| Strap behind bag rows only | Poor | Mostly upper attachment | Incorrect installation |
| Single clip | Low | One point | Very light accessory |
| Carabiner | Low against swinging | One small point | Secondary retention |
| Buckle-mounted panel | Good when stabilized | Several anchor points | Fast module replacement |
| Hook-and-loop backing | Moderate | Broad surface contact | Internal lightweight modules |
The physics become more noticeable as pouch depth and weight increase. A shallow empty admin pouch creates limited leverage. A tall pouch containing a full bottle creates much more.
One liter of water weighs approximately one kilogram before the bottle and pouch are included. If that load hangs several centimeters away from the side of the bag, every step creates outward and lateral movement.
A correctly woven pouch reduces the distance between the load and base platform. The system also makes the pouch harder to tear away if it catches on a doorway, branch, seat, or piece of equipment.
Full weaving does not make poor placement acceptable. A dense pouch woven perfectly onto the outer front of a pack can still pull the bag backward. Attachment security and load positioning are separate decisions.
A useful evaluation asks:
Is the pouch securely attached?
Is its position appropriate for its loaded weight?
Is the attachment panel reinforced for that load?
Can the user still reach the necessary equipment?
Does the pouch interfere with movement or surrounding components?
The MOLLE weave solves the mechanical connection. It does not solve every design problem.
How Do You Secure the Ends?
MOLLE strap ends are secured through snaps, reinforced tuck tabs, hook-and-loop closures, locking polymer elements, or other retention methods designed to stop the strap from withdrawing through the weave.
The final closure should be engaged only after the strap has passed through every required row. Securing a partly woven strap does not compensate for missing attachment passes.
Traditional snap closures provide a clear mechanical connection. The snap should close without excessive stretching or twisting. If substantial force is needed, the webbing spacing, pouch height, or strap length may be incorrect.
Tuck tabs slide beneath a final row or into a retention sleeve. They create a low-profile finish and eliminate metal hardware, but the tab needs enough stiffness to remain secure.
Hook-and-loop closures are quick and adjustable, although dirt and fibers can reduce holding strength. They may also create noise.
Polymer locking straps can be durable and easy to clean, but they need compatible slot dimensions and sufficient flexibility for weaving.
| End-Securing Method | Advantage | Limitation |
|---|---|---|
| Snap closure | Clear positive retention | Can corrode or create pressure |
| Tuck tab | Low profile and quiet | Needs correct stiffness |
| Hook-and-loop | Fast and adjustable | Collects debris |
| Polymer lock | Durable and moisture resistant | May be difficult in tight slots |
| Removable clip | Fast replacement | Adds hardware and possible movement |
The retained end should not protrude. Loose strap tails catch on surrounding objects and can gradually pull out of the grid.
The closing point should also remain accessible. A snap hidden behind the bottom of a full pouch may be difficult to inspect. A tuck tab compressed against a seam may not engage fully.
For high-load modules, the final closure is not the primary source of strength. Most stability comes from the interwoven strap path. The closure stops the weave from reversing.
Secondary retention can be added when a detachable module has unusual weight or movement. A side bottle pouch may sit beneath a compression strap. A buckle-mounted medical panel may also use hook-and-loop backing. A tool pouch may include a lower stabilizing strap.
Extra retention should not block rapid access or create a complicated removal process. The correct level depends on the module’s role.
What Attachment Mistakes Occur?
The most common MOLLE attachment mistake is passing the straps through the bag rows without weaving them back through the pouch. Other mistakes include skipping lower rows, choosing the wrong columns, overloading the pouch, blocking bag functions, leaving strap ends unsecured, and placing heavy modules too far from the body.
| Attachment Mistake | Immediate Result | Long-Term Risk |
|---|---|---|
| No alternating weave | Pouch hangs away from panel | Webbing and fabric wear |
| Skipped lower rows | Bottom swings | Strap fatigue |
| Misaligned columns | Pouch twists | Uneven panel loading |
| Unsecured strap end | Strap begins withdrawing | Pouch detachment |
| Overfilled pouch | Closure and panel tension | Zipper or seam failure |
| Heavy front placement | Pack pulls backward | User fatigue |
| Single heavy side pouch | Lateral imbalance | Uneven shoulder load |
| Pouch over zipper | Main bag access reduced | Delayed retrieval |
| Excess external modules | Pack becomes wide | Snagging and vehicle interference |
| Incompatible strap | Forced installation | Slot or webbing damage |
Users often choose a pouch position while it is empty. After loading, the module may become much heavier and deeper than expected. Placement should always be reassessed with the real contents.
Another mistake is mounting pouches across curved panels. A rigid pouch cannot lie flat against a strongly curved side, leaving gaps at its edges. Flat structural zones provide better contact.
Some users rely on carabiners for primary attachment. A carabiner is useful for temporary lightweight equipment or secondary retention, but it creates a point load and allows swinging. It does not reproduce the stability of a woven MOLLE connection.
Pouches are also sometimes installed over compression straps. This may make the pouch difficult to use and prevent the bag from controlling a partial load.
The opposite mistake is routing the compression strap over a pouch that needs immediate access. The strap stabilizes the module but must be released before the pouch can open.
Good bag design anticipates these conflicts by separating the attachment grid from key openings and strap routes.
Product instructions can reduce installation errors. A simple diagram showing alternating weaving often adds more value than a long list of tactical features.
How Do You Remove a Pouch?
A MOLLE pouch is removed by emptying or supporting its contents, releasing the final closure, and reversing the woven strap path one row at a time. Pulling the loaded pouch directly away from the panel can damage the straps, webbing, slots, or base fabric.
The removal sequence is:
Place the bag on a stable surface.
Empty heavy or fragile contents when practical.
Release the snap, tab, lock, or hook-and-loop end.
Pull enough strap free to release the lowest row.
Work upward, alternating between the pouch and bag rows.
Keep the pouch aligned while removing multiple straps.
Inspect both attachment surfaces after removal.
Removing the pouch empty reduces tension and makes the process easier.
Straps should not be twisted aggressively. Polymer tabs may need to be flexed in the intended direction rather than pulled sideways. Snaps should be separated at the fastener rather than by yanking the webbing.
After removal, the user should inspect:
Webbing abrasion
Loose bar tacks
Elongated slots
Cracked laminate edges
Bent polymer tabs
Corroded snaps
Fabric whitening around stitch lines
Coating wear behind the pouch
Trapped dirt or moisture
The hidden area behind a pouch can retain dust, sand, mud, or water. Regular removal allows cleaning and early damage detection.
Frequently changed modules may be better suited to buckle, hook-and-loop, or removable-panel systems. MOLLE weaving favors attachment security over rapid daily removal.
That trade-off is central to understanding the system. MOLLE is not the fastest possible attachment method. It is a dependable method for integrating a pouch closely with a load-carrying platform.
The next step is choosing which MOLLE construction and pouch types best match the intended load, environment, and frequency of reconfiguration.
Which MOLLE Type Is Best?

The best MOLLE type depends on expected load, carrying duration, attachment frequency, repair needs, product weight, environmental exposure, and appearance. Traditional sewn MOLLE is generally the safest choice for heavy-duty use, repeated pouch changes, and broad compatibility. Laser-cut MOLLE offers a flatter, cleaner profile and can reduce bulk when the laminate is engineered correctly. Hybrid systems combine both approaches, placing lightweight laser-cut panels in low-load areas and sewn webbing where heavier modules require stronger support.
There is no universally superior option. A lightweight urban tactical pack does not need the same attachment construction as a military field rucksack. A medical bag may benefit from internal laser-cut or hook-and-loop organization, while an outdoor tool pack may need reinforced sewn webbing for dense equipment.
The decision should begin with the maximum loaded pouch weight, not the desired visual style. A panel holding gloves and an empty utility pouch experiences limited stress. A panel holding water, batteries, radios, medical equipment, or metal tools needs a stronger load path into the bag structure.
| MOLLE Type | Main Strength | Main Limitation | Best Application |
|---|---|---|---|
| Traditional sewn MOLLE | Durable and widely compatible | Adds weight and bulk | Military, field, tool, and heavy-duty bags |
| Laser-cut MOLLE | Flat, clean, and potentially lighter | Depends heavily on laminate quality | Urban tactical, medical, and lightweight packs |
| Hybrid MOLLE | Balances durability and weight | More complex to develop | Multi-purpose tactical bags |
| Internal MOLLE | Protects modules from snagging | Uses internal wall space | Medical, electronics, and discreet bags |
| Removable MOLLE panel | Allows complete layout changes | Adds buckles or backing hardware | Multi-role response systems |
A practical product may use different systems in different zones. Sewn webbing can support a full bottle pouch on the side, while laser-cut slots hold a lightweight admin module on the front. Internal loop panels can secure removable organizers without adding external bulk.
This kind of material and attachment mapping is usually more efficient than applying one construction to the entire bag.
Is Traditional MOLLE Stronger?
Traditional sewn MOLLE is often stronger for heavy and repeated use because woven webbing has excellent tensile strength, flex resistance, and abrasion durability. When it is stitched onto a reinforced panel and connected to structural seams, it can support loaded pouches while remaining relatively easy to inspect and repair.
The webbing itself is only one part of the system. Its strength must transfer through thread, base fabric, backing, and the main bag body. Strong webbing attached to a weak unsupported shell can pull the panel out of shape without the webbing ever breaking.
Traditional MOLLE performs particularly well under repeated bending. Pouch straps can be installed, removed, and reinstalled many times without cutting directly against a laminated slot edge. Webbing also tolerates dirt and rough handling reasonably well, although trapped grit can still cause abrasion.
The construction offers visible inspection points. Loose stitches, damaged rows, frayed edges, and distorted channels can usually be identified quickly. Localized repairs may be possible by replacing a webbing section or resewing a stitch interval.
| Strength Factor | Traditional MOLLE Performance | Design Requirement |
|---|---|---|
| Tensile loading | Strong with quality webbing | Secure structural connection |
| Repeated pouch changes | Generally durable | Controlled spacing |
| Flexing | Handles bending well | Suitable webbing stiffness |
| Abrasion | Strong but not immune | Inspect contact areas |
| Field repair | Relatively practical | Accessible stitching |
| Heavy modules | Suitable when reinforced | Wide attachment footprint |
| Production consistency | Reliable with sewing guides | Accurate row placement |
The main disadvantage is material accumulation. A full front panel may use several meters of webbing. Add side panels, belt rows, and shoulder attachment points, and the empty bag weight increases.
Traditional MOLLE can also trap dirt between the webbing and shell. Mud, vegetation, and fine sand may collect in the channels. Cleaning requires removing the pouches and brushing or rinsing behind the rows.
The system creates a distinctly tactical appearance. That is appropriate for military and field products but may be undesirable for urban bags, professional medical products, or discreet travel gear.
Strength also depends on row direction and pouch shape. A tall pouch attached across many rows distributes force well. A short, dense pouch using only one or two rows concentrates stress.
Traditional webbing is usually the better option when:
The pouches are heavy.
Modules remain attached for long periods.
The product will be used against rough surfaces.
Field repair matters.
Third-party pouch compatibility is a priority.
The bag can accept a slightly higher empty weight.
It is not automatically necessary for lightweight organizers, small personal pouches, or bags where a smooth exterior is more important than maximum load capability.
Is Laser-Cut MOLLE Lighter?
Laser-cut MOLLE can be lighter because it removes separate rows of sewn webbing and integrates the attachment slots into one laminated panel. The actual weight saving depends on the laminate composition, panel size, backing, reinforcement, and number of layers.
A dense three-layer laminate covering the entire front of a pack may weigh as much as or more than a carefully limited webbing grid. The claim that laser-cut construction is always lighter should therefore be verified through physical measurement.
The greatest advantage is often reduced profile rather than dramatic weight reduction. A flat cut panel sits close to the shell and creates fewer raised layers. This gives the bag a cleaner appearance and reduces minor snag points.
Laser-cut panels can also support custom slot patterns. Designers can remove unused material, create ventilation openings, integrate logo shapes, or align the panel with the bag geometry.
However, every cut removes material. Slots must be arranged so enough laminate remains between them to carry the load. Decorative cutouts should not interrupt important load paths.
| Laser-Cut Design Variable | Effect on Performance |
|---|---|
| Laminate thickness | Controls stiffness and durability |
| Slot length | Determines strap compatibility |
| Slot width | Affects movement and installation |
| Corner radius | Reduces stress concentration |
| Material bridge width | Carries force between slots |
| Backing construction | Supports outward loading |
| Laser temperature | Affects edge hardness and bonding |
| Panel coverage | Controls weight and flexibility |
Laser-cut systems perform best when the laminate is developed specifically for repeated flexing and attachment. A simple coated fabric may not have enough structure to hold clean slots. A rigid sheet may crack when curved around a pack.
The panel should be tested after repeated pouch installation. Soft woven straps rub against the slot edges. Rigid polymer attachment tabs create concentrated pressure. The slot should not lengthen, curl, split, or separate between layers.
Temperature and humidity testing are also important. A laminate that remains stable in a climate-controlled room may soften or delaminate inside a hot vehicle. Cold conditions can make some materials stiffer and more vulnerable to cracking.
Laser-cut MOLLE is well suited to:
Low-profile tactical backpacks
Police and security bags
Urban outdoor packs
Medical bags
Lightweight response products
Interior modular panels
Products with a modern technical appearance
It is less appropriate when the laminate has not been validated for the intended weight or when users require simple field repair.
Are Hybrid Panels Practical?
Hybrid MOLLE panels are practical because they combine the strengths of sewn webbing and laser-cut construction. The designer can use traditional webbing where heavy loads are expected and laser-cut slots where a lower profile is more valuable.
A common hybrid layout might include:
Sewn side webbing for bottle and radio pouches
Laser-cut front slots for an admin or medical module
Internal loop panels for removable organizers
Direct webbing anchors for compression equipment
This avoids treating every pouch as if it carries the same load.
Hybrid construction can also integrate a laser-cut face with hidden webbing reinforcement behind it. The outer panel provides the slot interface, while internal structural tape transfers force into major seams.
| Hybrid Zone | Recommended System | Reason |
|---|---|---|
| Lower front panel | Sewn webbing or reinforced laminate | Supports heavier utility modules |
| Upper front panel | Laser-cut MOLLE | Keeps profile clean |
| Side bottle area | Sewn webbing | Handles vertical water load |
| Interior wall | Loop or laser-cut panel | Supports lightweight organizers |
| Compression anchor | Direct structural webbing | Carries tension into main seams |
| Removable medical panel | Buckles plus hook-and-loop | Combines speed and stability |
The main challenge is complexity. Different materials require different cutting, sewing, reinforcement, and inspection methods. A hybrid bag needs clear technical documentation so production teams understand which panel receives which construction.
Color coordination can also become more difficult. Laminated nylon, polyester shell fabric, woven webbing, zipper tape, and molded hardware may appear slightly different even when they share the same color name.
The designer must avoid visual clutter. Combining every available attachment method can make the product confusing. Hybrid construction should simplify performance, not showcase manufacturing techniques.
A good hybrid system is almost invisible to the user. Heavy pouches remain stable, lightweight modules sit flat, and the bag does not carry unnecessary material.
It is particularly valuable for products that need to serve several environments. A police response pack may require a low-profile front but strong side attachments. A rescue bag may need a removable medical panel while keeping the main shell light. An outdoor pack may combine bottle webbing with a clean front compression cradle.
Which Type Is Easier to Repair?
Traditional sewn MOLLE is generally easier to repair because the webbing and stitching are visible, familiar, and localized. A damaged row may be resewn or replaced without changing the entire panel, depending on access to the bag construction.
Laser-cut MOLLE can be harder to repair because the slot is part of a larger laminated sheet. If a slot tears or the laminate delaminates, attaching a patch may alter the spacing, flexibility, or appearance. Replacing the full panel may require opening several seams.
| Repair Issue | Sewn MOLLE | Laser-Cut MOLLE |
|---|---|---|
| Loose stitch | Can often be resewn | Not usually applicable |
| Frayed attachment row | Webbing section may be replaced | Slot edge cannot be replaced separately |
| Local panel tear | Backing patch may support repair | Patch may block nearby slots |
| Delamination | Not applicable to standard webbing | May require full-panel replacement |
| Field repair | More practical | Usually temporary only |
| Appearance after repair | Visible but functional | Difficult to restore cleanly |
Repairability should be considered according to product service expectations. A military or industrial bag used far from repair facilities may benefit from traditional webbing and replaceable hardware.
A consumer urban pack may prioritize low weight and appearance, with major repairs handled through product replacement or factory service.
Hybrid panels can improve repair strategy. High-risk zones use replaceable or resewable webbing, while lower-load laser-cut areas retain a clean profile.
The construction order also affects repair access. Webbing sewn before lining closure may be difficult to reach later. Designers can create access panels or use attachment methods that allow selected parts to be replaced.
A repair should restore the load path, not merely cover the damaged area. Sewing a small patch over a torn slot may hide the problem while concentrating force around the patch edge.
For product programs with long service expectations, manufacturers can retain replacement buckles, webbing, zipper pulls, and selected pouch modules. Modular pouches already offer a repair advantage because the damaged module can be replaced independently from the base bag.
Which System Fits Heavy Loads?
Heavy loads are best supported by traditional sewn webbing, direct structural anchors, reinforced hybrid panels, or internally supported modular systems. The attachment should connect to broad reinforcement and major seams rather than depending on one surface layer.
Heavy equipment includes:
Full water containers
Battery packs
Radio systems
Metal tools
Large medical modules
Technical hardware
Dense ammunition or protective equipment used by authorized personnel
The load should be evaluated dynamically. A two-kilogram pouch does not create only two kilograms of force when the wearer runs or drops the bag. Movement multiplies stress and changes its direction.
| Heavy-Load System | Best Use | Required Support |
|---|---|---|
| Multi-row sewn MOLLE | Dense external pouch | Backed structural panel |
| Direct webbing cradle | Tool or equipment carrier | Connection to main seam |
| Buckle and webbing combination | Removable heavy module | Secondary stabilizer |
| Internal framed module | Batteries and electronics | Close-to-back support |
| Reinforced side pouch pair | Water or specialist gear | Balanced left-right load |
| Compression platform | Bulky non-dense equipment | Multiple controlled straps |
Heavy equipment should use a wide attachment footprint. A narrow vertical strap cannot control a broad pouch filled with dense contents.
Internal storage is often more efficient. Place the densest equipment close to the spine, then use external MOLLE for lighter items requiring quicker access.
The carrying system must also match the expanded load. Adding heavy MOLLE pouches to a lightweight day pack does not upgrade the shoulder straps, frame, hip belt, or base seams.
A custom bag should define:
Maximum main-compartment load
Maximum weight per side panel
Maximum front-panel module weight
Maximum combined external load
Expected dynamic activity
These values guide reinforcement rather than leaving the user to assume that every row has unlimited capacity.
Which Pouches Fit MOLLE?
MOLLE pouches fit when their attachment width, height, strap construction, and locking system match the PALS grid on the bag. Many products follow common dimensions, but fit is not completely universal. A pouch may be mechanically attachable while remaining too wide, too deep, too heavy, or poorly positioned for the intended bag.
The best pouch is selected according to contents and access rather than empty appearance. It should protect the equipment, maintain internal organization, and remain stable after loading.
Common pouch categories include:
IFAK and medical pouches
Admin organizers
General utility pouches
Bottle carriers
Radio holders
Tool pouches
Electronics modules
Dump or temporary storage pouches
Hydration and sustainment pouches
Each category creates different loads and opening requirements.
Are MOLLE Pouches Universal?
MOLLE pouches are broadly cross-compatible when both the pouch and bag follow standard PALS spacing, but they are not guaranteed to fit every platform perfectly. Commercial variations in row spacing, webbing thickness, laser-cut slot size, strap stiffness, and panel curvature can affect installation.
Universal compatibility should be understood as a design goal, not an automatic fact.
| Compatibility Issue | What Happens | How to Verify |
|---|---|---|
| Rows too close | Strap cannot alternate properly | Measure vertical spacing |
| Columns too narrow | Pouch straps do not align | Test attachment footprint |
| Thick laminate | Standard straps become difficult to pass | Install final pouch sample |
| Short pouch straps | Final lock cannot close | Test all vertical rows |
| Curved panel | Pouch edges lift | Load pouch on completed bag |
| Rigid attachment tab | Slot cannot flex around it | Test exact locking hardware |
| Adjacent seam | Blocks one channel | Review panel drawing |
| Oversized pouch body | Covers zippers or straps | Check complete exterior dimensions |
A pouch advertised as two columns wide may have a body wider than its attachment footprint. It can occupy neighboring space and prevent another pouch from fitting beside it.
Laser-cut panels may create more friction than woven webbing. A soft strap that passes easily behind a standard row may be difficult to feed through a thick slot.
Pouch height also matters. A four-row pouch cannot be mounted properly on a panel providing only three usable rows. Leaving the lowest row unsupported increases movement.
The final closure system should match the panel. Snap straps need enough length to close after complete weaving. Polymer tabs need slots with suitable dimensions. Tuck systems need a final row positioned correctly.
For brands developing custom bags intended to accept third-party pouches, compatibility testing should include several common reference products rather than one factory-made pouch.
The test should confirm:
Installation without tools
Complete strap weaving
Final closure security
Loaded stability
Access to nearby zippers
Use of adjacent columns
Removal without panel damage
This is more reliable than relying on the MOLLE label alone.
How Many Columns Are Needed?
The number of columns needed depends on the pouch width, loaded weight, shape, and required stability. Small tool or flashlight pouches may use one column. Compact utility pouches commonly use two or three. Larger medical, admin, or sustainment pouches may need four to six or more.
A wider footprint distributes load across more vertical stitch channels. This reduces rotation and panel distortion.
| Pouch Type | Common Column Range | Main Load Character |
|---|---|---|
| Flashlight or narrow tool pouch | 1 | Light and vertical |
| Radio pouch | 1–2 | Dense and tall |
| Compact utility pouch | 2–3 | Mixed equipment |
| Bottle pouch | 2–3 | Dense vertical load |
| Small IFAK | 2–4 | Medium dense load |
| Admin pouch | 3–5 | Flat lightweight items |
| Large medical pouch | 4–6 | Broad organized contents |
| Sustainment pouch | 4–6 | Bulky mixed load |
Column count should not be reduced solely to save panel space. A pouch that is physically broad but mounted with two narrow straps may rotate or sag.
The pouch body should align with the attachment footprint. If the body extends far beyond both sides of the straps, the outer edges may move.
Vertical rows are equally important. Tall pouches require attachment down their full height. A bottle pouch connected only at the top swings at the bottom.
The available panel should be planned as a grid. Designers can use paper or digital module blocks to study how several pouches fit together before sampling.
For example, a six-column front panel might hold:
One four-column medical pouch and one two-column utility pouch
Two three-column pouches
One full six-column removable panel
The choice affects access, balance, and future flexibility.
Empty columns also need value. Leaving space can preserve a zipper path, allow compression, or support future customization. Complete coverage is not necessary.
What Is an IFAK Pouch?
An IFAK pouch is a compact Individual First Aid Kit module designed to keep essential medical supplies organized and accessible. The contents should follow the user’s training and approved procedures, while the pouch should provide clear identification, secure retention, and practical access.
Common formats include:
Fixed zippered pouches
Tear-away medical modules
Pull-out inserts
Clamshell organizers
Roll-open pouches
Compact belt or pack-mounted kits
| IFAK Design | Main Advantage | Main Limitation |
|---|---|---|
| Fixed MOLLE pouch | Secure and simple | May be difficult for wearer to reach |
| Tear-away pouch | Moves quickly to the treatment area | Needs secure backing retention |
| Pull-out insert | Exposes contents rapidly | Insert may release if poorly retained |
| Clamshell format | Clear full layout | Requires room to open |
| Roll-open organizer | Displays several categories | Slower to close and repack |
| Compact vertical pouch | Saves panel width | Can become deep and crowded |
A tear-away design commonly uses hook-and-loop backing with a securing strap or buckle. The backing holds the pouch during normal movement, while the secondary retention prevents accidental removal.
The release tab should be large enough for gloved use but not so exposed that it catches on surrounding equipment.
Internal supplies need retention. Elastic loops, mesh covers, zippered pockets, and divided sleeves prevent the contents from spilling when the pouch opens vertically.
The interior should use contrasting colors or clear labeling where appropriate. In poor light, a completely black interior can make small packages difficult to identify.
The pouch dimensions should be based on actual approved supplies. Generic elastic rows may look organized but fail to fit real packaging.
Medical items can be sensitive to water, heat, crushing, and expiration. The pouch should protect them without becoming excessively rigid or slow to open.
An IFAK should also be easy to inventory. Transparent pockets, labeled sections, or a removable checklist can reveal missing items before use.
The pouch alone does not create readiness. Correct placement, suitable contents, user training, and routine inspection are equally important.
Which Utility Pouches Help?
Utility pouches help when they group a specific task, protect loose equipment, or provide access that the main compartment cannot. A general-purpose pouch becomes useful only when its contents are defined.
Common utility categories include:
Repair kit pouch
Electronics organizer
Glove and protective-item pouch
Navigation pouch
Fire-starting or outdoor support module
Camera accessory pouch
Communication cable organizer
Small tool pouch
| Utility-Pouch Style | Best Contents | Recommended Feature |
|---|---|---|
| Flat zip pouch | Documents and cables | Internal sleeves |
| Box-shaped pouch | Mixed equipment | Structured sides |
| Vertical utility pouch | Radio accessories or bottle-shaped items | Upper retention |
| Tool organizer | Repair equipment | Elastic loops and reinforced base |
| Mesh-front pouch | Lightweight visible supplies | Protected location |
| Padded module | Electronics and optics | Foam and soft lining |
| Roll organizer | Small categorized components | Secure closure |
| Expandable pouch | Temporary mixed items | Compression control |
The pouch should match its contents. A deep empty cavity creates clutter. A highly divided organizer may be too restrictive when equipment changes.
Utility pouches should not become a hiding place for items that have no defined role. Regular inspection is easier when every module has a clear category.
Dense tools need reinforced bases and internal retention. Electronics need impact protection and separation from water. Cables need loops that prevent tangling without bending connectors sharply.
Opening direction matters. A clamshell utility pouch attached vertically should use internal covers so its contents do not fall out.
The exterior closure should remain protected from impact. A zipper placed directly on the pouch’s outermost edge may strike the ground when the bag is set down.
Removable utility pouches create useful transfer. A repair module can move from the main pack to a work site. An electronics module can transfer between a patrol bag and an office case.
The best utility pouch reduces search time and equipment movement without becoming a second unorganized main compartment.
Are Bottle Pouches Compatible?
Bottle pouches are compatible with MOLLE when their mounting footprint fits the available grid and their attachment is strong enough to support the full container. Compatibility should be tested while the bottle is filled because water creates a dense, moving load.
One liter of water weighs approximately one kilogram. Add the bottle and pouch, and the total may exceed 1.2 kilograms.
A bottle pouch should therefore use:
A reinforced base
Several vertical attachment rows
A sufficiently wide mounting footprint
Upper bottle retention
Drainage
A closure that fits the expected bottle diameter
| Bottle-Pouch Design | Main Benefit | Main Risk |
|---|---|---|
| Open-top elastic pouch | Fast bottle access | Bottle may escape |
| Flap-covered pouch | Strong retention | Slower access |
| Shock-cord top | Adjustable diameter | Elastic can wear |
| Zippered insulated pouch | Temperature moderation | Added bulk and drying time |
| Mesh bottle carrier | Drainage and low weight | Snagging and limited protection |
| Solid Oxford pouch | Abrasion protection | Can retain spilled water |
| Collapsible pouch | Low profile when empty | Less structural support |
The pouch should not rely only on a tight fabric fit. Bottles change diameter and surface texture. Condensation or rain can reduce friction.
An upper strap or adjustable cord prevents the bottle from falling when the user bends forward. A side compression strap can provide additional retention if it does not block access.
The base should use abrasion-resistant fabric or a reinforcement layer. A full bottle repeatedly impacts the lower panel during walking.
Drainage is necessary because bottle pouches are exposed to leaks, rain, and condensation. A small eyelet, mesh zone, or controlled opening allows water to escape.
Placement affects comfort. A full bottle on one side should be balanced with similar weight on the opposite side or carried internally near the spine.
Bottle pouches also increase width. A two-bottle configuration may be balanced but inconvenient in narrow vehicles or dense vegetation. Removable or collapsible designs allow the user to reduce the profile.
Compatibility should include the intended container, not just the MOLLE grid. The pouch may attach perfectly while failing to fit the bottle securely.
The most effective MOLLE pouch is not the one that fills an empty panel. It is the one that gives a defined equipment group the right balance of access, protection, retention, and weight control.
How Should MOLLE Gear Be Arranged?

MOLLE gear should be arranged according to weight, access priority, body movement, task sequence, and the shape of the bag. Heavy modules belong close to the wearer’s back and near the centerline. Frequently used pouches should remain easy to reach without blocking zippers, compression straps, handles, or hydration routing. Lightweight modules can sit farther forward, while side pouches should be balanced to prevent the pack from pulling unevenly.
The best arrangement is rarely the one that fills every available row. Empty MOLLE space is not wasted space. It preserves compression, reduces snagging, and gives the user room to adapt the bag later. A clean setup with three well-positioned pouches usually performs better than a pack covered with modules that duplicate functions or interfere with one another.
A useful arrangement process begins with the complete equipment list. Each item should be grouped into one of four categories:
Heavy and dense equipment
Urgent-access equipment
Frequently used equipment
Low-priority or bulky equipment
Heavy equipment should normally be packed internally. Urgent and frequent-access equipment may justify external pouches. Bulky but lightweight gear can sit under compression panels or in expandable pockets.
| Equipment Category | Preferred Position | Main Reason |
|---|---|---|
| Water, batteries, and metal tools | Close to back or low central zone | Reduces outward leverage |
| IFAK or medical module | Reinforced front or accessible side | Supports rapid identification |
| Radio and communication gear | Upper side close to body | Maintains cable and antenna access |
| Admin items | Upper front | Lightweight and frequently used |
| Rain gear | Front stretch pocket or lower quick-access area | Easy retrieval during weather changes |
| Spare clothing | Main compartment or lower pouch | Bulky but relatively light |
| Repair kit | Internal side or low utility pouch | Keeps dense tools controlled |
| Food and snacks | Top or upper internal zone | Frequent but not immediate access |
A modular setup should then be tested as one complete system. It is not enough to check each pouch separately. A medical pouch may fit the front panel, and a bottle pouch may fit the side panel, yet together they can change the bag’s center of gravity, opening path, and carrying comfort.
Where Should Heavy Gear Go?
Heavy gear should be kept close to the wearer’s spine, usually in the middle section of the main compartment. When a dense module must be mounted externally, it should sit close to the bag’s structural seams, use a broad attachment footprint, and remain near the vertical centerline.
The farther weight sits from the body, the more leverage it creates. This is why a one-kilogram tool pouch on the outer front of a pack can feel heavier than the same pouch placed internally against the back panel.
The user compensates for outward leverage by leaning forward. Over time, this can increase shoulder pressure, neck fatigue, and lower-back discomfort. The bag may also swing more during rapid movement.
Heavy side loads create a different problem. They pull the pack laterally. A full water bottle on one side and a lightweight glove pouch on the other do not create a balanced system.
| Heavy Module | Better Position | Poor Position | Main Risk |
|---|---|---|---|
| Water pouch | Internal sleeve or balanced side | Single outer side | Lateral imbalance |
| Battery module | Internal close-to-back zone | Upper front | Backward pull |
| Metal tool pouch | Low central or reinforced side | High side panel | Swinging and rotation |
| Radio system | Upper internal or close side | Outer front | Cable and antenna interference |
| Dense medical pouch | Reinforced mid-front | High loose panel | Top-heavy movement |
| Food and cooking kit | Internal middle zone | Hanging from lower exterior | Unstable swinging |
Heavy pouches also need internal organization. Several metal items collecting at the bottom of one pouch create a concentrated mass. Elastic loops, dividers, and fitted sleeves distribute the contents and reduce impact.
A wide attachment footprint improves control. A heavy pouch mounted across four columns generally distributes force better than one attached through two narrow straps.
However, a wider footprint does not solve poor placement. A broad pouch on the far outer front still creates leverage. Width spreads the panel load, but it does not move the weight closer to the body.
The base pack must also support the expanded load. Adding several dense MOLLE modules to a lightweight day pack may exceed the design capacity of the shoulder straps, back panel, and handle.
The most efficient rule is simple: dense gear goes inside whenever possible; external MOLLE should prioritize access, modular transfer, and equipment separation.
What Belongs on the Front?
The front of a MOLLE bag is best suited to lightweight, quick-access, or clearly identified modules. Typical examples include a compact IFAK, admin pouch, gloves, notebook, rain cover, map, or small utility kit.
The front panel is usually the farthest point from the wearer’s back. Dense items placed there create the greatest leverage. This is why a front pouch should be evaluated by loaded weight, not empty size.
A medical pouch may deserve front placement because visibility and access are important. Even then, its depth should remain controlled, and the mounting panel should be reinforced.
| Front Module | Suitable? | Reason |
|---|---|---|
| Compact IFAK | Yes | Fast identification and access |
| Flat admin pouch | Yes | Lightweight and organized |
| Gloves or protective equipment | Yes | Frequent use |
| Rain cover | Yes | Light and weather-related |
| Heavy battery pouch | Usually no | Moves weight too far outward |
| Large metal tool pouch | Usually no | Creates leverage and impact risk |
| Bulky clothing pouch | Sometimes | Light but may block access |
| Large sustainment pouch | Limited use | Adds depth and affects balance |
Front pouch depth matters. A shallow organizer may add only a few centimeters. A deep box-shaped pouch can turn a compact backpack into a bulky platform that catches on doors, branches, vehicle seats, and storage racks.
The front panel should remain clear enough for the main bag to open. A large pouch can prevent a clamshell backpack from lying flat. It may also block access to a secondary compartment or cover the ends of compression straps.
The pouch should not become the first point of ground contact when the bag is set down. A protruding front module may expose its zipper, label, and contents to abrasion.
Removable front panels can solve some of these problems. One panel can carry medical supplies, another communication gear, and another remain empty for a low-profile setup.
The panel connection may use buckles, hook-and-loop, MOLLE straps, or a combination. Heavy panels need secondary retention to prevent movement.
A good front layout usually contains one high-priority module and perhaps one lightweight organizer. The front should not become a storage wall for every item that does not fit elsewhere.
Which Pouches Fit the Sides?
Side MOLLE panels are well suited to narrow vertical modules such as bottle carriers, radio pouches, tripod holders, tool sleeves, and compact utility pouches.
The side location provides access and preserves front-panel space, but it increases overall width. This can interfere with arm movement, vehicle access, doorways, and dense vegetation.
Side pouches should remain narrow and close to the shell.
| Side Pouch | Best Use | Necessary Control |
|---|---|---|
| Bottle pouch | External hydration | Upper strap and reinforced base |
| Radio pouch | Communication equipment | Antenna and cable clearance |
| Tripod holder | Long narrow equipment | Upper and lower retention |
| Tool sleeve | Compact field tools | Puncture-resistant backing |
| Utility pouch | Task-based supplies | Controlled depth |
| Detachable sustainment pouch | Temporary capacity | Balanced opposite-side load |
| Fold-flat pouch | Occasional storage | Secure collapsed position |
A bottle pouch is one of the most demanding common side modules because water is dense. A full one-liter bottle creates roughly one kilogram of load before the pouch weight is included.
The bottle should sit deep enough to avoid falling out and use an upper strap, elastic cord, flap, or compression webbing for secondary retention. Drainage is also important because bottle pockets are exposed to rain, condensation, and leaks.
Radio pouches need enough clearance for the antenna, controls, and cables. The pouch should not force the antenna into the wearer’s arm or interfere with the shoulder strap.
Long tools or tripod legs require two-point retention. A lower pocket alone does not control the upper section. A side compression strap can stabilize the item, provided it remains easy to use.
Side pouches should be tested while the user walks and climbs. A tall pouch that looks well positioned on a table may strike the elbow during movement.
The opening direction must also make sense. A zipper that opens toward the main bag may be difficult to reach. An open top should not allow contents to fall when the wearer bends.
A modular side system should be removable or collapsible when not needed. This restores a narrower profile and reduces snagging.
How Do You Balance the Load?
Load balance requires equalizing weight from left to right, keeping dense equipment close to the back, and avoiding excessive weight at the top or outer front.
The user should first pack the internal compartment, then add external modules. Trying to correct a poorly organized interior with external pouches usually creates more imbalance.
A practical balance check considers three axes.
Left to right: Does one side carry more weight?
Front to back: Is dense equipment too far from the spine?
Top to bottom: Is the bag top-heavy or sagging?
| Balance Problem | User Experience | Recommended Correction |
|---|---|---|
| Heavy right-side pouch | Bag pulls left shoulder upward | Add similar left-side weight or relocate |
| Dense front module | Pack pulls backward | Move item internally |
| Heavy upper pouch | Bag feels unstable during turns | Lower the module |
| Heavy bottom load | Pack sags and strikes lower back | Move weight to middle zone |
| Loose internal tools | Sudden shifting and noise | Add retention and dividers |
| Empty main bag with full external pouches | Shell collapses outward | Repack or add structure |
The left and right sides do not need identical equipment. They need similar total loaded weight.
For example, a one-liter bottle on one side may be balanced by a radio and battery module on the other. The user should weigh or estimate the complete modules rather than judging from size.
Compression straps improve balance by drawing the internal load toward the back. They should remain accessible after pouches are attached.
A modular pouch should not cover the strap that stabilizes the main compartment. If it does, the attachment layout needs revision.
The bag should be tested through movement:
Walk at normal speed.
Walk quickly.
Climb stairs.
Turn sharply.
Kneel and stand.
Enter and exit a vehicle.
Lift the bag by the handle.
A balanced load should move with the wearer rather than continuing in a different direction.
The pack can also be placed upright on a flat surface. If it immediately falls to one side, the lateral imbalance is obvious. If it falls forward, the front load may be excessive.
Body shape changes the result. A configuration that works for one user may sit differently on another. Adjustable shoulder straps and torso fit help, but they do not eliminate the need for correct load arrangement.
Does MOLLE Add Too Much Bulk?
MOLLE can add too much bulk when external pouches duplicate internal storage, extend far from the shell, or fill spaces without a clear function. The webbing itself adds some weight and thickness, but the larger effect comes from the pouches, closures, straps, and contents attached to it.
A modular system is usually less volume-efficient than one integrated compartment. Every separate pouch needs its own walls, zipper, binding, reinforcement, and attachment hardware.
| Source of Bulk | Effect | Better Approach |
|---|---|---|
| Deep front pouches | Increase outward leverage | Use shallow organizers |
| Large side modules | Increase width | Use narrow or collapsible pouches |
| Overlapping pouches | Block openings | Define dedicated attachment zones |
| Long loose straps | Create snag points | Add strap keepers |
| Permanently empty modules | Add dead weight | Make pouches removable |
| Thick padding in every pouch | Reduces usable capacity | Pad only fragile equipment |
| Full MOLLE coverage | Adds webbing and labor | Use partial panels |
Bulk affects more than appearance. A wider pack may not fit behind a vehicle seat. A deep front pouch can catch on a doorway. A low pouch can strike the user’s legs. An overloaded exterior may make the bag difficult to store.
The configured dimensions should be measured, not just the base-bag dimensions. A 30-centimeter-wide bag can become more than 40 centimeters wide after side pouches are installed.
Low-profile MOLLE systems use shallow laser-cut panels and flat organizers. They work well for urban, vehicle-based, and professional applications where a clean exterior matters.
Compression can reduce the profile of soft, partly filled pouches. It does little for rigid equipment, bottles, or padded electronics modules.
The user should periodically remove unused modules. Tactical bags often gain weight over time because accessories are added but rarely removed.
A useful question is: does this pouch provide access, protection, or transferable organization that the main compartment cannot provide? When the answer is no, the pouch is probably adding bulk without enough value.
Which Materials Make MOLLE Durable?
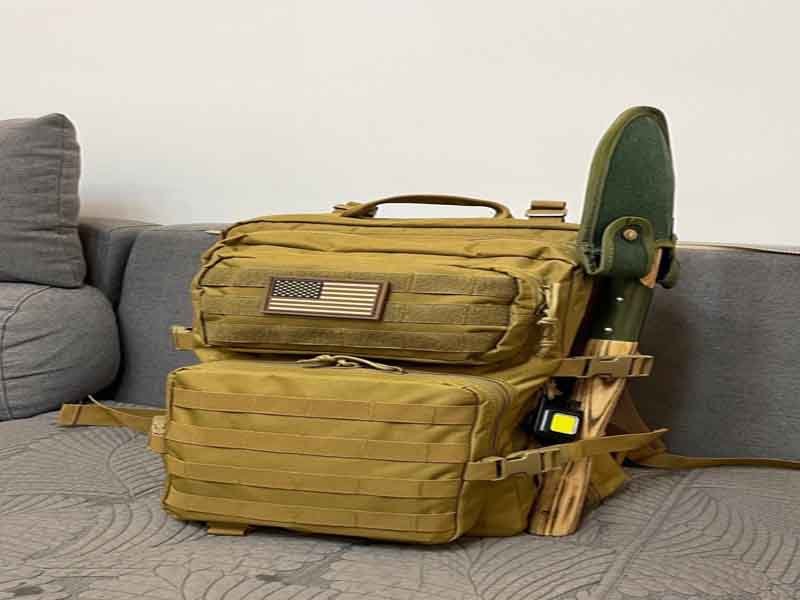
Durable MOLLE construction depends on the complete material system: shell fabric, webbing or laminate, reinforcement, thread, coating, backing, and structural seams. High-tenacity nylon is often used for demanding field products, while polyester Oxford offers stable structure, colorfastness, and strong value for patrol, outdoor, medical, and general tactical bags. Webbing must remain dimensionally consistent, reinforcement must spread load, and coated fabrics must protect against weather without becoming excessively stiff.
A MOLLE panel experiences more complex stress than an ordinary backpack shell. It receives downward pouch weight, outward leverage, repeated flexing, installation abrasion, and impact.
The material specification should therefore match the panel’s intended load. A front panel carrying a light admin pouch does not need the same construction as a side zone holding a full water bottle.
Material mapping is usually better than using one heavy fabric throughout. A lighter shell can reduce overall weight, while heavy reinforcement protects high-load zones.
Is Nylon Better Than Polyester?
Nylon is often preferred for demanding MOLLE systems because it provides strong abrasion resistance, tear performance, and flexibility. Polyester is often preferred for UV stability, low moisture absorption, dimensional consistency, and controlled cost.
The correct choice depends on the product rather than the tactical appearance.
| Material Factor | Nylon | Polyester |
|---|---|---|
| Abrasion resistance | Often excellent | Good to strong |
| Tear resistance | Strong in high-tenacity grades | Depends on yarn and weave |
| UV resistance | Moderate without treatment | Generally better |
| Moisture absorption | Higher | Very low |
| Flexibility | Often softer | Often more structured |
| Color stability | Good | Commonly excellent |
| Cost | Frequently higher | Often more economical |
| Printing | Good with compatible methods | Broad options |
A military field pack dragged across rough surfaces may justify high-tenacity nylon. A patrol bag stored in a vehicle and exposed to sunlight may benefit from polyester Oxford.
The fiber name alone is not enough. A tightly woven, well-coated polyester can outperform a loose low-grade nylon. Fabric weight, weave density, yarn quality, and coating matter.
Nylon often feels more flexible, which can make pouch installation easier and allow the bag to compress. Polyester can provide greater structure, helping patrol or equipment bags retain shape.
Moisture absorption is frequently misunderstood. Polyester fibers absorb very little water, while nylon absorbs more. This does not mean a polyester bag is waterproof. Water can still pass through the weave, seams, zipper openings, and needle holes.
Color matching is another issue. A nylon shell, polyester webbing, molded buckle, and coated zipper tape can all appear slightly different even when specified as the same color. Physical approval is necessary.
The best material is the one that delivers the required performance at the correct weight, cost, and appearance.
Which Denier Is Strong Enough?
Denier describes yarn linear density, not complete fabric strength. Higher denier usually means thicker yarn, but strength also depends on fiber, weave, yarn count, coating, and fabric weight.
For MOLLE tactical bags, 500D nylon and 600D polyester are common main-shell references. Heavier 900D or 1000D fabrics may be used in reinforced panels, bases, tool zones, and severe-duty products.
| Denier Range | Typical MOLLE Use | Main Consideration |
|---|---|---|
| 200D–300D | Lining and internal organizers | Not suitable for heavy external loads |
| 400D–500D | Lightweight technical packs | Strong when strategically reinforced |
| 600D | General tactical and patrol bags | Practical structure and value |
| 800D–900D | Heavy utility panels | Added weight and stiffness |
| 1000D | Severe-duty external zones | Strong but often excessive for full bag |
| Above 1000D | Industrial transport equipment | Limited use in mobile packs |
A high-quality 500D nylon can provide better strength-to-weight performance than a low-quality 1000D fabric. The technical specification should include more than the denier number.
Useful information includes:
Fiber type
Yarn tenacity
Fabric weight
Weave construction
Coating type
Coating weight
Colorfastness
Abrasion requirement
Tear requirement
Seam-slippage requirement
Using heavy material everywhere may seem safe, but it creates problems:
Higher empty weight
Thick seam stacks
Poor zipper flexibility
Difficult corner sewing
Reduced compression
Longer drying time
Higher material cost
Strategic reinforcement solves these issues. A 500D or 600D body can use 900D or 1000D patches in high-wear areas.
The front MOLLE panel, side bottle zone, bottom corners, and shoulder anchors can each receive different reinforcement based on force.
What Webbing Works Best?
The best MOLLE webbing maintains consistent width and thickness, resists abrasion, bends repeatedly without cracking, and works smoothly with the intended pouch straps.
Nylon webbing is common because it combines strength, toughness, and flexibility. Polyester webbing offers low moisture absorption and strong UV stability.
The webbing should be tested as part of the attachment pair. The bag webbing and pouch strap need compatible thickness and flexibility.
| Webbing Property | Why It Matters |
|---|---|
| Width consistency | Maintains PALS compatibility |
| Thickness | Controls weaving difficulty |
| Tensile strength | Supports loaded pouches |
| Abrasion resistance | Withstands repeated strap movement |
| Surface friction | Helps prevent shifting |
| Edge stability | Reduces fraying |
| Flexibility | Allows repeated weaving |
| Colorfastness | Protects appearance and uniforms |
| Shrinkage control | Preserves spacing after exposure |
Webbing that is too soft may sag and allow pouch movement. Webbing that is too stiff can be difficult to weave, especially when paired with thick attachment straps.
The rows should not be sewn too tightly against the base panel. There must be enough clearance for the pouch straps to pass through.
The webbing should remain flat. Twisted or puckered rows create uneven attachment channels.
Webbing ends need secure finishing. They may be enclosed in seams, heat cut, folded, or otherwise protected according to the material.
Color coordination should be approved physically. Black is relatively easy to coordinate, while coyote, olive, gray, and camouflage-related shades can vary significantly across material types.
The webbing strength should not exceed the supporting panel so dramatically that the fabric becomes the predictable failure point. The goal is balanced construction.
Where Is Reinforcement Needed?
Reinforcement is needed behind high-load MOLLE panels, bottle-pouch zones, buckle anchors, shoulder attachments, tool-pouch locations, lower front panels, and any area where a loaded module pulls against the shell.
Reinforcement should spread force into a wider panel or structural seam. A small patch directly under one bar tack may add thickness without distributing the load effectively.
| Reinforcement Zone | Main Stress | Suitable Response |
|---|---|---|
| Front MOLLE panel | Downward and outward pull | Broad internal backing |
| Side bottle area | Dense vertical movement | Connection to side seam |
| Laser-cut slots | Concentrated slot-edge stress | Full-area laminate backing |
| Buckle anchors | Point loading | Extended structural webbing |
| Bottom tool pouch | Impact and abrasion | Heavy shell plus insert |
| Shoulder-mounted module | Repeated motion | Backed attachment zone |
| Removable front panel | Multi-directional movement | Buckles plus anti-sway retention |
| Compression cradle | Continuous tension | Webbing path into main seams |
Reinforcement material may include heavier woven fabric, laminated panels, webbing extensions, nonwoven backing, plastic sheets, foam, or combinations.
The correct material depends on the desired flexibility. A rigid front panel can support equipment well but reduce compression. A soft backing preserves flexibility but may allow more movement.
Reinforcement should follow the force direction. A side bottle pouch needs strong vertical support. A front panel needs support against downward and outward force.
Stitching is part of reinforcement but should not be excessively dense. Too many needle holes can weaken coated fabric.
A loaded prototype should be inspected for early warning signs:
Fabric whitening
Webbing-row distortion
Loose bar tacks
Slot elongation
Panel rippling
Coating cracks
Delamination
Uneven pouch position
These signs often appear before complete failure.
Are Coated Fabrics Weatherproof?
Coated fabrics can provide strong water resistance, but a coated MOLLE bag is not automatically waterproof. Water can still enter through needle holes, seams, zipper tracks, webbing stitch lines, drainage holes, and openings.
PU coating is widely used because it creates a flexible moisture barrier. PVC provides a heavier and more structured barrier. TPU laminates support high-performance waterproof or laser-cut constructions but require controlled bonding and processing.
| Weather-Control Method | Main Function | Main Limitation |
|---|---|---|
| Water-repellent finish | Reduces surface wetting | Wears over time |
| PU coating | Flexible moisture barrier | Does not seal seams |
| PVC coating | Strong barrier and structure | Adds weight and stiffness |
| TPU laminate | High water resistance | Higher material and process cost |
| Seam tape | Covers selected stitch lines | Difficult around thick MOLLE seams |
| Rain cover | Protects complete exterior | May block pouch access |
| Internal liner | Protects critical contents | Outer bag still becomes wet |
| Dry pouch | Isolates sensitive equipment | Adds another component |
MOLLE construction creates additional needle holes because every webbing interval is stitched. This makes fully waterproof traditional sewn MOLLE difficult without internal protection.
Laser-cut panels reduce some external stitching but still require attachment to the bag. Slots also expose laminate edges.
A practical tactical bag often uses layered weather protection:
Water-repellent outer surface
Coated shell
Protected zipper design
Water-resistant internal pouches
Rain cover for prolonged exposure
Drainage in bottle and wet-equipment pockets
Critical items such as documents, batteries, electronics, and medical supplies should not depend only on the outer shell.
The intended weather claim should match a defined use. Light rain resistance, prolonged storm protection, and submersion are different requirements.
A rain cover can protect the main bag but may be difficult to use when multiple pouches protrude from the exterior. Custom covers may need extra depth or dedicated openings.
Coating durability should be tested after flexing, abrasion, and heat aging. A new coated fabric may resist water well but crack after repeated folding.
Weather performance should also include drying. Thick padded pouches and tightly spaced webbing retain water. Removable modules allow the user to separate and dry components more effectively.
Szoneier can develop MOLLE tactical bags using nylon, polyester, Oxford fabric, coated textiles, laminated panels, woven webbing, and targeted reinforcement according to the expected pouch loads and environment. The bag body, webbing grid, attachment geometry, internal modules, weather protection, and branding can be tested together during sampling rather than treated as separate decorative features.