Skip to content

Printed canvas fabric looks simple. Thick cotton base, bold graphics, strong visual impact. On a screen or sample swatch, it often looks perfect. Problems usually don’t appear until much later—after cutting, sewing, washing, or real-world use.
That’s why printed canvas has one of the highest “expectation vs reality” gaps among fabric categories. Many failures aren’t caused by poor printing alone, but by decisions made before ink ever touches fabric: artwork setup, base canvas choice, coating assumptions, or misunderstanding how canvas behaves after printing. Most printed canvas fabric issues come from design setup errors, incorrect base fabric selection, and mismatched printing methods. Experienced manufacturers avoid these problems by aligning artwork, fabric construction, ink systems, and finishing processes before production begins—not after defects appear.
One factory manager put it bluntly: “Canvas doesn’t forgive shortcuts. It records them.” Understanding where buyers usually go wrong is the fastest way to avoid costly rework.
What Is Printed Canvas Fabric and How Is It Commonly Used?

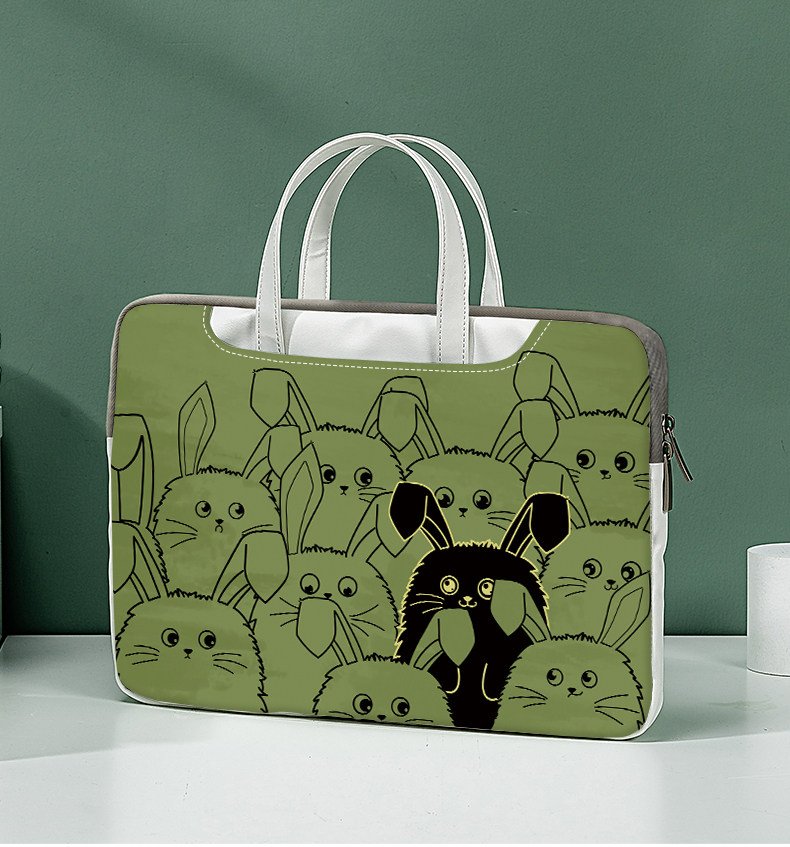
Printed canvas fabric is one of the most practical and visually impactful textile materials used in contemporary product manufacturing. In essence, it is a heavy-duty woven fabric—typically cotton, cotton blends, or occasionally linen—that has been printed with patterns, artwork, or branding graphics through various printing techniques. Unlike lightweight textiles, canvas was originally prized for robustness and structural strength, which historically made it ideal for sails, tents, tents, and painter’s supports. Modern printed canvas combines this mechanical strength with customized visual appeal suitable for fashion accessories, home décor, utilitarian gear, and branded merchandise. The enduring popularity of printed canvas stems from this duality: it is both functional and expressive.
Canvas remains widely adopted in applications where print visibility and material longevity are equally important. Whether in a carryall that needs to withstand daily use or a decorative wall panel that must retain color over years, printed canvas is engineered for performance and perception.
What Makes Canvas Different From Other Printed Fabrics
To appreciate printed canvas fully, it helps to understand what structurally differentiates canvas from other textiles. Canvas is woven in a plain weave, where warp and weft threads cross in a simple over-under pattern. This results in a fabric that is both dense and stable, lending itself well to surface printing without the extreme stretch or distortion seen in knitted or twill-weave materials. (维基百科)
The table below outlines the typical characteristics of canvas in comparison to other fabrics commonly used in printing.
| Feature | Canvas Fabric |
|---|---|
| Weave | Plain weave |
| Yarn size | Coarse |
| Weight range | 8–16 oz (270–540 gsm) |
| Surface texture | Visible grain |
This visible grain and heavier yarn influences how ink sits on the surface. Canvas does not absorb ink in the same way as smooth, fine fabrics. Instead, the weave texture contributes to a textured, almost artistic appearance, which many buyers actually seek for premium looks.
How Canvas Printing Appears in the Real World
Printed canvas fabrics are engineered not only for utility but also for aesthetic impact. In multiple commercial sectors, the material is a preferred choice because it delivers visual presence without sacrificing durability. Below are the most common real-world use cases:
| Application | Why Canvas Is Used |
|---|---|
| Tote bags | Strength + large print area |
| Backpacks | Durability with graphic customization |
| Cushion covers | Texture enhances interior appeal |
| Wall art | Matte nature reduces glare |
| Aprons | Wash resistance and rugged use |
Canvas is unique in that it serves both function and branding. In fashion accessories like bags, printed canvas is used to tell a story or reinforce brand identity through bold patterns or logos. In home décor, the texture can add a layer of depth not achievable with glossy or smooth print substrates. In industrial or heavy-use products, the choice of canvas often balances resilience with color retention.
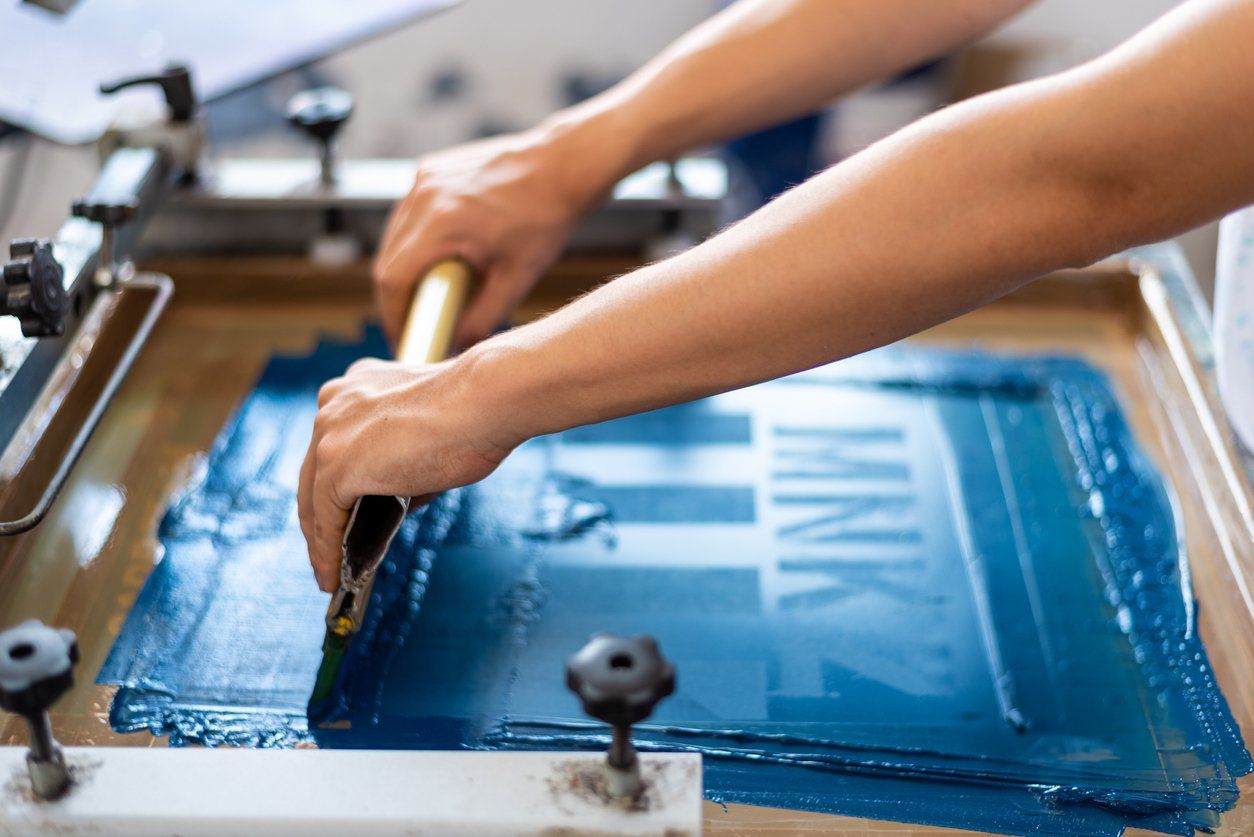
Typical Printing Methods on Canvas
Selecting a printing method for canvas hinges on the design’s complexity, volume, and the intended look and feel of the final product. Each technique interacts differently with the fabric’s texture and weight.
| Method | Best For |
|---|---|
| Digital printing | Complex artwork with high color variation |
| Screen printing | Bold, solid colors, cost-effective at scale |
| Pigment printing | General purpose graphics |
| Reactive printing | Better wash-fastness on natural fibers |
Digital printing has become a dominant choice for short runs and highly detailed designs because its inkjet systems can achieve fine gradations and a wide color gamut even on textured surfaces. Screen printing remains valuable for bulk runs with consistent solid colors, but it can struggle with minute detail on the coarse canvas grain. Reactive and pigment printing are techniques chosen for durability in wash-heavy applications.
Balancing Visual Quality with Material Performance
Understanding how canvas behaves in printing environments is essential. Unlike smooth fabrics, canvas often behaves more like a construction material than a delicate textile. This behavior creates both opportunities and challenges:
- Thick yarns can disrupt fine details in high-resolution artwork.
- Ink penetration varies with canvas weight and surface treatments.
- Pre-coatings or finishes affect how color is absorbed and how long it lasts.
This reality means that printed canvas often requires specialized development practices, especially when the print has tight lines or photographic content. In professional textile manufacturing, including at facilities like SzoneierFabrics, development typically starts with print-on-real-base testing rather than relying on generic cotton swatches. Testing on the actual canvas base reveals how the grain and weight interact with chosen inks and processes, minimizing surprises in production. This approach acknowledges that canvas is fundamentally different from smoother textiles and demands its own testing and optimization regime.
Why Buyers Should Care About Canvas Print Characteristics
Many buyers underestimate the complexity of printing on canvas because the fabric’s visual surface seems simple. However, a close look reveals multiple variables that influence final outcomes:
- Weight and weave density directly impact ink absorption and clarity.
- Texture visibility changes how colors appear once printed.
- Surface finishes or priming can improve ink bonding and wash resistance.
A heavy canvas, such as one in the 12–16 oz (400–540 gsm) range, provides a more rigid surface that holds shape and print alignment well but may sacrifice some flexibility. Lighter canvas (in the 8–10 oz / 270–340 gsm range) is easier to handle and sew, making it suitable for accessories where tactile feel and movement are important.
Printed canvas is not only chosen for its raw performance characteristics, but also for how those characteristics contribute to product identity. Whether it’s a fashion brand seeking structural bags with bold graphics or a boutique wall art maker selling gallery wraps, printed canvas brings durability and design together in a way that few other fabrics can.
Looking Ahead: Canvas in Modern Production
The adoption of advanced printing technologies and mixed fiber canvas blends continues to expand printed canvas applications. With digital printing enabling short runs and customized production, canvas has moved from industrial and home décor niches into mainstream fashion and brand merchandise. This trend reflects the fabric’s ability to serve both practical and expressive purposes simultaneously.
In practice, successful printed canvas products result from intentional material selection, thoughtful printing strategy, and rigorous testing—not just production convenience. That’s why professional manufacturers prioritize real substrate trials over assumptions based on other textiles, ensuring consistency in both performance and appearance.
Which Design and Artwork Mistakes Do Buyers Often Make with Printed Canvas Fabric?
For many brands and buyers working with printed canvas fabric, the biggest setbacks happen long before production begins — often at the design stage. Canvas is a robust substrate with a pronounced weave structure and significant weight, and it doesn’t respond to artwork the way smooth, light fabrics or glossy prints do. Precision, clarity, and predictability in final print quality are all influenced by decisions made in artwork development. Unfortunately, common design mistakes can compromise final results, leading to costly re-runs, disappointing samples, and product delays.
Understanding these pitfalls — and how to avoid them — is essential for both first-time buyers and seasoned product developers. In this article, we explore the most frequent errors brands make when preparing designs for printed canvas production, why they matter, and how professional manufacturers mitigate them.
Most Production Problems Begin with Design Decisions
Canvas texture and weight make it unforgiving of artwork issues that might be subtle or undetectable on a computer screen. When graphics fail to translate clearly to the woven surface, it’s almost always due to one of several avoidable design mistakes:
Low-Resolution Files and Improper Formats
One of the most prevalent issues buyers encounter is submitting artwork that lacks sufficient resolution or is saved in a format unsuited to large-format or textile printing. Canvas, because of its coarse yarn and visible grain, does not blur or blend pixelation the way smoother fabrics can; instead, it magnifies imperfections.
| Issue | Result |
|---|---|
| Low DPI artwork | Blurry prints |
| RGB instead of CMYK | Color shifts in output |
| Raster logos | Jagged edges and loss of definition |
Professional printing workflows require artwork at 300 dpi or higher in CMYK color space, especially for designs that cover large areas. Files in RGB may look vibrant on screen but often translate to muted or distorted colors when converted automatically by RIP software. Raster graphics with low pixel counts become visibly jagged when printed at large scale on textured canvas.
Canvas Texture: Not Just a Surface — It’s a Factor
Canvas is structurally different from fabrics like satin or polyester poplin. Its heavier yarns create an uneven surface that affects print clarity — particularly for fine design elements.
| Design Element | Canvas Impact |
|---|---|
| Fine lines | Broken or inconsistent |
| Small text | Unreadable |
| Gradients | Banding or uneven tones |
Designs that lay down delicate strokes or extremely subtle color transitions risk losing definition once printed. In practice, what looks crisp on screen may become fragmented or softened on a canvas print, particularly where yarn intersections interrupt ink deposition. This problem is magnified in heavier canvas grades (e.g., 12–16 oz), which emphasize texture.
Avoiding this issue begins with design adjustments that respect canvas texture: higher contrast, larger type, and simplified line work all contribute to more predictable outcomes.
Overly Complex Artwork
Complex graphics with abundant small details can be challenging on any textile surface, but the effect is most pronounced on printed canvas. The yarns and weave pattern tend to “absorb” ink in ways that flatten or soften fine elements, especially in shadowed or highly detailed sections.
| Detail Level | Print Outcome |
|---|---|
| High detail | Loss of clarity, muddled areas |
| Medium detail | Acceptable with some softness |
| Bold shapes | Crisp, reliable printing |
Printed canvas rewards bold, simplified graphics that leverage strong contrast and clear shapes. Where buyers insist on high detail, manufacturers may recommend design revisions that enlarge or exaggerate features to maintain definition and visual impact.
Incorrect Color Expectations
Color behavior on canvas is another area where buyers often make incorrect assumptions. Because canvas fibers absorb and disperse ink differently than coated or synthetic fabrics, printed colors rarely match on-screen expectations exactly.
| Expectation | Reality |
|---|---|
| Bright neon hues | Muted or dulled tones |
| Deep black | Charcoal or soft black |
| Flat, uniform color | Slight textured variation |
These differences arise because canvas lacks the reflective surface of glossy textiles. Ink is absorbed into the yarns and distributed unevenly due to the weave’s peaks and valleys, resulting in a subtly textured color appearance rather than a uniform field. Buyers expecting “screen-exact” colors without allowances for canvas behavior are frequently disappointed.
Real Buyer Mistakes: Case Examples
A telling example involves a brand that submitted a logo with line widths of approximately 0.3 mm for printing on canvas. On the screen, the lines looked crisp and elegant. However, once printed and washed, roughly half of the lines either disappeared or appeared incomplete, especially at corners and intersections.
The solution — increasing stroke widths, enlarging key details, and adjusting type sizes — was straightforward, but only after time, sampling, and additional costs had already accrued. Had these design limitations been considered earlier, the setback could have been avoided entirely.
These kinds of issues illustrate a critical truth in textile printing: canvas prints are governed as much by material science as by graphic design.
How Professional Manufacturers Prevent Artwork Problems
In experienced production environments, artwork review is treated as a technical step in the production planning process — not an optional courtesy. Before any sampling or run, manufacturers will validate submitted files for:
- Minimum line thickness and text size
- Appropriate color profile usage
- Pixel density (DPI) and vector file preference
- Compatibility with the intended printing method
At facilities like SzoneierFabrics, these checks are standardized and documented. Technical teams compare every artwork file against established thresholds (e.g., minimum text height of 8–10 pt for canvas prints, minimum line widths of 0.5–1 mm depending on camera distance and print scale). This upfront review saves time, reduces sampling iterations, and improves final print quality.
Designers and buyers are also advised to submit proofs or scaled mockups showing how graphics will interact with the canvas texture, especially for prints intended to cover large surfaces. This enables engineers to flag potential issues early and propose corrective adjustments.
Best Practices for Buyers’ Artwork Preparation
To minimize errors and ensure predictable printed canvas results, buyers should adhere to the following guidelines:
- Always start with high-resolution vector artwork (PDF, EPS, or AI) whenever possible.
- Use CMYK color profiles rather than RGB to maintain color consistency through print workflows.
- Simplify overly intricate designs where possible — favor bold shapes and strong contrast.
- Increase type size and line thickness to ensure legibility once printed.
- Request pre-production proofs or simulations that reflect canvas texture behavior.
These practices align design expectations with material realities, reducing risk and leading to more satisfying outcomes.
Printed canvas remains a powerful medium for expressing brand identity and visual creativity — but only when designs are adapted to the material’s unique properties. Canvas texture, ink absorption, and print method all interact in ways that demand thoughtful artwork preparation. Buyers who understand these dynamics and work collaboratively with manufacturers from the outset achieve superior results with fewer revisions and greater confidence.
Moving from screen design to physical canvas is not a simple “file export” step; it’s a translation from digital intent to textile reality. Recognizing this early ensures that printed canvas products not only look good but also perform reliably in the real world.
How Do Fabric Quality and Base Canvas Selection Affect Printing Results?
When buyers evaluate printed canvas products, attention often goes straight to artwork, colors, or printing technique. Yet in real production environments, printing results are largely determined by the fabric long before ink ever touches it. Base canvas quality controls how ink spreads, how color is perceived, how edges hold, and how long the print survives washing, friction, and exposure.
Many quality disputes described as “printing problems” are actually fabric selection errors. The print method may be technically correct, but the canvas underneath is mismatched, inconsistent, or unsuitable for the intended result. Understanding how base canvas characteristics interact with ink is therefore essential for predictable, professional outcomes.
Why the Base Canvas Matters More Than the Print
Printing does not occur in isolation. Ink is absorbed, dispersed, and fixed by the fiber, yarn, and weave structure of the canvas itself. Two prints made with identical files and machines can look dramatically different if the base canvas changes.
Canvas behaves more like a structural substrate than a neutral surface. Fiber composition determines how deeply ink penetrates. Weight influences color density. Yarn quality affects edge sharpness. Surface treatments can either enhance clarity or destroy color accuracy.
This is why experienced manufacturers treat canvas selection as a technical decision, not a purchasing shortcut.
Canvas Fiber Content
The fiber composition of canvas is the first variable that shapes print behavior. Different fibers interact with ink in distinct ways, influencing color saturation, consistency, and wash durability.
| Canvas Type | Print Behavior |
|---|---|
| 100% cotton | Best color absorption |
| Cotton-poly blend | Sharper edges, less absorption |
| Recycled cotton | Inconsistent texture |
100% cotton canvas remains the most predictable choice for printing. Cotton fibers absorb ink evenly, allowing dyes and pigments to anchor deep into the yarn structure. This produces rich, stable colors with fewer surprises during washing or aging.
Cotton-poly blends introduce synthetic fibers that absorb less ink. As a result, colors may appear slightly sharper and less diffused, but also marginally lighter. These blends can be useful when crisp edges matter more than color depth, such as logo-heavy designs.
Recycled cotton canvas, while appealing for sustainability narratives, often introduces variability. Fiber length inconsistency, mixed yarn sources, and uneven spinning can lead to patchy color areas and unpredictable absorption. Without additional quality control, recycled bases are more prone to visual defects.
Canvas Weight (GSM / oz)
Canvas weight directly influences how much ink the fabric absorbs and how color is perceived once dry. Heavier canvas is not “better” by default; it simply behaves differently.
| Weight Range | Printing Impact |
|---|---|
| 8–10 oz (270–340 gsm) | Brighter, less ink use |
| 12–14 oz (400–475 gsm) | Balanced |
| 15–16 oz (500+ gsm) | Darker, more ink needed |
Lightweight canvas (8–10 oz) absorbs less ink overall. Colors often appear brighter and cleaner, making this range suitable for decorative products, fashion accessories, or designs where vibrancy matters.
Mid-weight canvas (12–14 oz) offers the best balance between structure and print clarity. It is widely used for tote bags, backpacks, and home textiles because it holds shape while still delivering consistent color.
Heavy canvas (15–16 oz and above) absorbs more ink into thicker yarns. Colors can appear darker or slightly muted, and fine details may soften. Additional ink is often required to reach target color depth, increasing cost and drying time.
Selecting weight without considering print goals often leads to mismatched expectations.
Yarn Quality and Weave Consistency
Beyond fiber type and weight, yarn quality plays a critical role in print performance. Two canvases with identical GSM can behave very differently if yarn quality differs.
| Issue | Print Result |
|---|---|
| Uneven yarn | Patchy color |
| Loose weave | Ink bleeding |
| Tight weave | Sharper detail |
Uneven yarn thickness creates irregular ink absorption. Thicker yarns soak up more ink, while thinner sections absorb less, leading to visible color variation across the print.
A loose weave allows ink to migrate laterally, causing bleeding at edges and blurred details. This is especially problematic for text or line-based artwork.
A tight, consistent weave stabilizes ink placement and improves edge definition. While tighter weaves may cost more, they reduce rework, sampling iterations, and quality claims later.
Cheap canvas often cuts cost at the yarn level. Savings appear attractive upfront but frequently result in rejected samples, inconsistent batches, or higher ink consumption.
Pre-Treated vs Untreated Canvas
Canvas is often supplied either untreated or with surface treatments designed to influence ink behavior. These treatments can dramatically alter printing outcomes.
| Canvas State | Print Outcome |
|---|---|
| Untreated | High ink absorption |
| Pre-coated | Sharper edges |
| Over-coated | Color rejection |
Untreated canvas absorbs ink deeply into the fibers. This can produce rich color but also increases ink usage and can soften detail.
Pre-coated canvas is treated to control ink spread. When done correctly, it enhances edge sharpness and color uniformity, especially for digital printing.
Over-coated canvas is a common hidden problem. Excessive or incompatible coatings can repel ink, causing weak color adhesion, uneven saturation, or premature fading. Over-coating is often invisible until printing begins.
Because coatings vary by supplier and batch, assuming all “pre-treated canvas” behaves the same is a costly mistake.
How Fabric Choices Affect Long-Term Durability
Print quality is not only about first impressions. Canvas selection also determines how well prints survive real-world use.
Low-grade fibers and inconsistent yarns tend to release ink more quickly during washing. Loose weaves allow abrasion to break pigment bonds faster. Inadequate coatings fail to protect color against moisture and UV exposure.
Higher-quality base canvas improves:
- Wash fastness
- Abrasion resistance
- Color stability over time
- Consistency across production batches
In many cases, upgrading canvas quality reduces total cost by minimizing reprints, complaints, and product returns.
Common Buyer Misjudgments
A frequent buyer mistake is choosing canvas based solely on price per meter rather than performance per application. Two canvases may differ by a small unit cost but produce radically different outcomes once printed.
Another common error is selecting canvas before deciding on print method. Digital, screen, pigment, and reactive printing each interact differently with fiber type, weave density, and coatings. Locking in fabric too early restricts print optimization later.
These missteps are rarely obvious at the quoting stage but surface during sampling or after delivery.
Manufacturer Insight
At SzoneierFabrics, base canvas is never finalized until the printing method, design complexity, and end use are confirmed. Fabric is treated as part of the printing system, not a separate component.
Canvas trials are conducted with real artwork, real inks, and real finishing conditions. This approach ensures that ink behavior, color consistency, and durability are validated before bulk production begins.
Printing dictates canvas—not the other way around.
Practical Takeaways for Buyers
For buyers aiming to achieve reliable printed canvas results, several principles consistently hold true:
- Match fiber content to color expectations and durability needs
- Choose canvas weight based on visual goals, not perceived quality
- Inspect yarn consistency and weave density, not just GSM
- Verify coating type and compatibility with the chosen print method
- Test on actual base canvas, not generic cotton samples
When fabric selection is treated as a technical decision rather than a purchasing shortcut, printing outcomes become predictable instead of problematic.
Printed canvas succeeds when material science and design intent are aligned. Fabric quality is not a background detail; it is the foundation on which every printed result depends. Buyers who understand this relationship move faster, waste less, and produce products that perform as expected in the market.
In canvas printing, the fabric does not support the print. The fabric defines it.
What Are the Most Common Color, Ink, and Printing Method Mistakes?


Common mistakes include choosing the wrong ink system, misunderstanding color limitations on canvas, and selecting printing methods that don’t match fabric weight or end-use requirements.
Printing success is about compatibility, not technology.
Canvas behaves differently from smooth woven fabrics. The texture is higher, the yarns are thicker, and the surface has more micro “valleys” that scatter light. That single fact explains why so many print programs fail after production begins: colors look weaker than the lab proof, fine details break up, blacks look dusty, and rub fastness becomes unpredictable. The printing method may be “correct” in theory, but it’s wrong for the fabric weight, weave, end-use abrasion level, or required wash durability.
Where Ink and Method Choices Go Wrong
Most issues don’t come from one decision. They come from two decisions that don’t fit together, such as:
- A high-detail artwork pushed onto a coarse, heavy canvas without changing dot gain and line thickness
- A pigment system chosen for a product that must survive repeated washing and abrasion
- A curing method designed for lighter textiles applied to thick canvas, where heat penetration is slower
- A color target (neon, pastel, deep black) set without acknowledging canvas reflectance limits
- A printing method selected for cost or MOQ reasons, while the product’s use-case demands durability
A practical way to think about it is “performance priorities.” For canvas programs, the priorities typically rank like this:
- rub resistance (dry/wet)
- wash durability (if washable product)
- color consistency across lots
- visual sharpness
- hand feel (especially for bags or wearables)
- cost per unit and throughput
When priorities are clear, method selection becomes much easier.
Printing methods compared
| Method | Strength | Weakness |
|---|---|---|
| Digital pigment | Flexible, low MOQ | Lower wash fastness |
| Screen printing | Strong colors | Limited detail |
| Reactive printing | Excellent wash fastness | Higher cost |
| Sublimation | Not suitable for cotton | Works on polyester only; needs polymer bonding |
Sublimation does not work on cotton canvas—yet many teams still request it because they associate sublimation with bright, permanent color. Sublimation dyes require polyester (or a polymer-coated surface) to bond correctly. On cotton canvas, the dye has nothing to “lock into,” so the result is faint, unstable, or fails immediately.
The more common mismatch is subtle: using a method optimized for smooth fabric on a rougher canvas. Screen printing can produce bold, opaque coverage that hides the canvas texture better, while digital methods may show texture through the print, especially with lighter ink laydown.
Ink penetration vs surface coverage
| Ink Type | Canvas Interaction |
|---|---|
| Pigment ink | Sits on surface |
| Reactive ink | Bonds with fiber |
| Plastisol | Heavy hand feel |
Pigment inks are common—but require proper curing.
Canvas exposes pigment weaknesses quickly because pigment usually forms a film held by binders. If curing is slightly under target, the film remains soft and rubs off. If curing is too aggressive, the film becomes brittle and can crack or feel overly stiff, especially on fold lines and seam turns.
Reactive systems solve durability by bonding to fiber, but they come with a more complex process (often pre-treatment, steaming/fixation, washing-off, drying). That process cost is justified when wash fastness and long-term stability are non-negotiable.
Plastisol can deliver strong opacity, but the “hand” (feel) can be thick. On bags and accessories, that may be acceptable. On products requiring a softer touch or frequent folding, it can create crease lines and visual stress marks.
Color expectation mismatch
| Color Type | Canvas Reality |
|---|---|
| Neon | Muted |
| Pastel | Softer |
| Black | Not jet black |
Canvas naturally dulls color due to its texture.
The mismatch usually starts at sampling: a digital proof or screen mockup looks vibrant on a monitor or coated paper, then the first strike-off on canvas looks flatter. Canvas does three things at once:
- It reduces perceived saturation because the surface scatters light
- It changes the way ink sits, especially on thicker yarns
- It creates micro “shadowing” where valleys stay less covered
For neon requests, the issue is often physics and chemistry, not supplier capability. True neon intensity depends on specific pigment chemistry and optical brightening behavior. On a textured cotton surface, the visual impact drops. The right approach is to define acceptable “visual range” during approval: specify whether neon is a strict requirement or a “bright color family” target.
For black, many teams say “jet black,” but on cotton canvas the result can be a rich black, charcoal-black, or warm-black depending on ink type, curing, and the base fabric tone (natural, off-white, optical white). A controlled program defines black by measurable targets (for example, a target L* range and a tolerance) rather than subjective labels.
Curing and fixation errors
| Error | Result |
|---|---|
| Under-curing | Color rub-off |
| Over-curing | Fabric stiffness |
| Uneven heat | Color shift |
Many failures appear only after washing or use.
The hard truth: visual inspection alone is a poor predictor of durability. A print can look perfect at the packing table and still fail after one week of handling, because rub tests and wash tests reveal what the eye cannot see.
Curing and fixation errors often happen for predictable reasons:
- Canvas weight increases thermal mass, so the same conveyor speed used on lighter textiles undercures the ink film
- Thick canvas seams and fold areas heat unevenly, leading to partial cure at edges or corners
- Operators measure air temperature, but the ink film needs a specific film temperature for a specific time
- Humidity and storage conditions affect water-based systems, especially when stacking printed panels too quickly
A dependable workflow treats curing as a controlled process step, not a “dry enough” judgment call.
Typical mistakes by method, and how to prevent them
Digital pigment printing mistakes
Mistake 1: Treating pigment like dye. Pigment sits on the surface. If the binder system isn’t cured correctly, the ink can pass a quick look test but fail abrasion.
Mistake 2: Using high-detail art without canvas-specific compensation. Fine lines and small type can break up because the texture “steals” ink coverage. A practical fix is to increase minimum line thickness, avoid ultra-fine halftones, and adjust ink limits so coverage remains stable on peaks and valleys.
Mistake 3: Skipping post-print performance checks. Dry rub, wet rub, and tape pull checks catch film weakness early. A simple rule: if a print is meant for a bag that gets handled daily, rub testing should never be optional.
Screen printing mistakes
Mistake 1: Choosing mesh counts or emulsions that don’t suit canvas. Canvas often benefits from setups that allow higher ink deposit. Using a setup optimized for detail can starve coverage, making colors look weak and increasing texture show-through.
Mistake 2: Over-building ink thickness to “fix” dull color. Yes, heavier deposit can boost opacity, but it can also create cracking at fold points and a heavy hand feel. The better solution is often a balanced approach: correct underbase, correct ink system, and controlled curing.
Mistake 3: Ignoring artwork separations for canvas behavior. Overlapping colors, trapping, and knockouts can look different on canvas than on smoother substrates. Clean separations and deliberate overlap choices reduce misregistration visibility.
Reactive printing mistakes
Mistake 1: Expecting reactive cost and lead time to match pigment. Reactive printing typically involves more steps. If the program is cost-driven and the product doesn’t require wash durability, reactive may be over-specification.
Mistake 2: Weak process control on pre-treatment and washing-off. Reactive performance depends on proper fixation and washing off unfixed dye. If washing-off is insufficient, staining and back-tinting occur, and color consistency becomes unstable across lots.
Sublimation request mistakes
Mistake 1: Requesting sublimation on cotton canvas. It’s fundamentally mismatched. If the business case demands sublimation-level brightness on a cotton-look canvas, the solution is usually material substitution (poly canvas or coated substrates) or a different ink system, not “trying harder” with sublimation.
Real failure case
A client used digital pigment printing on heavy canvas without adjusting curing temperature. Prints passed visual checks but failed rub tests. Re-printing with adjusted curing solved the issue.
Here’s what typically happens in that scenario:
- The same dryer profile used on a medium-weight fabric was reused for heavier canvas
- The surface dried, so the print looked “done,” but the binder system didn’t fully crosslink
- During rub testing, the film released pigment, producing visible transfer and dull patches
- The failure appeared after packing because friction during handling replicated the rub condition
The corrective action is usually straightforward once the cause is understood: adjust curing so the ink film reaches the necessary temperature consistently, and validate with rub testing before sign-off. In many factories, the difference between pass and fail can be a small change in belt speed, dwell time, or heat uniformity—especially with heavy canvas.
Manufacturer prevention strategy
Experienced manufacturers run:
- Ink compatibility tests
- Color fastness tests
- Rub and wash simulations
At SzoneierFabrics, ink systems are selected based on end-use, not convenience.
In practice, prevention looks like a structured decision path rather than a single “best method” recommendation.
A practical selection checklist that reduces failure rates
Step 1: Define end-use stress in plain terms
Before discussing ink, clarify:
- Will the product be washed regularly, occasionally, or never?
- Does it face daily handling (tote bags, tool rolls) or decorative use (wall art canvas)?
- Will it contact moisture, sunscreen, oils, or abrasion from clothing?
- Does it need outdoor UV stability?
When teams skip this, they accidentally buy the wrong performance profile.
Step 2: Match method to performance priority
- If wash durability and long-term stability matter most, reactive systems often win
- If bold color coverage and high abrasion resistance are needed, screen printing can be strong
- If low MOQ and many designs are required, digital pigment can be efficient, but testing and curing become critical
- If “sublimation brightness” is demanded, the substrate must support it
Step 3: Control color expectations early
Successful programs do not approve color from a monitor image. They approve from a physical strike-off on the same canvas weight and color.
A useful approval habit is to lock:
- color target range (not a single “perfect” point)
- acceptable tolerance between lots
- the viewing condition (daylight, indoor lighting)
- which colors are “critical” and which can float slightly
Canvas texture will always introduce some variation. The goal is to control it, not pretend it doesn’t exist.
Step 4: Treat curing as a verified process step
Curing is the invisible failure point. A better workflow includes:
- a defined curing profile for each canvas weight range
- a quick rub test before bulk packing
- periodic checks during production (not just at start)
For heavy canvas, also check edge areas, seams, and fold lines, because these are the first zones to fail in real use.
Step 5: Build performance testing into sampling, not after production
A sampling stage that only checks appearance is incomplete. A sampling stage should also confirm:
- rub resistance (dry and wet)
- wash behavior if applicable
- color shift risk under heat or friction
- stiffness and hand feel after curing
- whether the print cracks after repeated folding
That’s why experienced factories run “simulation mindset” sampling: they try to mimic what the market will do to the product.
Most printing problems blamed on “ink quality” are actually process mismatches: a reasonable ink used in the wrong method, or a suitable method executed with the wrong curing profile for canvas weight and texture.
When a program treats canvas like paper, results disappoint. When it treats canvas like a structured textile system—fiber, weave, weight, ink chemistry, curing, and real-use stress—printing becomes repeatable.
At SzoneierFabrics, the guiding rule stays simple: choose the ink system and method that match how the product will be used, then prove it with fastness and rub validation before scaling. That single discipline prevents the costly loop of reprinting, rework, and brand-level quality complaints.
How Do Shrinkage, Coating, and Finishing Issues Impact Printed Canvas Products?

Shrinkage, improper coatings, and unsuitable finishing processes can distort prints, shift alignment, dull colors, and reduce wash durability, often appearing only after cutting, sewing, or washing.
These are “late-stage failures”—the most expensive kind.
If printing mistakes feel painful, finishing mistakes can be brutal. A print can pass inspection on flat fabric, then fail after it becomes a product. That’s because finishing changes fabric geometry and surface behavior in ways that printing teams often underestimate.
Shrinkage, coating, and finishing choices sit downstream, but they control whether a printed canvas product stays accurate after real use.
Why Finishing Decisions Matter as Much as Printing
The most expensive print failures are the ones that appear late:
- after cutting (alignment suddenly looks wrong)
- after sewing (panels stop matching)
- after washing (distortion, warping, fading, stiffness)
- after coating (color tone shifts, details soften, adhesion weakens)
At that point, you’re not just reprinting fabric—you’re scrapping labor, trims, packaging, and schedules.
A good finishing plan prevents that by defining what the fabric will experience before artwork approval.
Shrinkage behavior of canvas after printing
| Canvas Type | Typical Shrinkage (Wash) |
|---|---|
| Untreated cotton canvas | 4–8% |
| Pre-shrunk canvas | 1–3% |
| Coated canvas | <1–2% |
Printing on unshrunk canvas almost guarantees post-wash distortion.
These shrinkage ranges are a practical planning tool. Even within the same “cotton canvas” label, shrinkage varies with:
- weave tightness
- yarn twist and fiber quality
- finishing history (desizing, washing, softening)
- washing temperature and drying method
The point isn’t the exact number; the point is that 4–8% is huge. A centered logo can move enough to look “wrong,” and a repeat pattern can drift enough that seams no longer align.
Print alignment problems after shrinkage
| Problem | Cause |
|---|---|
| Off-center prints | Fabric relaxation |
| Warped graphics | Uneven shrinkage |
| Pattern mismatch | No pre-shrink |
Buyers often approve prints on flat fabric, not considering post-wash geometry.
Shrinkage doesn’t always happen evenly. Warp and weft can shrink differently, and the effect is visible on geometric artwork:
- circles become slightly oval
- squares become rectangles
- repeated grids stop lining up at seams
- stripes tilt after panel assembly
A frequent mistake is approving a large “centered” print with tight tolerance (for example, a logo that must sit exactly between handles) without defining whether the canvas will be washed before cutting.
The hidden issue: relaxation shrinkage vs wash shrinkage
Two different behaviors often get mixed up:
- Relaxation shrinkage: fabric “settles” after tension is released (can happen after printing, after storage, or after steaming)
- Wash shrinkage: fiber and yarn permanently contract after water + heat + agitation
If a production line prints, stores rolls under tension, and then cuts later, the fabric can relax and shift alignment even before the product sees water. That’s why some teams see “same roll, different day” alignment drift.
Coating misunderstandings
| Coating Type | Common Mistake |
|---|---|
| Acrylic coating | Assumed washable |
| PU coating | Blocks ink absorption |
| Wax finish | Changes color tone |
Some coatings are applied after printing and can alter appearance dramatically.
Coating decisions create two major risks:
Adhesion risk
If the coating is applied before printing, some inks can’t anchor well. If applied after printing, the coating can change friction, flexibility, and perceived color.
Appearance risk
Coatings change how light reflects off the surface. A matte cotton print can look darker, glossier, or slightly blurred after PU or wax finishes because the coating fills micro texture and shifts optical behavior.
PU coating is particularly tricky because it can block ink absorption or create a slick surface, depending on formulation and coating weight. The result can be weaker bonding, reduced sharpness, or unpredictable color.
Finishing sequence errors
| Incorrect Sequence | Result |
|---|---|
| Print → Wash → Coat | Color loss |
| Coat → Print | Poor ink adhesion |
| Print → Over-soften | Reduced fastness |
Sequence matters as much as process choice.
Sequence errors happen when different teams control different stages. Printing teams focus on color and detail. Finishing teams focus on hand feel, water resistance, or cost. If sequence isn’t agreed upfront, you get conflict like:
- A print looks perfect, then a softener is applied that reduces rub resistance.
- A waterproof coating is added later that deepens colors and softens edges.
- A wash step is added for “better hand feel,” but it strips pigment or weakens fixation.
A simple rule works well: decide the finishing route first, then approve print on the finished route, not on a simplified sample.
Real production issue
A buyer requested waterproof canvas but approved samples printed on untreated canvas. After PU coating was applied in bulk, colors darkened and details blurred—forcing a full re-approval cycle.
This kind of re-approval cycle is more than a paperwork problem. It usually triggers:
- delayed packing schedules
- missed launch windows
- extra freight costs
- reprinting or discounting inventory
It also creates trust issues because everyone believes they “approved the color,” but they approved it under a different surface condition.
What “waterproof” can do to print feel and durability
Waterproof or water-repellent finishes change:
- hand feel (often stiffer, sometimes tacky depending on formulation)
- fold behavior (creased zones can look lighter or crack if the print film is too rigid)
- surface friction (can increase rub marks or reduce them depending on topcoat)
- sewing behavior (needle heat, seam marks, and scuffing can become visible)
This matters for printed areas near seams, folds, and straps—exactly where customers touch and stress the product most.
Practical controls that reduce finishing-related print failures
To control late-stage failures, a manufacturer typically sets three checkpoints:
Shrinkage test before print approval
Test the actual fabric (or pre-treatment plan) so alignment decisions are made on realistic geometry.
Finish-first rule
If coating or softening will happen, approve print through the full finishing route. Samples must match bulk, not “close enough.”
Performance confirmation
Repeat rub and wash simulations after finishing, because coating and softeners can change outcomes.
Even a small pilot run can catch most issues, especially when the print includes dark solids, fine details, or tight alignment requirements.
Manufacturer prevention strategy
Experienced manufacturers define finish-first rules, including:
- Whether fabric must be pre-shrunk
- When coatings are applied
- How prints are protected during finishing
At SzoneierFabrics, shrinkage testing is mandatory before print approval.
That single discipline prevents a long list of expensive surprises. When shrinkage behavior is known early, the team can decide whether to:
- pre-shrink before printing
- adjust artwork placement to allow tolerance
- change canvas type (pre-shrunk or coated base)
- modify finishing sequence to protect print clarity
In the end, shrinkage, coating, and finishing are not secondary details. They are the environment your print must survive. When they’re planned upfront, the print stops being a gamble—and starts behaving like a controlled, repeatable production outcome.
6. Which Durability and Performance Factors Are Often Overlooked by Buyers?
Buyers often overlook rub resistance, wash fastness, UV stability, seam stress, and abrasion behavior—factors that determine whether printed canvas products last weeks or years.
Canvas looks tough—but prints are vulnerable.
Canvas has a reputation for durability. It feels heavy, resists tearing, and survives rough handling better than many lighter fabrics. That reputation often creates a false sense of security around printing. Buyers assume that if the fabric is strong, the print must be strong too. In reality, the print layer is almost always the weakest part of a canvas product.
Most print failures don’t come from dramatic defects. They come from quiet performance gaps: color slowly transferring to clothing, fading after months of sunlight, cracking at fold lines, or dull patches forming where hands repeatedly touch the surface. These issues rarely show up during basic sampling. They show up after weeks of use, when it’s too late to fix.
Why durability expectations are often misaligned
The most common problem is not poor manufacturing—it’s unclear expectations. Buyers approve samples based on appearance, not performance. They may say “good quality print” without defining what “good” means in daily use.
Durability is not a single property. It’s a combination of multiple stress responses:
- friction (dry and wet rubbing)
- moisture and washing
- UV and light exposure
- folding, creasing, and seam construction
- abrasion from repeated contact
- interaction with coatings, softeners, and finishes
Ignoring even one of these can shorten product life dramatically.
The Real-World Performance Tests That Matter
Lab tests are useful only when they reflect real behavior. For printed canvas, a small set of performance tests explains most field failures.
Rub resistance (crocking)
| Test | Why It Matters |
|---|---|
| Dry rub | Color transfer risk |
| Wet rub | Real-use contact |
Pigment prints often fail wet rub if not properly cured.
Rub resistance is the first durability problem customers notice. It shows up as color transfer onto light clothing, linings, packaging, or even hands. Dry rub simulates friction under normal handling. Wet rub simulates sweat, rain, condensation, or damp hands.
Canvas amplifies this issue because:
- the textured surface increases friction
- pigment ink often sits on the surface
- dark colors are visually unforgiving when they transfer
Wet rub is especially critical for:
- tote bags
- backpacks
- aprons
- tool rolls
- any product carried close to the body
A print that passes dry rub but fails wet rub is a ticking clock. The product may look fine on the shelf, then generate complaints after first use.
Wash fastness expectations
| End Use | Required Performance |
|---|---|
| Tote bags | Medium |
| Aprons | High |
| Cushion covers | High |
| Wall décor | Low |
Not all printed canvas needs the same durability—but it must be specified.
One of the most expensive misunderstandings is assuming all canvas products need “washable” prints. Some do. Some don’t.
A wall décor canvas may never see water. A branded tote might be spot-cleaned occasionally. An apron or cushion cover may be washed weekly. Each scenario demands a different ink system, curing approach, and testing threshold.
Problems arise when:
- wash expectations are not discussed
- buyers approve samples without wash testing
- the first wash happens after the product is sold
Canvas shrinkage, ink bonding, and fabric movement all interact during washing. Even if the color doesn’t fade dramatically, washing can:
- dull surface appearance
- increase stiffness in printed areas
- reveal micro-cracks at folds
- shift alignment around seams
UV and light exposure
| Use Case | Risk |
|---|---|
| Outdoor bags | High fading |
| Window décor | Color shift |
| Indoor accessories | Lower |
Canvas pigments can fade faster than expected without UV stabilizers.
Light exposure is one of the most underestimated risks, especially for lifestyle products. Many canvas bags are marketed as “outdoor” or “everyday,” yet the print system is selected without considering UV stability.
Sunlight affects prints in two ways:
- it breaks down pigment molecules
- it degrades binders that hold pigment to the surface
The result is gradual fading, often uneven. Reds and blues typically fade faster than blacks. Prints facing sunlight (window displays, car interiors, outdoor cafés) can show visible shift within months.
UV risk is not limited to outdoor products. Indoor items near windows or bright lighting can fade faster than expected. If a brand wants consistent color over time, UV behavior must be part of the print decision—not an afterthought.
Seam and fold stress
| Stress Area | Print Risk |
|---|---|
| Fold lines | Cracking |
| Seams | Ink break |
| Corners | Abrasion |
Prints must survive construction, not just fabric testing.
This is where many buyers are surprised. A print can pass every fabric-level test, then fail after sewing. Why? Because sewing introduces stresses that flat fabric never experiences.
Common construction-related risks include:
- needle penetration breaking the ink film
- seam compression causing micro-cracks
- folding during assembly stressing cured ink
- corner abrasion during turning and shaping
Canvas bags, in particular, place prints under mechanical stress at:
- top folds
- boxed corners
- handle attachment zones
- side seams
If prints are placed too close to seams or folds without testing, cracking or flaking can appear almost immediately.
The hidden interaction between ink and sewing
Sewing machines generate:
- heat from needle friction
- localized pressure
- repeated puncture points
On rigid or over-cured prints, this can cause:
- visible cracking along stitch lines
- white stress marks at folds
- weakened adhesion around needle holes
This is not a sewing defect. It’s a print formulation and curing balance issue.
Abrasion behavior over time
Beyond rub tests, long-term abrasion matters. Canvas bags rub against:
- clothing
- car seats
- floors
- other bags
- metal hardware
Abrasion doesn’t always remove color instantly. It can:
- polish the surface, changing gloss
- thin the ink layer gradually
- expose base fabric tone unevenly
Dark solid prints are most vulnerable. Over time, they can develop “wear maps” that make the product look old far earlier than expected.
Real buyer oversight example
A printed canvas bag passed fabric tests but failed after sewing—the needle perforation caused ink cracking along seams. Adjusting ink formulation and curing temperature resolved the issue.
This case illustrates a common oversight: testing stops at fabric level. The buyer approved the print based on:
- color accuracy
- rub performance on flat fabric
- visual appearance
But the product was a structured bag with:
- tight seam tolerances
- heavy canvas
- prints extending close to stitch lines
Once sewn, the ink film couldn’t flex enough around needle holes. The solution wasn’t redesigning the bag—it was adjusting the print system to better tolerate mechanical stress.
Why “canvas durability” is not a single number
Buyers sometimes ask for a single durability rating. That doesn’t exist.
Durability depends on:
- fabric weight and weave
- ink chemistry
- curing profile
- finishing and coatings
- product construction
- real-use environment
A print that lasts years on a wall hanging may last months on a daily-carry tote. Both can be “correct” if expectations are aligned.
The cost of ignoring late-stage performance
When durability issues appear after launch, the cost multiplies:
- returns and replacements
- brand reputation damage
- negative reviews
- forced discounts
- redesign and reapproval cycles
Most of these costs far exceed the small investment required for proper performance testing during development.
Manufacturer prevention strategy
Professional manufacturers test printed canvas at three levels:
- Fabric only
- After finishing
- After sewing simulation
SzoneierFabrics includes seam-area testing as part of print approval for bags and accessories.
This layered approach mirrors reality. Fabric-level tests catch basic ink and curing issues. Finishing-level tests reveal changes caused by coatings, washing, or softeners. Sewing simulations expose mechanical stress risks before bulk production begins.
What smart buyers specify upfront
To avoid disappointment, experienced buyers define:
- expected product lifetime
- typical usage conditions
- wash frequency and method
- exposure to sunlight or moisture
- whether prints cross seams or folds
With that information, manufacturers can recommend:
- appropriate ink systems
- curing targets
- print placement rules
- reinforcement or spacing near stress zones
Closing perspective
Canvas earns its reputation for strength, but printed graphics do not automatically inherit that strength. Durability lives at the intersection of ink chemistry, process control, and real-world use.
The most reliable printed canvas programs are not the ones with the most advanced technology. They are the ones where performance expectations are clear, tested at every critical stage, and validated against how the product is actually built and used.
When durability is treated as a design parameter—not a post-production surprise—printed canvas stops failing quietly and starts performing consistently, season after season.
How Do Experienced Manufacturers Prevent Printing and Production Failures?
Experienced manufacturers prevent printed canvas failures by validating artwork, matching canvas construction to printing methods, testing shrinkage and durability before approval, and controlling process sequence from printing through finishing and sewing.
Most failures are preventable — if risks are addressed before bulk production.
What separates experienced manufacturers from inexperienced ones is not better machines or trendier inks. It is how early they identify risk, how systematically they remove uncertainty, and how little they rely on visual approval alone. In printed canvas production, failures are rarely random. They follow repeatable patterns, and seasoned factories build guardrails around those patterns long before fabric reaches mass production.
Why prevention matters more than correction
Once bulk printing starts, every downstream step multiplies cost. Printing errors affect not only fabric but also cutting, sewing, packaging, logistics, and delivery schedules. A single overlooked risk can cascade into:
- material waste
- labor loss
- missed shipping windows
- forced re-approvals
- compromised brand credibility
Experienced manufacturers work backward from these risks. Their systems are designed not to “fix problems quickly,” but to ensure problems never reach the production floor in the first place.
Manufacturer Practices That Actually Work
The following practices are not theoretical best practices. They are habits developed from years of seeing where canvas printing fails in real production environments.
Start with artwork engineering, not aesthetics
| Checkpoint | Why It Matters |
|---|---|
| Minimum line thickness | Prevents detail loss |
| Text size limits | Maintains readability |
| Color profile validation | Avoids color shift |
Manufacturers treat artwork as a technical file, not just a design.
Designers naturally focus on visual impact. Manufacturers focus on what survives fabric texture, ink behavior, curing, washing, and sewing. Experienced factories bridge that gap by converting artwork into an engineered production file.
Common artwork risks include:
- ultra-thin lines that disappear into canvas weave
- small text that breaks after ink penetration
- gradients that band on textured surfaces
- color values that shift dramatically on natural cotton
Artwork engineering addresses these risks before sampling begins. This may involve:
- increasing minimum stroke thickness
- simplifying overly complex graphics
- adjusting contrast for textured substrates
- redefining color builds specifically for canvas
The goal is not to “change the design,” but to ensure the design performs reliably on fabric, not just on screen.
Match canvas to print method early
| Print Method | Required Canvas Traits |
|---|---|
| Digital pigment | Smooth surface, pre-treated |
| Screen printing | Stable weave, even yarn |
| Reactive printing | High cotton content |
Choosing canvas first and “hoping” printing works is a common failure path.
Inexperienced teams often select canvas based on feel, weight, or price, then try to force a printing method onto it. Experienced manufacturers reverse that logic. They evaluate canvas construction and printing method as a paired system.
Key canvas traits that matter include:
- yarn thickness consistency
- surface hairiness
- weave tightness
- fiber composition
- finishing history
For example:
- Digital pigment printing performs better on smoother, more uniform surfaces where ink film remains continuous.
- Screen printing tolerates texture better but needs weave stability to avoid registration drift.
- Reactive printing demands high cotton content to chemically bond with fibers.
By aligning fabric and print method early, manufacturers avoid costly mid-project changes.
Lock shrinkage before printing
| Step | Purpose |
|---|---|
| Pre-shrink test | Predict geometry change |
| Wash simulation | Reveal distortion |
| Dimensional tolerance | Set acceptance limits |
Print alignment is meaningless if fabric dimensions change later.
Shrinkage is one of the most underestimated risks in printed canvas production. Experienced manufacturers never approve artwork placement or alignment until shrinkage behavior is known.
This involves more than a single wash test. A proper shrinkage evaluation considers:
- warp vs weft behavior
- relaxation shrinkage after tension release
- changes caused by finishing or coating
- impact of washing temperature and drying method
Once shrinkage data is confirmed, manufacturers set dimensional tolerances. These tolerances define what level of movement is acceptable and prevent subjective disputes later.
Without this step, even perfectly printed fabric can become unusable after finishing or washing.
Control the process sequence
| Correct Order | Benefit |
|---|---|
| Pre-shrink → Print → Cure → Finish | Stable results |
| Print → Test → Sew simulation | Early problem detection |
Sequence errors cause most late-stage rejections.
In printed canvas production, order matters as much as process. Many failures occur not because the wrong process was chosen, but because the right processes were done in the wrong order.
Common sequence mistakes include:
- printing before shrinkage control
- coating after print approval without re-testing
- applying softeners that reduce ink fastness
- washing after printing without protecting the print layer
Experienced manufacturers document and lock the full sequence early. Samples are approved only if they follow the exact same route planned for bulk production. No shortcuts. No “temporary” steps.
Sew-aware printing tests
Experienced manufacturers test prints after simulated sewing:
- Needle penetration
- Fold stress
- Seam abrasion
At SzoneierFabrics, printed canvas for bags and accessories is always evaluated post-sewing simulation, not just as flat fabric.
This step separates professional operations from basic print shops.
Flat fabric testing cannot predict how prints behave under mechanical stress introduced by sewing. Sewing adds:
- puncture points
- compression
- heat from needle friction
- bending at seams and folds
Sew-aware testing typically includes:
- stitching through printed zones
- folding and creasing printed panels repeatedly
- checking for cracking, whitening, or ink breakage along seams
- evaluating abrasion at corners and edges
If a print cannot survive construction, it cannot survive real use.
Multi-stage testing instead of single approvals
Experienced manufacturers never rely on a single approval point. They layer validation to mirror real production stages.
Typical validation flow:
- Fabric-level testing: ink adhesion, rub resistance, color accuracy
- Finished-fabric testing: shrinkage, coating impact, wash behavior
- Post-construction testing: seam stress, fold durability, abrasion
Each stage answers a different risk question. Skipping any one creates blind spots.
Documentation and repeatability
Another overlooked prevention tool is documentation. Experienced factories record:
- ink system specifications
- curing temperatures and dwell times
- fabric batch details
- finishing chemistry
- sewing thread and needle types
This creates repeatability. When a reorder happens months later, the process does not rely on memory. It relies on data.
Without documentation, even successful projects can fail on repeat orders.
Why experienced manufacturers say “no” early
One of the strongest signals of an experienced manufacturer is their willingness to challenge unrealistic requests early.
Examples include:
- requesting sublimation on cotton canvas
- demanding jet-black on natural canvas without tolerance
- placing prints across heavy seam zones
- skipping shrinkage testing to save time
Saying “yes” to these requests often leads to failure. Experienced manufacturers explain the risks, propose alternatives, and align expectations before money is spent.
Cost control through prevention
Preventive practices are often seen as adding cost. In reality, they reduce total cost.
Early testing may add:
- small sampling expenses
- extra approval time
But it prevents:
- reprinting entire fabric lots
- scrapping sewn goods
- urgent air shipments
- damage to brand reputation
From a cost perspective, prevention is almost always cheaper than correction.
How buyers benefit from experienced prevention systems
Buyers working with experienced manufacturers gain:
- fewer surprises
- faster approvals
- more consistent repeat orders
- predictable timelines
- stable quality across batches
Most importantly, they gain confidence that the product will perform in the market, not just in the sample room.
Manufacturer prevention strategy
Experienced manufacturers do not rely on luck. They rely on systems.
At SzoneierFabrics, prevention includes:
- artwork engineering reviews
- fabric–print compatibility validation
- mandatory shrinkage testing before print approval
- controlled process sequencing
- post-sewing simulation testing for bags and accessories
These steps are not optional add-ons. They are built into the production workflow.
Closing perspective
Printing failures in canvas production are rarely mysterious. They follow known patterns tied to artwork limits, fabric behavior, process sequence, and mechanical stress.
Experienced manufacturers prevent these failures not by reacting faster, but by thinking earlier. They treat printing as an engineered system that must survive finishing, construction, and real-world use.
When risks are addressed before bulk production, printed canvas stops being unpredictable. It becomes repeatable, scalable, and commercially reliable — exactly what brands need when quality matters as much as appearance.
What Should Buyers Check Before Approving Printed Canvas Fabric for Production?
Before approval, buyers should verify artwork suitability, base canvas consistency, printing method compatibility, shrinkage behavior, durability performance, and finishing sequence alignment.
Approval without a checklist is approval for risk.
In printed canvas projects, approval is not a formality. It is the last control point before cost, complexity, and consequences multiply. Once bulk production starts, problems no longer affect just fabric—they affect labor, delivery schedules, packaging, and brand reputation. The most experienced buyers understand this and treat approval as a structured validation process, not a visual “looks good” decision.
Printed canvas rarely fails loudly at first. It fails quietly: slight color transfer, subtle misalignment, small cracks at seams, dulling after a few washes. By the time the issue is obvious, hundreds or thousands of units may already be finished.
That is why a disciplined approval checklist matters more than any single machine, ink, or factory claim.
A Practical Printed Canvas Approval Checklist
The checklist below reflects how experienced buyers and manufacturers reduce uncertainty before committing to bulk production.
Artwork & design checks
| Item | Confirm |
|---|---|
| Resolution ≥300 DPI | Yes / No |
| CMYK color mode | Yes / No |
| Minimum line ≥0.6 mm | Yes / No |
| Text ≥5 pt | Yes / No |
If artwork fails here, everything downstream is compromised.
Artwork is often treated as “finished” once the design team signs off. In reality, artwork is only finished when it is production-safe for canvas.
Canvas magnifies artwork weaknesses because of its texture and fiber structure. Thin lines can disappear between yarns. Small text can break or blur. Gradients can band. Colors can shift once they interact with cotton fiber and ink chemistry.
Buyers should confirm not only technical specs like DPI and color mode, but also functional readability on canvas. A logo that looks sharp on screen may lose definition on a 14 oz canvas with visible weave.
Experienced buyers also confirm:
- whether artwork has been adapted specifically for canvas, not reused from paper or PU
- whether critical elements sit away from seams, folds, and stress zones
- whether color targets were approved from physical strike-offs, not digital proofs
Artwork approval is not about aesthetics alone. It is about survivability.
Base canvas verification
| Parameter | Approved Value |
|---|---|
| Fiber content | Cotton / Blend |
| Weight (gsm / oz) | Confirmed |
| Weave consistency | Even |
| Pre-treatment | Defined |
Never approve prints on “similar” canvas.
One of the most common approval mistakes is approving prints on a canvas that is “close enough.” That shortcut creates unpredictable results in bulk.
Canvas performance varies dramatically with:
- fiber length and quality
- yarn twist
- weave density
- finishing history
- batch-to-batch variation
A 12 oz cotton canvas from one mill can behave very differently from a 12 oz canvas from another. Ink absorption, color depth, shrinkage, and surface friction can all change.
Buyers should verify that:
- the canvas used for approval is exactly the same as bulk
- weight is confirmed with tolerance, not nominal label
- weave uniformity is acceptable across width
- any pre-treatment (washing, coating, priming) is defined and repeatable
Approving prints on substitute fabric is one of the fastest ways to guarantee rework later.
Printing & ink validation
| Item | Status |
|---|---|
| Printing method confirmed | ✓ |
| Ink system compatible | ✓ |
| Curing conditions tested | ✓ |
Ink without correct curing is temporary decoration.
Printing method and ink system are often discussed early, but curing is frequently treated as an operational detail. That is a mistake.
A print is only as durable as its weakest link:
- the ink chemistry
- the interaction with the fiber
- the curing profile that locks it in place
Buyers should confirm that:
- the printing method is chosen for the canvas type, not convenience
- the ink system is suitable for the intended use (washable, outdoor, decorative)
- curing conditions were tested on the same canvas weight and construction
A print that looks perfect but has not been cured correctly will fail quietly during handling, washing, or abrasion. Visual approval alone cannot detect this risk.
Shrinkage & finishing confirmation
| Test | Result |
|---|---|
| Wash shrinkage | Within tolerance |
| Coating effect | Approved |
| Finish sequence | Locked |
Shrinkage after printing is the fastest way to ruin alignment.
Shrinkage is not an abstract textile property. It directly affects:
- logo centering
- pattern alignment
- panel matching after cutting
- seam symmetry in finished products
Buyers should confirm that shrinkage behavior is known before approving artwork placement. This includes:
- wash shrinkage under realistic conditions
- relaxation shrinkage after tension release
- any dimensional change caused by finishing or coating
Finishing choices add another layer of risk. Coatings, softeners, and waterproof treatments can:
- darken colors
- reduce sharpness
- change hand feel
- affect ink adhesion
Approval must reflect the final finished state, not an intermediate sample. If coating or washing will occur after printing, the approval sample must go through the same sequence.
Durability & real-use checks
| Test | Required |
|---|---|
| Dry & wet rub | Yes |
| Wash fastness | Yes |
| UV resistance (if needed) | Yes |
| Seam stress test | Yes |
Printed canvas must survive use, not just inspection.
Durability is where many approvals fail silently. Buyers approve prints that look good flat, then discover problems after sewing or use.
Key durability questions buyers should ask:
- Will this product be washed? How often?
- Will it be exposed to sunlight or outdoor conditions?
- Will it be handled daily or occasionally?
- Does the print cross seams, folds, or corners?
Based on these answers, durability tests should be selected deliberately. A decorative wall canvas does not need the same tests as a daily-use tote bag.
Seam stress testing is especially important for bags and accessories. Sewing introduces mechanical stress that flat fabric never experiences. If prints crack or whiten at seams, the product will fail quickly in the market.
Why approvals fail when checklists are skipped
Most approval failures are not caused by lack of knowledge. They are caused by assumptions:
- assuming artwork is “print-ready”
- assuming similar canvas behaves the same
- assuming curing is handled correctly
- assuming finishing won’t change appearance
- assuming fabric-level tests predict product-level performance
Each assumption adds risk. When several stack together, failure becomes almost inevitable.
Experienced buyers replace assumptions with confirmations.
The buyer’s role in risk prevention
Approval is not solely the manufacturer’s responsibility. Buyers play a critical role by:
- providing clear end-use information
- defining durability expectations upfront
- insisting on approval samples that match bulk conditions
- refusing to rush approval without data
When buyers push for speed without validation, they often pay for it later through delays, rework, or customer complaints.
What experienced buyers ask before approving
Experienced buyers often ask questions like:
- Was this sample made on the same canvas batch as bulk?
- Has this print been washed or finished the same way as production?
- What rub and wash results were achieved, not just “passed”?
- Where will this print sit relative to seams and folds?
- What changes, if any, were made between sample and bulk process?
These questions signal seriousness and usually lead to better outcomes.
Printed Canvas Fails Quietly — Until It Doesn’t
Printed canvas fabric doesn’t usually fail at the printer. It fails when assumptions go unchecked — about artwork, base fabric, ink, shrinkage, or durability.
The most reliable printed canvas projects are not those with the newest equipment, but those where decisions are made in the right order and validated step by step before bulk production.
A structured approval checklist turns uncertainty into controlled risk. It gives buyers confidence that what they approve on the table will behave the same way after cutting, sewing, washing, and real-world use.
Mistakes are common. Repeat mistakes are optional.
Start Your Printed Canvas Fabric Project with SzoneierFabrics
If you’re developing printed canvas fabric for bags, home textiles, or accessories and want to avoid costly rework, SzoneierFabrics can support you with:
- Base canvas selection matched to print method
- Artwork technical review before sampling
- Shrinkage, rub, and wash testing
- Print-plus-sewing simulation
- Low MOQ sampling and fast iteration
- Stable bulk production with consistent quality
Share your design files, end-use, and performance expectations. Our team will help you deliver printed canvas that looks right, lasts longer, and behaves as expected in real use.
When you’re ready, contact SzoneierFabrics to request samples or a tailored quotation.
printed canvas fabric, printed canvas fabric mistakes, canvas fabric printing problems, printed canvas fabric buyers guide, canvas printing mistakes, printed canvas fabric quality issues, canvas fabric printing methods, digital printing on canvas fabric, screen printing canvas fabric, pigment printing on canvas, canvas fabric base selection, cotton canvas fabric printing, canvas fabric shrinkage printing, printed canvas fabric durability, canvas fabric color fastness, printed canvas fabric wash fastness, canvas fabric rub resistance, printed canvas fabric finishing, canvas fabric coating printing, printed canvas fabric quality control, custom printed canvas fabric, printed canvas fabric manufacturer china, printed canvas fabric supplier, printed canvas fabric low MOQ, printed canvas fabric sampling, printed canvas fabric testing, printed canvas fabric production checklist, canvas fabric printing guide