Skip to content
A modular tactical bag can look almost unfinished when it is empty. Rows of webbing, laser-cut slots, hook-and-loop panels, compression straps, and attachment loops leave open spaces that seem to invite more equipment. That flexibility is the whole appeal. The same base bag can carry medical supplies today, communications equipment tomorrow, and outdoor tools on the next trip.
But modularity creates a problem that ordinary backpacks rarely face: every new attachment changes the way the bag carries.
Add a pouch to the front, and the center of gravity moves away from the body. Add two loaded side pouches, and the bag becomes wider. Place a heavy medical module high on one side, and the pack may pull unevenly with every step. Choose a laser-cut panel that looks clean but lacks adequate laminate strength, and repeated attachment can begin tearing the slot edges. Use poorly spaced webbing, and supposedly compatible pouches may be difficult to weave securely.
A modular tactical bag is a pack built with standardized or configurable attachment zones that allow pouches, organizers, tools, and accessories to be added, removed, or repositioned. The most common system combines PALS-style webbing with MOLLE-compatible pouches. Other options include laser-cut laminated panels, internal hook-and-loop fields, removable organizer boards, buckle-mounted modules, and compression-based attachment points. The best system is the one that supports the required equipment securely without creating excessive weight, movement, width, or complexity.
That answer matters because modular does not mean unlimited. A bag may technically accept ten external pouches while remaining practical with only three. It may support several attachment methods while becoming difficult to repair. It may offer hundreds of possible configurations even though most users need only one dependable layout.
The strongest modular design begins with a mission rather than a blank attachment grid. What equipment must be carried? Which items need to be reached in seconds? Which modules are heavy? Will the bag move through vehicles, narrow doors, forests, medical environments, or public spaces? Does the user wear body armor? Will the modules be changed daily or remain attached for months?
Imagine a responder preparing for a night exercise. A medical pouch is attached to the front, a bottle carrier sits on one side, and a radio pouch is added to the other. Everything fits. Ten minutes into the movement, the bottle begins swinging, the medical pouch pulls the front panel downward, and the radio antenna catches the shoulder strap. Nothing has broken, yet the system is already failing. The problem is not a lack of attachment points. It is a lack of attachment planning.
What Is a Modular Tactical Bag?
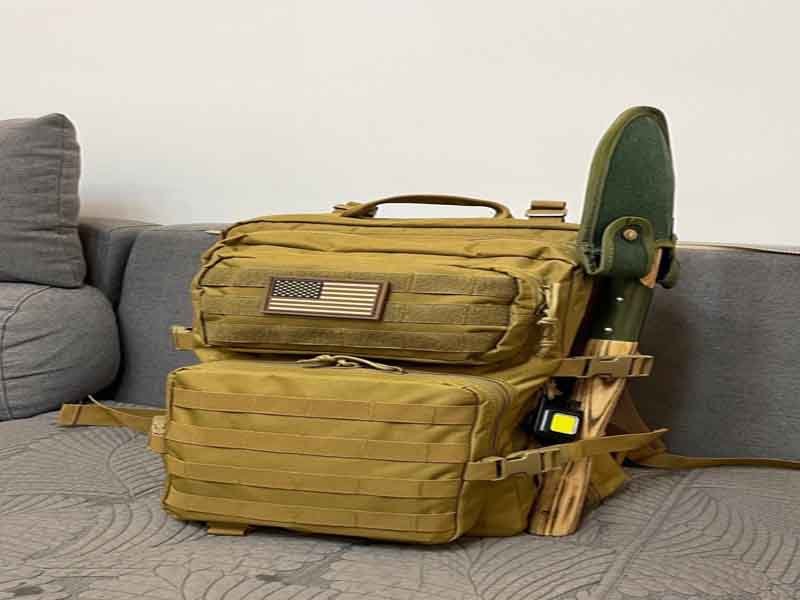
A modular tactical bag is a load-carrying platform designed so that equipment storage can be changed without replacing the complete bag. It normally combines a stable main compartment with external or internal attachment zones for pouches, medical modules, bottle carriers, radios, tools, organizers, and mission-specific accessories.
The defining feature is not the number of webbing rows. It is the ability to adapt while maintaining security, access, balance, and carrying comfort. A modular bag should let the user alter the equipment layout without creating loose movement, blocked openings, overloaded seams, or unnecessary bulk.
Modularity can exist outside, inside, or across the carrying system. External modularity adds pouches and equipment to the shell. Internal modularity uses dividers, hook-and-loop boards, removable pouches, and elastic organizers. Harness modularity may include detachable shoulder straps, removable belts, or interchangeable panels. Capacity modularity can use expandable compartments, removable lids, or attachable side pockets.
A strong system does not use every type of modularity at once. It selects the methods that match the product’s actual role.
What Makes a Bag Modular?
A bag becomes modular when its storage, attachment, or carrying components can be reconfigured while the core structure remains usable. The user should be able to add, remove, reposition, or replace a module without permanently altering the bag.
The most obvious example is an exterior pouch woven onto PALS webbing. The base backpack remains the same, while the user chooses whether to attach an IFAK pouch, utility pocket, radio carrier, bottle holder, or tool module.
Internal hook-and-loop panels offer another form of modularity. Removable organizers can be positioned according to the equipment. A medical team may use color-coded pouches. A communications team may use padded radio and battery modules. A photographer may install adjustable dividers.
Removable dividers are modular only when they remain stable under real use. A divider that collapses when the bag is lifted technically moves, but it does not provide useful reconfiguration.
The same principle applies to exterior attachments. An attachment point is not valuable merely because something can be clipped onto it. The attached item must stay controlled during walking, running, vehicle movement, bending, and lifting.
| Modular Element | What Can Be Changed | Main Benefit | Common Weakness |
|---|---|---|---|
| PALS webbing | Pouch position and type | Broad accessory compatibility | Adds weight and visual bulk |
| Laser-cut slots | Pouches and accessories | Clean, modern profile | Depends heavily on laminate quality |
| Internal loop panel | Organizer placement | Protected reconfiguration | Uses internal wall space |
| Removable dividers | Compartment dimensions | Fits different equipment | Can collapse under dense loads |
| Buckle-mounted panel | Complete module | Fast replacement | Requires precise buckle alignment |
| Compression attachment | Bulky external gear | Flexible temporary storage | Less secure for small items |
| Detachable side pouch | Capacity and category storage | Adds volume only when needed | Can widen and unbalance the bag |
| Removable harness | Carrying method | Supports vehicle or body carry | Increases component complexity |
The practical value of modularity can be judged through five questions.
Can the module be attached without special tools?
Does it stay secure when loaded?
Can it be removed without damaging the bag?
Does the new position preserve access to the main compartment?
Does the complete load remain balanced?
When the answer to any of these is no, the attachment may be adjustable without being truly useful.
A modular bag also needs a strong core. The main compartment should still function when no pouches are installed. Compression straps should stabilize changing loads. The harness should support the maximum intended configuration. Attachment panels should connect to reinforced structural zones.
A weak base pack does not become stronger because more modules can be added.
There is also a difference between configurable and expandable. A configurable bag changes how equipment is organized. An expandable bag increases volume. Some systems do both, but they solve different problems.
A removable admin pouch changes organization.
A detachable 10-liter side pocket increases capacity.
A compression panel may secure a helmet without adding a closed compartment.
Understanding these distinctions helps prevent a product from becoming overloaded with attachment features that serve no clear purpose.
What Is the MOLLE System?
MOLLE means Modular Lightweight Load-carrying Equipment. In everyday product language, the term is often used for the complete system of bags, pouches, and woven attachment straps associated with modular military-style gear.
The visible attachment grid is generally based on PALS webbing. MOLLE-compatible pouches use straps or tabs that weave through this grid to create a stable connection.
The key idea is interlocking. The pouch strap does not simply pass behind one row of webbing. It alternates between the webbing on the bag and the webbing or slots on the pouch. This repeated weave holds the module close to the base panel and distributes force across several attachment points.
That distribution matters. A pouch containing gloves places little stress on the system. A pouch containing batteries, medical supplies, metal tools, or a full water bottle can place several kilograms of moving force on the panel.
MOLLE is valuable because one base platform can serve several tasks. A backpack can carry a medical pouch during one operation, a utility pouch during another, or no external module when a clean profile is preferred.
However, compatibility does not guarantee suitability. A pouch may physically fit while creating poor load balance. A three-column pouch may attach to a narrow panel but block a zipper. A tall pouch may fit on the side but interfere with shoulder movement.
| MOLLE Advantage | Practical Value | Possible Trade-Off |
|---|---|---|
| Reconfigurable pouch layout | Supports changing missions | Requires planning and training |
| Wide accessory availability | Easier module sourcing | Quality varies between products |
| Secure woven connection | Reduces pouch movement | Slower than simple clips |
| Distributed attachment force | Supports moderate loads | Base panel still needs reinforcement |
| Replaceable modules | Simplifies repair and restocking | More parts to inspect |
| Shared platform | Allows coordinated equipment systems | Cross-brand fit may not be perfect |
MOLLE is most effective when users attach only what they need. Empty webbing does not require a pouch. Leaving part of the platform unused can improve movement and reduce weight.
The system should also be considered during manufacturing. Webbing rows need consistent spacing. Stitch intervals need to align accurately. The thread, stitch density, and base fabric must withstand repeated loading.
Webbing that is sewn slightly too tight makes attachment difficult. Webbing that is too loose allows pouches to sag. Inconsistent vertical alignment creates twisted modules.
MOLLE also affects cleaning and maintenance. Dust, mud, and debris collect behind attached pouches. Modules should occasionally be removed so the base panel and attachment straps can be inspected.
The best MOLLE layout is not necessarily the largest. A compact front panel and two side zones may serve a general tactical pack better than complete webbing coverage across every surface.
What Is PALS Webbing?
PALS means Pouch Attachment Ladder System. It is the grid of horizontal webbing rows used as the attachment foundation for many MOLLE-compatible pouches.
Traditional PALS commonly uses webbing approximately one inch wide, arranged in horizontal rows with standardized spacing and vertical stitching intervals. Those intervals create channels through which attachment straps are woven.
The distinction between MOLLE and PALS is useful even though the terms are often mixed in commercial language.
MOLLE refers to the broader modular load-carrying system.
PALS refers more specifically to the webbing grid that supports attachment.
Understanding this difference improves product specifications. A technical file should not simply say “add MOLLE.” It should identify the panel location, row count, column count, webbing width, spacing, stitch pattern, backing, and expected load.
The strength of PALS webbing depends on more than the webbing tape. The base fabric, reinforcement, thread, and connection to the bag structure all matter.
A strong webbing row sewn onto a weak unsupported panel may pull the fabric into a distorted shape. The webbing itself remains intact while the bag fails around it.
| PALS Design Factor | Why It Matters | What Poor Execution Causes |
|---|---|---|
| Webbing width | Controls pouch compatibility | Straps may not fit correctly |
| Row spacing | Allows proper interlocking | Pouches become difficult to weave |
| Stitch interval | Creates attachment channels | Modules sit crooked or loose |
| Base reinforcement | Spreads load into shell | Panel stretches or tears |
| Thread strength | Holds repeated tension | Rows loosen over time |
| Stitch density | Balances strength and fabric damage | Excessive holes weaken fabric |
| Panel location | Affects load balance | Heavy gear pulls bag outward |
| Edge clearance | Protects nearby zippers and seams | Pouches block bag access |
Webbing material also affects performance. Nylon webbing is widely used for tactical products because of its strength and flexibility. Polyester webbing offers strong UV resistance and low moisture absorption. The correct choice depends on environment, color requirements, cost, and compatibility with the shell.
The webbing surface should provide enough friction to hold the pouch straps without making installation excessively difficult. Very smooth webbing may allow movement. Extremely stiff webbing becomes difficult to weave through several rows.
PALS stitching should be evaluated after the panel is loaded. A neat empty grid can distort when a pouch is attached. The vertical stitch lines should keep each channel stable without cutting or puckering the base fabric.
For laser-cut systems, slots replace the traditional webbing channels, but the same principles remain: standardized geometry, stable spacing, adequate material strength, and proper load distribution.
How Is Modular Gear Used?
Modular gear is used by selecting a base bag, grouping equipment by task, assigning each group to a pouch or internal module, and positioning those modules according to access and weight.
The process should begin with the gear, not the available attachment space.
A medical module may need immediate access and clear identification.
A radio pouch needs antenna and cable clearance.
A bottle holder needs drainage and upper retention.
A utility pouch may carry dense tools and should remain close to the body.
An admin pouch usually contains lighter flat items and can sit on the front.
Different users can configure the same bag in different ways, but the laws of balance do not change. Heavy equipment should stay close to the user’s centerline. Frequently used items should be reachable. Fragile equipment should be protected. External width should remain controlled.
| Application | Useful Modules | Preferred Position |
|---|---|---|
| Medical response | IFAK, glove pouch and supply panel | Front or clearly marked side |
| Communications | Radio, battery and cable modules | Close to back or upper side |
| Outdoor survival | Bottle, fire kit and utility pouch | Balanced side and front zones |
| Law enforcement | Medical, admin and response pouch | Access based on vehicle or body carry |
| Military field use | Utility, hydration and sustainment pouches | Distributed near structural zones |
| Technical fieldwork | Tool roll, meter pouch and cable organizer | Low and close to center |
| Photography | Padded lens and battery modules | Internal or protected side access |
Modular gear also supports equipment transfer. A complete medical pouch can move from a backpack to a vehicle panel. A communications module can transfer between users. A detachable organizer can be removed for inspection or restocking.
This creates a maintenance advantage. Instead of emptying the whole pack, the user removes one category. Missing items become easier to see. Used supplies can be replaced as a module.
The disadvantage is component accumulation. Each pouch has its own fabric, zipper, attachment straps, binding, labels, and internal organization. A modular system can weigh more than one integrated compartment holding the same equipment.
Modular products should therefore be evaluated as a complete configured system, not as an empty base bag.
The empty bag weight may appear acceptable.
The attached pouches add weight.
The contents add more weight.
The external position increases leverage.
The final system may feel substantially heavier than the sum of its individual parts suggests.
A smart modular layout uses the minimum number of modules needed to achieve the required access.
Which Attachment System Is Best?
The best attachment system depends on load weight, frequency of reconfiguration, required speed, manufacturing method, environmental exposure, repair expectations, and desired appearance. Sewn MOLLE webbing remains one of the strongest and most widely compatible options. Laser-cut panels reduce visual bulk and may reduce weight. Hook-and-loop systems work well for internal organizers. Buckles are useful when complete modules must be removed quickly. Heavy gear requires reinforced attachment integrated into the bag structure rather than relying on surface panels alone.
No system is universally superior. The strongest system may be unnecessarily heavy. The lightest may not support repeated heavy loading. The fastest to remove may be more likely to move or release accidentally. The cleanest-looking system may be harder to repair in the field.
The correct decision begins with a simple distinction: permanent mission configuration or frequent reconfiguration?
A bag configured once and used for months may prioritize maximum attachment security.
A shared medical platform may prioritize fast module replacement.
A retail outdoor pack may prioritize simple compatibility and low weight.
A technical equipment bag may need custom buckles or rails rather than standard MOLLE.
Is Sewn MOLLE More Durable?
Sewn MOLLE webbing is often the most durable option for repeated attachment, heavy field use, and products that need broad pouch compatibility. Its performance comes from woven webbing, multiple stitch points, and the ability to distribute load across a reinforced panel.
Traditional webbing tolerates bending and abrasion well. If one stitch area is damaged, the entire grid may not fail immediately. Webbing can also be repaired more easily than some laminated laser-cut panels.
Its main disadvantage is weight. Every row adds webbing and thread. Full coverage on the front, sides, belt, and shoulder straps can add substantial material.
Sewn MOLLE also creates a visibly tactical appearance. That may be desirable for military or field use but less suitable for discreet urban or professional applications.
| Sewn MOLLE Factor | Advantage | Limitation |
|---|---|---|
| Webbing construction | Strong and familiar | Adds weight |
| Standard channel geometry | Broad pouch compatibility | Requires accurate sewing |
| Multiple stitch points | Distributes force | Increases labor |
| Flexible tape | Handles repeated bending | Can collect dirt |
| Repairability | Individual areas may be resewn | Repair may affect coating |
| Traditional appearance | Clearly communicates modular use | Can look bulky or conspicuous |
Durability depends on how the grid is connected to the bag. Webbing should not float on a large unsupported panel. High-load rows should sit near structural seams or receive internal backing.
The backing does not always need to be heavy. A carefully selected reinforcement layer can spread the force without making the panel rigid.
Stitch pattern matters as well. Vertical bar tacks or dense short stitch blocks are common, but excessive stitch concentration can perforate coated fabric. The correct stitch density balances thread holding strength with protection of the base material.
Webbing ends should be secured within seams or properly finished. Exposed ends can fray, peel away, or create snag points.
For heavy pouches, the module should use several rows and columns. Narrow attachment concentrates force. A tall pouch connected only at its upper section may swing even when the webbing remains intact.
Sewn MOLLE is generally a strong choice when the product must accept common tactical pouches, survive repeated changes, and remain repairable. It may be less attractive when weight, discretion, and a smooth modern profile matter more.
Are Laser-Cut Panels Better?
Laser-cut panels are better when the design requires a cleaner profile, reduced webbing layers, modern appearance, or lower potential weight. They are not automatically stronger or lighter. Performance depends on the laminated material, slot geometry, layer bonding, cut quality, backing, and attachment to the bag.
A laser-cut panel normally uses a laminated textile construction. Slots are cut directly into the panel to accept pouch straps. This removes separate horizontal webbing rows and allows more visual control over the pattern.
The panel may combine a durable face textile with an internal film and backing layer. The laminate must resist delamination, edge tearing, flex fatigue, temperature changes, moisture, and repeated strap installation.
| Laser-Cut Factor | Advantage | Limitation |
|---|---|---|
| Flat surface | Clean, low-profile appearance | Less traditional repairability |
| Reduced webbing layers | Potential weight saving | Laminate may still be heavy |
| Flexible pattern design | Custom slot layouts | Nonstandard geometry can reduce compatibility |
| Controlled color surface | Consistent visual appearance | Cut edges reveal material layers |
| Modern branding | Suitable for urban tactical products | May look less rugged to some users |
| Integrated panel structure | Can combine attachment and reinforcement | Failure may affect a large area |
Slot design is critical. A narrow slot makes pouch installation difficult. A wide slot allows movement. Sharp internal corners can concentrate stress. Rounded slot ends distribute force more effectively.
The distance between slots and panel edges also matters. If a slot is cut too close to a zipper, seam, or panel boundary, the remaining material may not carry the load.
Laser settings must be controlled. Excessive heat can harden, discolor, melt, or weaken the cut edge. Insufficient energy may leave incomplete cuts or frayed layers.
The laminate should be tested after repeated attachment cycles. Pouch straps create friction around the slot edges. Heavy modules pull continuously during movement.
Delamination is another concern. Heat, humidity, flexing, cleaning chemicals, and aging can weaken the bond between layers. A panel may look perfect when new but begin separating after repeated field use.
Laser-cut MOLLE works well for compact packs, low-profile tactical bags, modern police gear, medical products, and urban outdoor designs. It should not be selected merely because it looks more advanced. The material system and expected load need to justify the choice.
A hybrid design can use laser-cut panels for light front pouches and sewn webbing in high-load side or lower zones. This approach preserves a clean appearance while placing traditional reinforcement where it is needed.
How Do Hook-and-Loop Panels Work?
Hook-and-loop panels create modularity by allowing compatible pouches, organizers, labels, and retention panels to attach to a field of loop material. They are especially effective inside bags, where modules are protected from direct abrasion, dirt, and snagging.
The system is fast. A pouch can be removed without unweaving straps. Its position can be changed in seconds. This makes hook-and-loop useful for medical kits, camera inserts, tool organizers, cable panels, and shared equipment bags.
The holding force depends on contact area, material quality, orientation, contamination, and load direction. Hook-and-loop performs best when force pulls across the surface rather than peeling from one edge.
A small patch may hold a light label but not a dense medical pouch.
A large panel spreads the load and provides more positioning options.
| Hook-and-Loop Use | Main Benefit | Main Limitation |
|---|---|---|
| Internal medical pouches | Fast removal and clear layout | Needs sufficient panel area |
| Admin organizers | Easy reconfiguration | Can peel under heavy vertical load |
| Identification patches | Simple role changes | Collects lint and debris |
| Padded divider attachment | Flexible compartment sizes | Divider may collapse |
| Tool boards | Clear item visibility | Dense tools require additional retention |
| Cable organizers | Fast equipment transfer | Hook surfaces may snag delicate materials |
Internal loop fields should be sewn to a stable base. Large loop panels can add stiffness, so placement should be coordinated with the bag shape.
The pouch backing needs enough hook coverage. Two narrow strips may allow the pouch to twist. Full or broad backing provides more stability.
Heavy modules may need secondary retention. A buckle, strap, or elastic keeper can prevent peeling during impact.
Hook-and-loop also creates noise. In medical or general outdoor applications, this may not matter. In settings where quiet access is important, zipper or buckle modules may be preferred.
Contamination reduces holding power. Dust, fibers, vegetation, and dirt collect in the hook surface. External hook-and-loop fields require regular cleaning and may be less suitable for muddy environments.
Hook-and-loop is best used where rapid reconfiguration is more important than maximum structural load. It is an excellent internal system and a useful supplement to MOLLE rather than a direct replacement for every application.
When Are Buckle Systems Useful?
Buckle systems are useful when complete modules need to be attached or removed faster than MOLLE weaving allows. They are common on removable front panels, detachable lids, compression flaps, side pouches, helmet carriers, medical modules, and convertible bag systems.
A buckle creates a clear mechanical connection and provides tactile confirmation when engaged. It can also support one-handed operation when the component is correctly sized and positioned.
Buckle systems require alignment. The male and female components must meet easily even when the bag is partly loaded. Misaligned attachment points create tension and make connection difficult.
| Buckle Application | Benefit | Main Risk |
|---|---|---|
| Removable front panel | Fast mission change | Panel may move without lower retention |
| Detachable side pouch | Adds temporary capacity | Can unbalance the bag |
| Compression flap | Secures helmet or clothing | Loose straps can snag |
| Removable lid | Changes volume and access | Exposes opening when removed |
| Medical module | Rapid transfer | Accidental release must be prevented |
| Convertible harness | Changes carrying method | More hardware and setup steps |
Buckles should not be the only connection for heavy modules unless the system is specifically engineered for that load. Movement can occur between attachment points. Additional webbing, hook-and-loop, or lower tabs may stabilize the panel.
The buckle material must match the environment. Cold, heat, impact, dirt, and chemical exposure affect performance. Oversized buckles add weight and may press against the body or nearby equipment.
Release direction matters. A buckle placed under a pouch may be difficult to reach. A buckle facing outward may strike hard surfaces. A release tab that feels similar to another critical buckle can cause confusion.
For removable modules, color or tactile identification can help users find the correct release. The system should still remain visually controlled and not create unnecessary snag points.
Buckle systems work best when the user frequently changes a complete module rather than individual pouches.
Which System Fits Heavy Gear?
Heavy gear needs attachment that transfers force into the bag’s structural seams, frame, or reinforced panels. Surface webbing alone may be insufficient when modules contain water, batteries, metal tools, ammunition, medical equipment, or technical hardware.
The first question is not which attachment system looks strongest. It is how much the loaded module weighs and how that force moves during use.
A two-kilogram pouch creates more than a static two-kilogram load when the user runs, jumps, drops the bag, or changes direction. Dynamic movement increases the stress on webbing, slots, thread, and base fabric.
| Heavy-Load Strategy | Suitable Use | Structural Requirement |
|---|---|---|
| Multi-row sewn MOLLE | Dense utility pouches | Reinforced base panel |
| Direct webbing anchor | Tools and equipment | Connection to major seam |
| Buckle plus webbing | Removable heavy module | Secondary anti-movement retention |
| Compression cradle | Helmet or bulky equipment | Multiple controlled straps |
| Internal frame-mounted module | Batteries or communications gear | Load transfer close to back |
| Reinforced detachable side pouch | Water or technical gear | Balanced placement on both sides |
Heavy modules should remain close to the body. A dense pouch attached to the outer front panel increases leverage and can make the pack feel much heavier.
Side placement can work when the load is balanced. A water pouch on one side and an equally heavy equipment pouch on the other may preserve stability. The bag becomes wider, however, and may interfere with movement.
The attachment area should be tested with the exact loaded module. Empty pouches reveal almost nothing about dynamic performance.
Testing should include repeated walking, rapid turns, controlled drops, one-handle lifting, strap tightening, and vehicle movement. The panel should be inspected for slot elongation, stitch distortion, fabric whitening, coating cracks, webbing movement, and delamination.
For genuinely heavy equipment, internal carriage is usually better than external attachment. External modules are most valuable for access and category separation. They should not become a substitute for a properly sized main compartment.
The best attachment system is therefore the one that places the correct equipment in the correct position with the fewest unnecessary components. Strong modular design is not about covering a bag with options. It is about controlling change.
How Does MOLLE Attachment Work?
MOLLE attachment works by interweaving a pouch’s mounting straps through alternating rows on the pouch and the bag’s PALS platform. This repeated connection holds the pouch close to the base panel, distributes weight across several points, and reduces swinging during movement. A pouch is not securely mounted when its straps pass behind only one webbing row or when they are clipped loosely to the outside.
Correct attachment matters because modular equipment is exposed to more than static weight. Walking, running, climbing, entering vehicles, dropping the pack, and changing direction all create dynamic forces. A pouch that weighs one kilogram while stationary can place much greater momentary stress on its straps and the bag panel when it moves suddenly.
The attachment system must control three things at the same time:
Vertical movement, which makes the pouch bounce up and down
Horizontal movement, which allows the pouch to swing from side to side
Separation from the base panel, which creates leverage and snagging
The tighter and more completely the pouch is woven into the attachment grid, the better these movements are controlled. However, tight attachment should not require excessive force or damage the webbing. Correct dimensions, material flexibility, and consistent spacing are essential.
How Do You Weave MOLLE Straps?
To weave MOLLE straps correctly, align the pouch with the intended columns, insert the mounting straps behind the first row of webbing on the bag, pass them back through the corresponding row on the pouch, and continue alternating between the bag and pouch until the complete strap length is secured.
The process can feel slow compared with clipping on an accessory, but that interlocking pattern creates stability.
A typical sequence follows these steps:
Position the empty pouch on the bag and confirm that it does not block zippers, straps, or handles.
Align every attachment strap with a corresponding PALS channel.
Pass the strap through the highest available row on the bag.
Bring the strap back through the next attachment point on the pouch.
Continue alternating between bag and pouch rows.
Pull the strap snug after each pass rather than tightening everything at the end.
Secure the final snap, tuck tab, hook-and-loop end, or locking section.
Load the pouch and check for movement.
The pouch should sit flat against the attachment panel. A visible gap between the pouch and bag usually indicates incomplete weaving, excessive strap length, poor webbing spacing, or an attachment system that is not fully compatible.
| Installation Check | Correct Result | Warning Sign |
|---|---|---|
| Column alignment | Pouch sits straight | Pouch leans or twists |
| Strap path | Alternates through bag and pouch | Strap passes behind bag rows only |
| Final retention | Strap end is fully secured | Snap or tab remains under tension |
| Base contact | Pouch rests close to panel | Large gap behind pouch |
| Loaded movement | Minimal bouncing or swinging | Pouch shifts during walking |
| Nearby access | Zippers and handles remain usable | Pouch blocks primary functions |
Pouches should usually be installed empty. A loaded pouch is harder to compress against the panel and more difficult to weave accurately. Once attached, the pouch can be loaded and checked again.
The installation direction also matters. Beginning from the top normally makes it easier to align the pouch and control downward movement. The final retention point should not sit where it rubs against the body, catches on equipment, or presses into another compartment.
Some pouch straps use snaps. Others use rigid polymer tabs, tuck-under ends, hook-and-loop closures, or integrated locking systems. Each type should be checked after attachment. A snap that appears closed may be under twisting tension and reopen during movement.
Short pouches may use two horizontal rows, while taller modules may require four or more. Every available row should generally be woven when the pouch is expected to carry meaningful weight. Leaving lower rows unused allows the bottom of the pouch to swing.
Webbing can be stiff when new. A rounded, non-sharp tool may help guide a strap through a tight channel, but it should not cut, stretch, or damage the webbing. If every compatible pouch requires extreme force, the spacing or webbing specification may be incorrect.
After installation, the pack should be shaken and moved in several directions. The pouch should not slap against the shell. A small amount of material flex is normal, but obvious separation indicates a weak connection.
Why Must Straps Be Interlocked?
Straps must be interlocked because interweaving converts several separate webbing rows into one connected load path. Instead of allowing the pouch to hang from a single horizontal row, the force is shared across the pouch, attachment straps, bag webbing, and reinforced base panel.
A pouch that is simply clipped or passed behind one webbing row acts like a pendulum. The top connection carries most of the load while the bottom swings. The movement increases strain and can make the bag feel heavier.
Interlocking reduces leverage by pulling the pouch closer to the bag.
This effect becomes more important as pouch weight and height increase. A shallow glove pouch creates limited leverage. A tall bottle carrier or tool pouch creates more because its contents sit farther from the upper attachment point.
| Attachment Method | Load Distribution | Movement Control | Suitable Use |
|---|---|---|---|
| Fully interwoven straps | Spread across several rows | Strong | Loaded tactical pouches |
| Single-row pass-through | Concentrated at one row | Weak | Not recommended for duty loads |
| Simple clip | Concentrated at clip point | Limited | Temporary lightweight items |
| Carabiner attachment | Point load | Poor against swinging | Secondary retention only |
| Buckle plus panel | Spread through buckle anchors | Good when stabilized | Removable complete modules |
| Hook-and-loop only | Spread over contact area | Moderate | Lightweight internal organizers |
Interlocked attachment also reduces wear. A swinging pouch repeatedly rubs against the shell and webbing. Over time, this can damage coating, fray binding, loosen stitching, and wear the pouch backing.
The bag feels more predictable when modules remain close to the body. During rapid turns, unsecured equipment continues moving after the user changes direction. This creates a delayed pulling sensation and can affect balance.
Interlocking does not make every load appropriate. A pouch can be woven perfectly and still be too heavy for its location. A large battery module on the outer front panel remains inefficient because the weight sits far from the spine.
The system should therefore be judged in two stages:
Is the pouch mechanically attached correctly?
Is the pouch positioned appropriately for its weight and use?
Both answers must be yes.
The interwoven system also helps prevent accidental removal. A fully woven pouch cannot usually be pulled away in one motion. This is useful in dense vegetation, vehicles, crowds, and confined spaces where protruding equipment may catch.
The trade-off is slower reconfiguration. Removing a woven pouch takes more time than releasing a buckle or hook-and-loop panel. That is why MOLLE works well for modules that remain attached through an operation, while faster systems may be better for equipment transferred frequently.
Are Different Brands Compatible?
Different brands are often compatible when they follow common PALS dimensions and use flexible, correctly sized attachment straps. However, commercial products can vary in webbing width, spacing, stitch interval, panel thickness, strap length, and locking method.
The word MOLLE is used broadly in product descriptions. Not every product follows the same construction tolerance. Two items may both be advertised as MOLLE-compatible while fitting together poorly.
Common compatibility problems include:
Webbing rows placed too close together
Vertical stitch channels that are too narrow
Pouch straps that are too thick or stiff
Laser-cut slots that are too short
Attachment straps that do not reach the final locking point
Pouch backing that is wider than the available panel
Buckles or snaps positioned over bag seams
Panel curves that prevent the pouch from lying flat
| Compatibility Factor | Effect on Fit | What to Check |
|---|---|---|
| Webbing width | Controls strap passage | Compare physical dimensions |
| Row spacing | Determines interlocking pattern | Test over full pouch height |
| Column spacing | Controls pouch alignment | Check all mounting straps |
| Strap thickness | Affects weaving difficulty | Confirm with final material |
| Slot length | Determines laser-cut compatibility | Test common strap types |
| Panel curvature | Changes surface contact | Load pouch on finished bag |
| Final closure position | Controls retention | Ensure tab or snap closes fully |
Cross-brand fit should be tested physically rather than assumed from descriptions. This is particularly important for custom bags intended to accept popular third-party pouches.
A manufacturer can develop the panel using reference accessories supplied by the customer. Testing several pouch widths and heights helps confirm that the grid works beyond one sample.
Laser-cut systems require special attention. Traditional woven straps may fit through standard webbing but struggle through thick laminated slots. Slot edges may also create more friction.
Some attachment systems use polymer locking tabs that need specific slot lengths. A slot that accepts soft webbing may not accept a rigid tab.
Compatibility also involves usable space. A pouch may attach mechanically but cover adjacent columns, prevent side compression, block a zipper, or extend beyond the bag panel.
A three-column pouch mounted on a four-column area may leave insufficient space for another module. Pouch dimensions should include the exterior body, not only the attachment footprint.
Color compatibility can matter for uniform products. Olive fabrics from different suppliers may not match. Nylon webbing, polyester shell fabric, coated laminate, zipper tape, and molded hardware can all show different shades.
A coordinated modular system should therefore define both mechanical and visual compatibility.
For large custom programs, standard reference modules should be retained alongside the approved bag sample. Future production can then be checked against the same physical pouches.
How Do You Prevent Pouch Movement?
Pouch movement is prevented through complete strap weaving, accurate panel dimensions, adequate attachment height, close surface contact, proper loading, and secondary retention where needed.
Movement should first be identified by direction.
Vertical bounce usually indicates incomplete lower attachment or excess strap length.
Side-to-side swing may result from a narrow mounting footprint or uneven load.
Outward separation may come from a stiff pouch backing, overloaded front section, or poor panel contact.
Rotation may indicate that the center of mass sits outside the attachment footprint.
| Movement Type | Likely Cause | Corrective Action |
|---|---|---|
| Vertical bounce | Lower rows not woven | Use every available row |
| Side swing | Attachment footprint too narrow | Use wider pouch or secondary strap |
| Outward pull | Dense contents far from panel | Repack or relocate module |
| Rotation | Uneven internal load | Balance pouch contents |
| Strap loosening | Weak final retention | Change locking method |
| Panel deformation | Unsupported base fabric | Add reinforcement |
| Buckle movement | Excess distance between anchors | Add lower stabilizer |
A pouch should be selected according to its contents. A tall narrow pouch may be appropriate for a bottle because the object matches the shape. The same pouch may be poor for several heavy metal tools that collect at the bottom.
Internal elastic loops and dividers prevent contents from shifting inside the pouch. Even when the pouch itself is stable, loose contents can create movement and noise.
Compression straps can provide secondary control. A side bottle pouch may sit under the bag’s side compression strap, which holds the upper section close. This only works when the compression strap does not block access or crush the contents.
Shock cord is useful for lightweight irregular equipment but should not serve as the primary retention for dense modules. Elastic loses force over time and responds differently in heat and cold.
Lower tabs or secondary webbing can stabilize buckle-mounted panels. Hook-and-loop backing can reduce movement between a detachable front panel and the pack, while buckles carry the primary separation load.
Pouch placement should also match the curvature of the bag. A rigid rectangular pouch attached across a curved side panel may contact only at the center. This creates edge movement. Flat structural areas are more suitable for rigid modules.
Testing should use the expected equipment weight. An empty pouch almost always feels stable. Load it fully, wear the pack, walk quickly, climb stairs, and make sudden direction changes.
A useful standard is not zero movement, which may be unrealistic with flexible textile products. The goal is controlled movement that does not change balance, create noise, damage the shell, or interfere with the user.
What Causes Attachment Failure?
Attachment failure is usually caused by poor load distribution, incomplete weaving, weak base fabric, incorrect stitch density, inadequate reinforcement, incompatible dimensions, material aging, or equipment that is too heavy for the selected position.
Failure can occur in several components:
The pouch strap tears.
The final snap or tab releases.
The bag webbing separates from the panel.
The panel fabric tears around the stitch line.
A laser-cut slot elongates or cracks.
The laminate begins to separate.
The pouch backing deforms.
The entire bag panel pulls out of shape.
| Failure Location | Common Cause | Preventive Measure |
|---|---|---|
| Pouch strap | Abrasion or undersized material | Use suitable webbing and edge finish |
| Snap closure | Misalignment or repeated impact | Reduce twisting tension |
| Webbing row | Weak stitching | Improve reinforcement and stitch plan |
| Base fabric | Concentrated force | Add backing and spread load |
| Laser-cut slot | Sharp corners or weak laminate | Use rounded geometry and tested material |
| Laminated panel | Heat, humidity or flexing | Validate bonding and aging |
| Pouch body | Overloading | Define realistic capacity |
| Main pack panel | Heavy outward load | Relocate dense module |
One frequent cause is treating webbing strength as the only requirement. Strong webbing sewn onto lightweight unsupported fabric can pull the fabric apart. The complete load path should be designed from pouch to panel to structural seam.
Another cause is inconsistent production. A development sample may use correct spacing, while mass production drifts because webbing is positioned manually without a reliable guide. Small errors accumulate across several rows and make attachment difficult.
Sewing thread and needle selection also matter. Excessively large needle holes can weaken coated fabric. Too many stitches in a small area can form a perforated tear path. Too few stitches may allow the webbing to peel away.
Laser-cut failure often begins at slot corners. Rounded ends reduce stress concentration. Material around the slot must be wide enough to carry the load.
Environmental aging can weaken attachment systems. Ultraviolet exposure, moisture, heat, cold, cleaning chemicals, and abrasion affect fabrics, coatings, webbing, laminates, and molded components differently.
User behavior contributes as well. Pulling a loaded pouch away from the panel without unweaving it damages both systems. Carrying the entire bag by one attached pouch places force in a direction the panel may not be designed to support.
Clear product guidance can reduce misuse. Maximum pouch weight, recommended locations, attachment instructions, and cleaning guidance may be included for specialized products.
Which Modular Pouches Are Useful?

The most useful modular pouches are those that organize a clear equipment category, improve access, or allow a complete task module to transfer between bags. Common examples include medical pouches, utility pouches, bottle carriers, radio holders, admin organizers, tool pouches, and electronics modules. A pouch should not be added simply because attachment space is available.
Each pouch adds weight and bulk before anything is placed inside it. A heavily organized modular system may weigh significantly more than a bag with equivalent fixed pockets. The benefit must justify that cost.
Useful pouch selection begins with three questions:
Does the equipment need faster access than the main compartment provides?
Does it need separation from other contents?
Will the module be moved between bags or users?
When all three answers are no, the item may be better stored inside the main bag.
Which Pouches Need Quick Access?
Quick-access pouches should hold items required frequently, urgently, or while the user is moving. These may include basic medical supplies, gloves, a light, communication accessories, navigation tools, rain protection, or role-specific equipment.
The pouch should be positioned where the intended user can reach it. A quick-access module placed on the middle of the rear panel may be visible to another team member but unreachable by the wearer. This may be intentional for team-access medical equipment, but the use must be defined.
Quick access is influenced by more than location. Closure type, opening direction, zipper size, pull design, internal retention, and pouch structure all matter.
| Pouch Contents | Access Priority | Suitable Position | Preferred Closure |
|---|---|---|---|
| Basic medical supplies | Immediate | Front or clearly marked side | Two-way zipper or pull-open panel |
| Protective gloves | Immediate | Upper front or shoulder zone | Simple flap or elastic access |
| Flashlight | Frequent | Belt, shoulder, or upper side | Retained open-top or zipper |
| Navigation tools | Frequent | Upper front | Zippered organizer |
| Radio accessories | Frequent | Upper side or front | Zipper or secured flap |
| Rain cover | Situation-dependent | Bottom or outer pocket | Easy-open zipper |
| Small tools | Task-specific | Side or front | Structured zip pouch |
The pouch should not open accidentally when brushed against a seat, branch, wall, or other equipment. Quick access does not mean weak retention.
Two-way zippers allow the opening point to be positioned intentionally. Zipper pulls can use different shapes or textures so users identify a module in low light.
Pull-open medical pouches often use a tab that releases the pouch or exposes the contents. The release force should be high enough to prevent accidental opening but low enough for gloved operation.
Internal layout affects retrieval. A quick-access pouch filled with loose equipment still requires searching. Elastic loops, divided sleeves, and contrasting lining improve visibility.
Frequently used items should not sit underneath less important equipment. The user should reach the intended object without removing the pouch or emptying its contents.
Quick-access pouches should also be tested in the user’s working posture. An attachment that works while standing may be difficult while seated in a vehicle or wearing protective equipment.
What Is an IFAK Pouch?
An IFAK pouch is an Individual First Aid Kit pouch designed to hold essential medical supplies in a compact, recognizable, and quickly accessible module. Its exact contents should follow the user’s training, organizational policy, and approved medical protocol.
The pouch may be mounted on a backpack, belt, vest, vehicle panel, or other platform. Common design formats include direct-opening pouches, clamshell pouches, tear-away modules, pull-out inserts, and roll-style organizers.
The most important design characteristics are identification, retention, accessibility, and internal visibility.
| IFAK Format | Main Advantage | Main Limitation |
|---|---|---|
| Fixed zip pouch | Secure and simple | May be difficult for wearer to reach |
| Tear-away pouch | Module can move to patient | Requires reliable backing retention |
| Pull-out insert | Fast content exposure | Insert must not release accidentally |
| Clamshell pouch | Clear organized layout | Needs working space to open |
| Roll organizer | Displays multiple categories | Slower to repack |
| Belt-mounted pouch | Immediate personal access | Limited capacity and comfort |
A tear-away IFAK usually attaches to a backing panel through hook-and-loop and a securing strap or buckle. The secondary retention prevents accidental removal. The release should remain accessible with gloves.
The internal layout should match the shapes of actual supplies. Generic elastic loops often fit some packages poorly. Loop width, pocket depth, and retention force should be confirmed with approved equipment.
The pouch should open without spilling contents. Covered elastic panels, mesh sections, or zippered internal pockets control supplies when the module is held vertically.
Identification can use a medical symbol, contrasting pull tab, color panel, woven label, or removable patch. The marking should be clear without being unnecessarily conspicuous when low-profile use is required.
Moisture protection is important, but a heavily sealed pouch can become slow to access. Individually packaged supplies and a weather-resistant outer construction often provide a practical balance.
The pouch should be easy to inspect and restock. A removable inventory card, transparent window, numbered loops, or labeled sections can help.
An IFAK pouch is not made effective by appearance. Its value depends on appropriate contents, user training, placement, and routine inspection.
Which Pouches Hold Tools?
Tool pouches should match the weight, dimensions, edges, and access requirements of the equipment. General utility pouches can hold gloves, cord, small repair supplies, and lightweight tools. Dense or sharp tools need reinforced bottoms, internal sleeves, rigid protection, and stronger attachment.
A tool pouch should not allow metal equipment to collect at one lower corner. Internal elastic loops, dividers, and fitted sleeves distribute the load.
| Tool Type | Suitable Pouch Design | Needed Protection |
|---|---|---|
| Small hand tools | Divided utility pouch | Elastic retention |
| Measuring equipment | Padded structured pouch | Impact and screen protection |
| Cables and adapters | Flat organizer | Anti-tangle loops |
| Multi-tool | Compact fitted carrier | Secure flap or snap |
| Repair supplies | Removable zip module | Category dividers |
| Sharp tools | Reinforced sheath compartment | Puncture-resistant layer |
| Heavy hardware | Low-mounted structured pouch | Strong base and wide attachment |
The pouch bottom is a common failure point. Dense tools repeatedly strike the same area during walking and vehicle movement. A double fabric layer, coated reinforcement, plastic insert, or high-abrasion panel can extend service life.
Sharp or pointed tools should never rely on outer fabric alone. A sheath, molded insert, or puncture-resistant layer protects the bag and user.
The closure should account for tool shape. A zipper forced over protruding equipment will wear quickly. Roll-top or flap designs may suit irregular items, while fitted carriers work for standardized tools.
Heavy tools should be mounted low and close to the center of the bag. A tool pouch placed high on one side creates imbalance.
Tool modules also benefit from removable construction. The user can carry the complete repair kit to the work area while leaving the main bag behind.
Noise control may matter. Metal tools striking one another can reveal movement, damage surfaces, and irritate the user. Elastic retention and padded dividers reduce rattling.
A tool pouch should be evaluated after contamination. Dust, oil, mud, and metal debris may affect zippers and hook-and-loop. Wipe-clean lining or removable internal trays can simplify maintenance.
Are Bottle Pouches Necessary?
Bottle pouches are useful when the bag lacks integrated bottle storage, when the user needs external access, or when different missions require different hydration capacity. They are not necessary when an internal reservoir, fixed side pocket, or vehicle-based water system already meets the need.
A full one-liter bottle weighs approximately one kilogram. This makes bottle placement a balance issue, not just a storage decision.
A side-mounted bottle pouch should have enough depth to support the container and an upper retention method such as a strap, elastic cord, or compression webbing. An open-top pouch without secondary retention may lose the bottle when the user bends, climbs, or runs.
| Bottle-Pouch Feature | Function | Failure Risk |
|---|---|---|
| Reinforced base | Supports full bottle weight | Bottom wear or tearing |
| Drainage opening | Releases spilled water | Water collects inside |
| Upper strap | Prevents bottle loss | Bottle falls during movement |
| Adjustable diameter | Fits several bottle sizes | Container shifts or rattles |
| Wide attachment | Spreads side load | Pouch swings |
| Insulated layer | Slows temperature change | Adds bulk and drying time |
Two side bottles can balance one another. A single heavy bottle should be counterbalanced with equipment of similar weight on the opposite side or placed inside the pack near the back.
Bottle pouches increase width. This matters in doorways, vehicles, dense vegetation, and public spaces. A collapsible pouch can lie flat when not in use.
Material should be selected according to environment. Mesh drains and dries quickly but can snag. Solid coated fabric protects the bottle and resists abrasion but may trap water. Hybrid construction combines a durable lower section with a lighter upper retention panel.
The pouch should allow the user to replace the bottle without removing the pack when this is a requirement. Position and opening angle should be tested on different body sizes.
Bottle pouches may also carry cylindrical tools, fuel bottles, or canisters, but the product should be designed and labeled for safe intended use. Fuel and drinking water should not be confused or stored without appropriate controls.
How Do Admin Pouches Help?
Admin pouches help organize small flat items such as notebooks, maps, identification, pens, cables, cards, keys, batteries, and communication accessories. They reduce clutter and prevent frequently used items from disappearing into the main compartment.
A good admin pouch is shallow enough to keep contents visible. Deep admin compartments become general storage pockets and quickly fill with loose items.
Internal organization may include pen loops, flat sleeves, key clips, mesh pockets, cable retainers, and document sections.
| Admin Item | Useful Retention | Design Consideration |
|---|---|---|
| Pens and markers | Elastic loops | Fit several diameters |
| Notebook | Flat sleeve | Allow gloved removal |
| Maps or forms | Protected document pocket | Prevent folding and moisture |
| Cables | Elastic or divided loops | Avoid connector strain |
| Keys | Tethered clip | Prevent loss |
| Small batteries | Individual holders | Protect contacts |
| Identification cards | Clear or covered sleeve | Balance visibility and privacy |
Admin pouches are usually best for lightweight contents. Users often overload them with tools, spare batteries, and dense electronics because the internal loops appear convenient. This makes the front of the bag heavy.
The pouch should not be so tall or rigid that it blocks access to the main compartment. A full front admin panel can prevent a clamshell bag from opening flat.
Document storage needs weather protection. A coated exterior does not guarantee that the internal sleeve remains dry. Waterproof inner pouches may be necessary for critical papers.
Transparent windows help identify cards or labels but can scratch, yellow, or reflect light. Covered sleeves provide better protection.
Admin pouches are especially useful when removable. A user can transfer documentation and small electronics between a patrol bag, backpack, and office without repacking each item.
The layout should be simple enough to remember. Too many tiny loops create the appearance of organization without practical flexibility.
A successful modular pouch earns its place by shortening access time, protecting equipment, or allowing a complete task group to move independently. When it does none of those things, it is simply another layer of fabric and weight.
How Should Modules Be Positioned?
Modules should be positioned according to weight, access priority, body movement, pack geometry, and the surrounding environment. Heavy pouches belong close to the back and near the vertical centerline. Frequently used equipment should remain reachable without blocking major openings. Lightweight modules can sit on the front, while side attachments should be balanced and kept narrow enough for vehicles, doors, vegetation, and natural arm movement.
A modular tactical bag should not be treated like an empty display board. Every attached pouch changes the pack’s center of gravity, width, surface area, and interaction with the wearer. A bag that feels balanced without modules may become tiring when several loaded pouches are placed on the outer front panel.
Positioning should therefore begin after each module has been packed with its real contents. An empty medical pouch may weigh only a few hundred grams. Once filled, it may become one of the heaviest external modules. A bottle pouch may look compact, but one liter of water adds approximately one kilogram. Batteries, tools, metal hardware, and communication equipment create similarly dense loads.
A practical layout normally divides the bag into three zones.
The central load zone sits close to the back and carries dense equipment.
The access zone includes the top, upper front, and selected side areas.
The expansion zone holds lightweight or temporary modules that can be removed when not required.
This approach keeps the attachment system useful without turning the entire exterior into a collection of protruding pouches.
Where Should Heavy Pouches Go?
Heavy pouches should be positioned as close to the user’s back and the bag’s vertical centerline as possible. When external placement is necessary, they should sit low to mid-height on a reinforced panel rather than high on the outer front surface.
Weight placed far from the body creates leverage. The pack pulls backward, and the wearer compensates by leaning forward. Over time, this can increase shoulder, neck, and lower-back fatigue.
A heavy module mounted high may also make the pack feel top-heavy. This is especially noticeable when the user bends, turns, climbs, or crosses uneven ground. A low position improves stability, although placing all dense equipment at the very bottom can make the bag sag and interfere with natural movement.
| Module Type | Approximate Loaded Density | Preferred Position | Position to Avoid |
|---|---|---|---|
| Battery pouch | High | Internal, close to back | Outer upper front |
| Metal tool pouch | High | Low reinforced side or internal | High side panel |
| Full water pouch | High | Balanced side or internal sleeve | Single unbalanced outer side |
| Medical pouch | Medium to high | Accessible reinforced front zone | Loose upper attachment |
| Radio module | Medium to high | Upper side near body | Far outer front |
| Clothing pouch | Low | Front or lower external area | Prime central load zone |
| Empty utility pouch | Low | Any compatible area | Position that blocks access |
Heavy pouches also need a wide attachment footprint. A narrow two-column connection may be sufficient for a small accessory but inadequate for a tall pouch carrying dense equipment. Wider attachment spreads force and reduces rotation.
The base panel should connect to structural seams or internal reinforcement. Surface fabric alone may distort even when the webbing remains intact.
Heavy side pouches should usually be paired or counterbalanced. The opposite side does not need to carry an identical object, but the total weight should be similar.
For example, a one-liter water bottle on the right could be balanced by a radio and battery pouch of comparable weight on the left. Balance should be checked after the modules are fully loaded, not estimated from pouch size.
Heavy modules may also interfere with the bag’s frame or compression system. If a pouch covers the side compression strap, the user loses an important method of stabilizing the main load.
When possible, dense equipment should be stored internally and external pouches used for access-oriented items. External modularity is excellent for organization, but it should not move the pack’s heaviest equipment away from the body.
How Do You Balance the Load?
Load balance requires controlling weight from left to right, top to bottom, and front to back. The objective is to keep the combined center of mass close to the wearer’s spine and prevent individual modules from pulling the pack in different directions.
Left-to-right balance is easiest to notice. A heavy bottle on one side causes the shoulder strap on the opposite side to work harder. The wearer may adjust posture without realizing it, creating uneven fatigue.
Front-to-back balance is more difficult because users often focus only on whether the bag feels heavy. A front-mounted pouch can make a moderate load feel significantly heavier because its weight sits farther from the spine.
Vertical balance changes movement. High weight can support a more upright posture on smooth ground but feels unstable on technical terrain. Lower placement improves stability but can make the bag pull on the lower back when the structure is weak.
| Balance Direction | Poor Configuration | Better Configuration |
|---|---|---|
| Left to right | Full bottle on one side only | Similar-weight module on opposite side |
| Front to back | Dense tools on outer front panel | Dense tools close to back |
| Top to bottom | Heavy module above shoulders | Moderate central placement |
| Internal to external | Empty main compartment with loaded pouches | Main load fills and supports bag |
| Fixed to moving load | Loose contents inside pouches | Internal retention and dividers |
The internal load should be arranged before external modules are added. A well-balanced interior can be disrupted by one heavy front pouch.
Compression straps help by drawing the main load inward. They should be tightened after modules are attached and the pack is filled. If an attached pouch blocks compression, the system should be reconsidered.
Pouches also need internal balance. A large utility pouch filled with several small metal tools may become bottom-heavy. Elastic loops, divider panels, and fitted sleeves keep the contents distributed.
A practical balance test includes walking, turning quickly, climbing stairs, kneeling, and lifting the pack by the handle. The bag should not rotate, slap against the back, or pull one shoulder downward.
Users can also place the packed bag upright on a flat surface. A bag that immediately falls to one side has an obvious lateral imbalance. A bag that falls forward may carry too much external weight.
Balance should be checked in the final wearing system. Body armor, duty belts, hydration reservoirs, and clothing layers all affect how the pack sits.
A modular layout may need to change between users. One person’s torso length, shoulder width, and equipment arrangement may make a pouch position comfortable, while another user experiences interference. Adjustable attachment is valuable, but the organization should still follow clear balance rules.
Which Gear Belongs on the Front?
The front of a tactical bag is best for lightweight equipment that benefits from quick access, clear identification, or removable task grouping. Suitable items include gloves, maps, a compact medical module, rain protection, lightweight admin supplies, and small utility items.
Dense equipment should generally not occupy the outer front panel. The farther weight sits from the body, the more leverage it creates.
A front-mounted medical pouch can be justified because access speed matters. Its weight should still be controlled, and the mounting area should be reinforced. A large medical module may be better placed on a removable front panel that transfers force through several buckles, webbing rows, or structural seams.
Admin pouches are common on the front because they hold relatively flat, lightweight items. They become problematic when users fill them with batteries, tools, and dense electronics.
| Front-Mounted Gear | Why It Works | Main Caution |
|---|---|---|
| Compact IFAK | Rapid identification and access | Keep weight and depth controlled |
| Gloves | Light and frequently used | Prevent accidental loss |
| Map or notebook | Flat and easy to organize | Protect from weather |
| Rain cover | Lightweight and situational | Ensure pocket drains |
| Small admin module | Organizes flat items | Avoid dense contents |
| Reflective panel | Improves visibility | Make removable if discretion is needed |
| Lightweight utility pouch | Flexible storage | Do not overfill |
The front panel should remain compatible with the main opening. A large pouch can prevent a clamshell backpack from lying flat. It may also block a front zipper or interfere with an expandable compartment.
Pouch depth matters. A shallow medical pouch may preserve a compact profile. A deep utility pouch can create a shelf that catches on branches, vehicle interiors, and door frames.
Front modules should also be checked when the bag is placed on the ground. A protruding pouch may become the primary contact point, exposing its zipper, contents, and attachment panel to abrasion.
A removable front panel can improve flexibility. One mission panel might carry medical supplies, another administrative equipment, and another remain blank for low-profile use. The base bag can then serve several roles without permanent external clutter.
The release system should be secure enough to resist accidental detachment. Buckles, hook-and-loop, webbing tabs, or combinations may be used depending on the load.
The strongest front arrangement is often one compact high-priority module rather than several small pouches competing for space.
What Should Go on the Sides?
Side attachment zones are suitable for water bottles, radios, narrow tools, tripod legs, compact utility pouches, and equipment that benefits from vertical storage. Side modules should remain narrow, balanced, and clear of arm movement.
The side of the bag offers useful access, but it creates width. This matters in vehicles, doorways, crowds, dense vegetation, and narrow indoor spaces.
Bottle pouches are common because cylindrical containers fit the side geometry. A full bottle requires upper retention and base reinforcement. A side compression strap can provide secondary security when positioned correctly.
Radio pouches also work well on the side because antennas can extend upward. The design must account for cable routing and access to controls.
| Side Module | Suitable Use | Required Control |
|---|---|---|
| Bottle pouch | External hydration | Upper strap and drainage |
| Radio pouch | Communications | Antenna clearance and cable routing |
| Tripod or pole holder | Long narrow equipment | Upper and lower retention |
| Tool sleeve | Compact field tool | Puncture protection |
| Utility pouch | Task-specific supplies | Controlled depth |
| Detachable side pocket | Temporary capacity | Balanced opposite load |
| Compression panel | Jacket or shelter component | Multiple stable straps |
Side modules should not cover the hip-belt connection or shoulder strap base. They should also remain clear of quick-release hardware.
A tall side pouch may interfere with the wearer’s elbow. This should be tested while walking, running, and climbing.
Pouch openings must face a practical direction. A zipper positioned against the main bag may be difficult to operate. An open top may allow contents to fall when the user bends.
Some side modules are designed to be reached while the pack remains worn. This requires testing across different body sizes. A position that one user can reach may be inaccessible to another.
Balanced side loading is especially important. Two full water bottles create symmetry. One bottle and one lightweight fabric pouch do not.
Side capacity can be made removable. When additional volume is not required, the base pack returns to a narrow profile. This works well for military, outdoor, and technical products with changing mission requirements.
Do External Pouches Add Bulk?
External pouches add bulk in three ways: they increase physical dimensions, add material weight, and create more irregular surfaces that can snag or interfere with movement.
The effect is often underestimated because individual pouches appear small. Four separate modules can add several centimeters to the front and sides of the pack. Their zippers, webbing, flaps, and contents create additional protrusions.
External pouches also reduce the efficiency of the total volume. A fixed internal compartment may use less material than several separate external pouches carrying the same contents.
| Bulk Source | Effect on Use | Design Response |
|---|---|---|
| Pouch depth | Pulls load away from body | Use shallow modules |
| Side width | Interferes with doors and arm movement | Limit side projection |
| Multiple closures | Adds hardware and weight | Simplify pouch architecture |
| Loose straps | Create snag points | Add strap keepers |
| Overlapping modules | Blocks access | Define clear attachment zones |
| Rigid contents | Prevent compression | Store internally when possible |
| Empty permanent pouches | Add unused weight | Use removable modules |
Bulk is not always negative. A front medical module may justify its size. A side bottle pouch may provide better access than an internal bottle. The question is whether the added bulk delivers operational value.
Low-profile modular systems use flat laser-cut panels and shallow pouches. They are useful for urban, vehicle-based, and law-enforcement products where external width must be controlled.
Compression can reduce bulk only when pouches are partially filled and designed to flatten. Rigid equipment, molded inserts, and thick foam do not compress meaningfully.
Loose straps create visual and functional clutter. Elastic keepers, hook-and-loop wraps, rolled retention, or controlled strap lengths prevent snagging.
Pouches should not extend below the bottom of the main pack. Low-hanging modules strike the legs, contact the ground, and create unstable movement.
The complete configured dimensions should be measured and included in product development. A bag advertised as 30 centimeters wide may become 45 centimeters wide after side pouches are attached.
External modularity should therefore be treated as optional capacity, not invisible capacity.
Which Materials Support Modular Loads?

Materials for modular tactical bags must support repeated pouch attachment, concentrated pulling, abrasion, bending, weather exposure, and heavy localized loads. High-tenacity nylon is often preferred for demanding applications, while polyester Oxford provides strong structure, color stability, and production value. Denier should match each panel’s function, webbing must be compatible with the attachment method, laminates need strong bond and slot durability, and reinforcement should spread force into major seams.
A modular bag places unusual demands on fabric. A standard backpack shell mainly contains internal pressure. A modular panel also receives external pulling from multiple directions.
Each pouch strap presses against webbing or slot edges.
Heavy modules pull the panel outward.
Movement bends the attachment area repeatedly.
Removing and reinstalling pouches creates abrasion.
The materials must therefore be selected as a system. Shell fabric, webbing, laminate, backing, thread, binding, and reinforcement must work together.
Is Nylon Better Than Polyester?
Nylon is often preferred for high-abrasion, high-flex, and demanding modular applications because it can provide excellent toughness and tear resistance. Polyester is often preferred when UV stability, color consistency, low moisture absorption, and cost control are priorities.
Neither fiber is automatically correct for every modular bag.
A high-tenacity nylon shell may work well for military packs, field equipment, and heavy pouch platforms. A structured polyester Oxford can perform well for patrol bags, medical bags, utility packs, and general tactical products.
| Material Factor | Nylon | Polyester |
|---|---|---|
| Abrasion resistance | Commonly excellent | Good to strong |
| Tear performance | Strong in high-tenacity grades | Specification-dependent |
| UV resistance | Moderate without treatment | Generally better |
| Moisture absorption | Higher | Very low |
| Flexibility | Often softer | Often more structured |
| Color stability | Good | Commonly excellent |
| Cost | Often higher | Frequently more economical |
| Printing | Good with compatible methods | Broad options |
For attachment panels, abrasion matters because pouch straps repeatedly rub against the surface. Tear resistance matters around stitch lines and laser-cut slots.
Polyester may be a better choice for products exposed to long periods of direct sun, such as vehicle bags, outdoor equipment cases, and high-visibility response packs.
Nylon may be better when the bag is dragged, compressed, folded, and used against rough surfaces.
Hybrid construction is common. A bag may use polyester for the main shell and nylon webbing for attachment zones. Another may use nylon shell fabric with polyester lining and binding.
Fiber compatibility also affects dye shade. Nylon webbing and polyester fabric may appear different even when specified with the same color reference. Physical color approval is necessary.
Coatings change performance. A flexible PU coating may preserve the textile hand. A heavier PVC layer creates structure but may crack under repeated folding. TPU laminate can support modern laser-cut panels but requires controlled bonding.
The correct choice should be made through fabric samples, test data, prototype sewing, and loaded attachment trials.
Which Denier Is Strong Enough?
The appropriate denier depends on the panel function, expected module weight, fabric construction, reinforcement, and total bag target weight. A higher denier indicates thicker yarn but does not guarantee a stronger finished fabric.
For modular tactical bags, 500D nylon and 600D polyester are common main-body choices. Heavier 900D or 1000D fabrics may be used for high-wear panels, bases, and heavy attachment zones.
| Denier Range | Modular Application | Strength Consideration |
|---|---|---|
| 200D–300D | Lining and internal pouches | Not suitable for unsupported heavy attachments |
| 400D–500D | Lightweight premium shell | Strong when reinforced correctly |
| 600D | General tactical shell | Good structure and value |
| 800D–900D | Heavy utility panels | Increased abrasion resistance |
| 1000D | Severe-duty attachment zones | Strong but heavy |
| Above 1000D | Industrial or specialized bags | Often unnecessary for mobile packs |
A 500D high-tenacity nylon can outperform a lower-quality 1000D fabric in strength-to-weight efficiency. Weave density, yarn tenacity, coating, and fabric weight should be considered together.
Attachment panels may need heavier or doubled material even when the main shell is lighter. This is especially true for side bottle zones, front medical platforms, and detachable heavy pouches.
Using 1000D fabric throughout the bag can create several problems.
The product becomes heavy.
Corners become difficult to sew.
The bag loses flexibility.
Zipper curves become stiff.
Internal capacity is reduced by thick seam stacks.
Material mapping solves these issues. Lighter fabric is used where it primarily contains soft contents. Heavy fabric is placed where it receives abrasion or external load.
The specification should state the expected module weight for each panel. Without a target, designers may either overspecify the material or create attachment zones that are weaker than users assume.
What Webbing Performs Best?
The best webbing provides adequate tensile strength, stable width, controlled flexibility, abrasion resistance, colorfastness, and compatibility with pouch straps and adjustment hardware.
Nylon webbing is common in tactical systems because it is strong, flexible, and resistant to repeated bending. Polyester webbing offers good UV resistance, low water absorption, and stable dimensions.
Webbing stiffness is critical. Very soft webbing may sag under loaded pouches. Very stiff webbing becomes difficult to weave.
| Webbing Characteristic | Why It Matters |
|---|---|
| Width consistency | Maintains pouch compatibility |
| Thickness | Affects weaving and buckle fit |
| Surface texture | Controls strap friction |
| Edge finish | Prevents fraying |
| Tensile strength | Supports loaded modules |
| Flex resistance | Survives repeated bending |
| Colorfastness | Maintains coordinated appearance |
| Shrinkage control | Preserves spacing after exposure |
Webbing should be checked against the exact pouch straps. Two materials that each meet their individual specification may still be difficult to weave together.
Traditional PALS webbing needs enough space behind each row for strap passage. If webbing is sewn too tightly to the shell, installation becomes difficult.
Webbing should remain flat after sewing. Puckering indicates tension, feed, or spacing problems. Twisted rows create poor module alignment.
Color differences between webbing and shell are common. A tonal match may be desired, while deliberate contrast may support product styling. The decision should be approved physically.
High-load webbing should connect to structural seams. A strong tape attached only to one shell layer cannot transfer its full capacity.
Are Laminated Panels Durable?
Laminated panels can be durable when the face fabric, bonding film, backing layer, slot design, and production process are matched correctly. They can also fail through delamination, slot elongation, edge cracking, heat damage, or repeated flex fatigue.
A laser-cut panel is exposed to concentrated stress at every slot. Rounded slot ends help spread force. Sharp corners increase the risk of tearing.
| Laminate Risk | Cause | Prevention |
|---|---|---|
| Delamination | Weak bonding or heat aging | Validate adhesive and aging performance |
| Slot tearing | Sharp geometry or heavy pouch | Use rounded ends and adequate spacing |
| Edge hardening | Excess laser heat | Control cutting parameters |
| Surface cracking | Low flex resistance | Select compatible layers |
| Water intrusion | Open cut edges | Use stable internal film |
| Panel distortion | Unsupported heavy load | Add backing and structural connection |
The laminate should be tested after repeated pouch installation and removal. One successful attachment does not represent long-term use.
Heat and humidity are important. A panel stored in a vehicle or used in tropical conditions may experience temperatures and moisture levels much higher than those in a sample room.
Cleaning chemicals can affect the bond between layers. Medical and industrial products may need compatibility testing with approved cleaning agents.
Laminated panels often provide a lower-profile appearance than sewn webbing. They may also allow custom slot patterns and integrated branding.
Weight savings should be measured rather than assumed. Some laminates are dense, and a large full panel may weigh as much as a webbing grid.
Hybrid construction can improve durability. A laminate provides the visible slot platform, while internal fabric or webbing spreads force into the main seams.
Where Is Reinforcement Needed?
Reinforcement is needed behind high-load attachment panels, around slot edges, at webbing row terminations, near detachable buckle anchors, and where modular loads connect to handles, shoulder straps, frames, or compression systems.
The purpose of reinforcement is to distribute force. Simply adding another small patch directly under one stitch line may make the area thicker without spreading the load.
| Reinforcement Zone | Main Stress | Suitable Reinforcement |
|---|---|---|
| Front MOLLE panel | Outward pouch pull | Broad internal backing |
| Side bottle zone | Vertical and lateral movement | Structural seam connection |
| Laser-cut panel | Slot edge concentration | Full-area backing |
| Buckle anchor | Point load | Webbing extension |
| Removable side pouch | Asymmetric pull | Reinforced panel and balance support |
| Compression flap | Tension across pack | Multi-point webbing path |
| Bottom tool pouch | Impact and abrasion | Heavy shell plus insert |
| Shoulder-mounted module | Repeated movement | Backed webbing and controlled load |
Reinforcement material may include heavier shell fabric, woven backing, webbing extensions, plastic sheet, laminated panels, nonwoven reinforcement, or combinations.
The reinforcement should follow the direction of force. A vertical bottle pouch needs strong vertical support. A front panel experiences outward and downward pulling. Buckle anchors receive concentrated point loads.
Stitching should avoid excessive perforation. Several rows of moderate stitching may spread force better than one extremely dense bar tack.
Reinforced panels also affect flexibility. A large rigid front panel may prevent the bag from compressing. This may be acceptable for a medical or equipment bag but undesirable for a lightweight outdoor pack.
Prototype inspection should look for early warning signs.
Fabric whitening around stitches
Panel rippling
Slot elongation
Webbing distortion
Coating cracks
Delamination bubbles
Loose bar tacks
Uneven pouch position
These signs often appear before complete failure.
Szoneier can develop modular tactical bags using nylon, polyester, Oxford fabric, woven webbing, coated materials, and laser-cut laminates matched to the intended load. Pouch locations, webbing spacing, panel reinforcement, material denier, buckle systems, internal organizers, and removable modules can be tested with representative equipment during sampling, helping ensure the final modular system remains secure, balanced, and practical in real use.
How Are Modular Systems Tested?
Modular attachment systems should be tested as complete load-bearing structures rather than as separate pieces of fabric, webbing, or hardware. A proper test program examines webbing strength, stitch security, laser-cut slot durability, pouch retention, panel deformation, environmental aging, and real movement under the expected load. The goal is not merely to prove that a pouch can be attached. It is to confirm that the pouch remains secure, accessible, and balanced throughout repeated use.
Testing should begin with a defined configuration. The manufacturer needs to know which pouch will be mounted, how much it will weigh, where it will sit, and how the user will move with the bag. A lightweight admin pouch and a two-kilogram tool module should not be evaluated under the same conditions.
The attachment system should also be tested at several stages:
Before the pouch is installed
Immediately after installation
After repeated attachment and removal
After walking or vibration cycles
After loaded drops
After heat, cold, humidity, or water exposure
After abrasion and cleaning
This sequence helps reveal gradual changes. A webbing row may look normal after one use but begin loosening after repeated pulling. A laser-cut slot may hold a pouch initially but slowly elongate. A laminate may remain strong in a dry room yet soften after heat and humidity exposure.
A reliable test plan measures both structural performance and user experience. The attachment may remain technically intact while allowing too much movement. A pouch may stay connected but block a zipper. A panel may support the load while pulling the bag away from the wearer’s back.
These issues are failures of the complete system even when no material has torn.
How Is Webbing Strength Tested?
Webbing strength is tested by evaluating the webbing material, its sewn attachment, and the complete panel under controlled load. Testing only the loose webbing does not show whether the bag construction can support the same force.
The webbing tape itself can be examined for tensile strength, elongation, abrasion resistance, edge stability, and colorfastness. The sewn panel then needs a pull test that reproduces the direction in which a loaded pouch acts.
For example, a front MOLLE pouch pulls both downward and outward. A side bottle pouch creates vertical force combined with repeated lateral movement. A buckle-mounted panel may concentrate force at four small anchor points.
The test fixture and pull direction should reflect these differences.
| Test Area | Test Purpose | Common Failure Sign |
|---|---|---|
| Loose webbing | Confirms base material strength | Tape breaks or stretches excessively |
| Sewn webbing row | Checks stitch and panel connection | Thread breaks or row peels away |
| Full MOLLE grid | Evaluates load distribution | Panel distorts across several channels |
| Webbing edge | Reviews abrasion and fraying | Fibers separate along edge |
| Wet webbing | Checks performance after moisture | Excess stretching or color transfer |
| Heat-aged webbing | Reviews long-term stability | Stiffness, shrinkage, or strength loss |
| Repeatedly flexed webbing | Simulates pouch installation | Cracking or permanent deformation |
A pull test should not be described only with a maximum force. The duration of loading matters. A system may survive a brief high load but gradually deform under a lower sustained load.
Static load testing checks whether the attachment can hold a defined force for a fixed period.
Cyclic loading applies the force repeatedly to simulate walking, vibration, and normal use.
Shock loading applies sudden force, similar to a loaded pouch moving during a drop or rapid direction change.
All three provide different information.
The test should also examine what happens after the load is removed. Webbing that remains permanently stretched may no longer hold pouches tightly. A panel that does not tear but becomes distorted can still be functionally damaged.
Webbing spacing should be measured after loading. A channel that widens or narrows may become incompatible with standard attachment straps.
Stitching should be inspected from both sides. External thread may remain intact while internal backing shifts or seam allowances begin separating.
The webbing specification should be tied to the expected use. Lightweight internal organizers do not need the same construction as external attachment points carrying water or metal tools. Overbuilding every row adds weight and cost without improving the user’s experience.
Do Bar Tacks Prevent Failure?
Bar tacks help prevent failure by concentrating multiple stitches across a small area, making them useful for securing webbing ends, attachment intervals, handles, and strap anchors. However, bar tacks do not automatically make an attachment strong. Their effectiveness depends on stitch density, thread, needle, fabric, backing, direction of force, and placement.
A bar tack can fail in several ways.
The thread can break.
The webbing can tear around the stitches.
The base fabric can split.
The coating can crack.
The entire stitched area can pull out of the panel.
The webbing may remain attached while the panel deforms.
An extremely dense bar tack may weaken coated fabric by creating many needle holes close together. Instead of reinforcing the area, it can form a perforated line that tears under load.
| Bar-Tack Factor | Why It Matters | Poor Result |
|---|---|---|
| Stitch density | Controls thread coverage | Too dense damages fabric |
| Tack width | Spreads force across webbing | Too narrow concentrates load |
| Thread size | Supports repeated tension | Thread cuts through base material |
| Needle size | Creates stitch holes | Oversized holes weaken coating |
| Backing layer | Distributes load | Shell fabric tears around tack |
| Force direction | Determines stitch orientation | Tack resists wrong direction |
| Machine consistency | Controls production repeatability | Uneven or incomplete stitches |
Bar tacks should be placed according to how the load pulls. A vertical strap may need a horizontal tack that resists downward movement. A side compression anchor may need a pattern that handles lateral force.
A box-and-cross stitch can be more appropriate for wider attachment zones. Several straight rows may distribute force better across certain materials. The correct pattern depends on the component rather than a universal preference.
Manufacturers should test alternative stitch patterns during sampling. The strongest option is the one that protects both thread and fabric.
The inspection should also consider stitch appearance. Skipped stitches, loose loops, needle cuts, melted thread, and uneven coverage indicate process problems.
Bar-tack machines need consistent settings. Thread tension, stitch count, machine speed, and material stack should be controlled. A bar tack produced through two layers may behave differently when sewn through webbing, shell fabric, reinforcement, foam, and lining.
For modular attachment panels, the webbing intervals should remain consistent across the whole grid. One missing or weak bar tack can create a loose channel that allows pouch movement.
Bar tacks are valuable, but they are only one part of a broader load path. Reinforcement begins with the panel and ends at the structural seams of the bag.
How Are Laser-Cut Slots Checked?
Laser-cut slots are checked for dimensional accuracy, edge quality, laminate bonding, flex resistance, load deformation, and compatibility with the intended attachment straps.
The slot should be wide and long enough to accept standard straps without excessive force. It should not be so large that the pouch moves after installation.
Rounded slot ends are preferred because they reduce concentrated stress. Sharp corners can become starting points for tears.
The distance between slots is also critical. Narrow material bridges may stretch, split, or fold when loaded. Large empty areas may increase panel weight without improving attachment options.
| Slot Inspection | Acceptable Condition | Warning Sign |
|---|---|---|
| Cut edge | Clean and consistent | Burned, hardened, or incomplete edge |
| Slot length | Accepts intended straps | Strap cannot pass through |
| Slot width | Provides controlled fit | Excessive free movement |
| Corner shape | Smooth rounded ends | Sharp stress points |
| Panel bridge | Sufficient material remains | Thin section stretches |
| Layer bond | No separation | Bubbling or peeling |
| Repeated attachment | Shape remains stable | Slot gradually elongates |
| Loaded movement | Panel remains flat | Panel curls or tears |
Cutting parameters must be controlled for each laminate. Laser power, speed, focus, and number of passes influence edge quality. Excessive heat can melt internal films, discolor the surface, or create brittle edges.
A test sample should be cut from production material rather than a visually similar substitute. Small differences in film thickness, textile face, backing, or adhesive can change the result.
The slots should be checked after bending and folding. A panel that remains strong when flat may crack near the slots when wrapped around a curved bag surface.
Repeated attachment testing should include the actual pouch straps. Rigid polymer tabs create different edge stress than soft woven webbing.
The panel should also be examined after heat and humidity exposure. Delamination may begin around the slots because the cut edges expose the laminate structure.
Water can enter cut edges if the internal bond is unstable. The panel may not visibly fail immediately, but repeated wetting and drying can weaken it over time.
Loaded testing should inspect slot elongation. Measure the slot before and after repeated cycles. Permanent dimensional change indicates that the attachment may become looser with use.
Laser-cut attachment systems can be highly reliable when they are engineered and validated carefully. Their clean appearance should never replace structural testing.
How Is Pouch Retention Tested?
Pouch retention is tested by loading the pouch with representative equipment, attaching it according to instructions, and evaluating movement during walking, vibration, impact, drops, and directional pulling.
The pouch should be filled according to the intended use. Soft filler cannot reproduce the behavior of a water bottle, metal tools, batteries, medical packages, or electronics.
Retention testing should examine four separate outcomes:
Does the pouch remain attached?
Does the closure remain closed?
Do the contents remain controlled?
Does the base bag remain stable?
A pouch can pass the first condition and fail the other three.
| Retention Test | What It Simulates | What to Observe |
|---|---|---|
| Loaded walk | Normal repeated movement | Bounce, swing, and noise |
| Rapid direction change | Sudden lateral force | Rotation or side pull |
| Stair climbing | Vertical movement | Lower pouch movement |
| Controlled drop | Impact and shock load | Strap release or panel damage |
| Vehicle vibration | Repeated low-level motion | Gradual loosening |
| Grab-and-pull check | Snag or external force | Detachment or deformation |
| Inverted test | Bag placed upside down | Closure and content retention |
| Wet-condition test | Reduced friction and added moisture | Strap slippage |
A retention test should use the full attachment height. If the pouch has four rows, all four should be woven. Testing an incorrectly mounted pouch provides little useful information unless the purpose is to study likely user error.
The final strap or locking tab should be checked after each cycle. Some systems gradually work loose even though the main weave remains intact.
Internal equipment movement matters as well. A secure pouch containing loose tools may still create impact and noise. Elastic loops, dividers, foam, or fitted sleeves should keep the contents organized.
Closure testing should include zipper, flap, hook-and-loop, buckle, and shock-cord systems. The closure should resist accidental opening while remaining practical with gloves.
The base panel should be inspected for stretching, puckering, coating damage, loose stitches, and distortion. The pouch may show no damage while the bag panel experiences gradual failure.
The test should also evaluate access. A pouch secured so tightly that its zipper cannot move is not functional. Retention and usability must remain balanced.
What Should Field Testing Include?
Field testing should reproduce how the modular bag will actually be packed, worn, opened, stored, and reconfigured. It should include realistic users, representative equipment, clothing, vehicles, weather, movement, and access tasks.
The bag should first be tested in its lightest planned configuration. Then modules should be added until the maximum intended configuration is reached. This reveals how the carrying behavior changes.
Field testing should include:
Walking at normal and fast speed
Running short controlled distances where appropriate
Climbing stairs
Moving over uneven ground
Bending and kneeling
Entering and exiting vehicles
Passing through narrow doors
Moving beside walls or equipment
Opening the main bag with pouches attached
Removing and reinstalling modules
Retrieving named equipment with gloves
Using the bag in low light
Carrying the bag partly loaded
Carrying the bag at maximum approved load
| Field Scenario | Main Evaluation |
|---|---|
| Long loaded walk | Comfort and module movement |
| Vehicle entry | Width, snagging, and seat compatibility |
| Low-light access | Tactile identification and layout memory |
| Gloved pouch opening | Pull size and closure force |
| Main-compartment access | Whether modules block zippers |
| Team handover | Whether another user understands the setup |
| Wet-weather use | Grip, drainage, and closure behavior |
| Pouch reconfiguration | Attachment time and wear |
| Uneven terrain | Balance and center-of-gravity control |
| Part-load movement | Compression and panel stability |
Several users should test the bag when possible. Body size, shoulder width, arm length, and experience influence the result.
The testers should record specific observations rather than general opinions.
“The bag feels uncomfortable” is too vague.
“The right bottle pouch hits the elbow during climbing” is actionable.
“The front medical pouch prevents the main panel from opening fully” identifies a structural conflict.
“The lower laser-cut slot begins curling after repeated removal” identifies a material issue.
Timing can also be useful. How long does it take to reach a specific pouch? How long does it take to replace a panel? Can the user identify the correct module without looking?
Field testing should include equipment handover. Another person should be asked to locate and remove items. This shows whether the organization is intuitive or dependent on one user’s memory.
After testing, the bag should be inspected before cleaning. Dirt patterns and abrasion marks reveal where the product contacts the body, vehicle, or ground.
Modifications should be documented and retested. Moving a pouch may improve balance but block another feature. Adding reinforcement may increase weight and stiffness. Enlarging the panel may affect the bag opening.
The final configuration should be approved as a complete system, including base bag, selected pouches, attachment instructions, target load, and packing arrangement.
How Can Modular Bags Be Customized?

Modular tactical bags can be customized through attachment layout, capacity, pouch type, material, webbing, laser-cut panels, reinforcement, internal organization, removable modules, colors, logos, and packaging. Effective customization begins with the intended equipment and user workflow. The design should be developed around the real load rather than adding a generic MOLLE grid to an existing backpack.
The development process should answer several core questions:
What equipment will the system carry?
Which items require immediate access?
Which modules will be changed frequently?
How heavy is each loaded pouch?
Will the bag be used in vehicles?
Will the user wear armor or a duty belt?
How much external width is acceptable?
What weather and cleaning conditions are expected?
Which third-party pouches must fit?
What testing is required?
These answers determine the correct attachment system.
A custom project can range from a simple logo and color change to a completely new platform with dedicated medical, communications, field, or technical modules.
Which Layout Fits Each Application?
The right modular layout depends on how equipment is accessed and carried. A medical bag benefits from visible removable modules. A military field pack needs reinforced external attachment and load balance. A patrol bag may require internal modularity and limited exterior bulk. A technical bag may use custom tool panels rather than standard pouches.
| Application | Recommended Modular Layout | Main Priority |
|---|---|---|
| Military field pack | Sewn MOLLE front and sides | Durability and compatibility |
| Law-enforcement pack | Partial external MOLLE and internal loop | Controlled profile |
| Tactical medical bag | Removable pouches and tear-away panel | Rapid identification |
| Communications pack | Internal padded modules | Equipment protection |
| Outdoor survival pack | Limited utility and bottle zones | Balance and versatility |
| Tool backpack | Reinforced sleeves and utility modules | Weight control |
| Vehicle response bag | Internal dividers and removable boards | Fast top access |
| Urban tactical bag | Laser-cut low-profile panel | Discreet appearance |
| Camera or optics bag | Adjustable padded dividers | Impact protection |
| Search-and-rescue pack | Medical, hydration, and tool modules | Weather and access |
The exterior should not be fully covered by attachment points unless users genuinely need that flexibility. Partial modular zones create clearer organization and reduce weight.
A medical layout may use one large removable panel rather than several individual exterior pouches. The complete panel can be placed beside the patient while the main bag remains closed.
A patrol bag may use loop-lined internal walls so equipment remains protected inside the vehicle. A small external medical patch or reflective panel can provide identification without making the bag bulky.
A field pack may use sewn webbing on the lower front and sides while keeping the upper area clear for compression and head movement.
A low-profile urban bag may use laser-cut slots that visually blend with the shell. The interior can provide more extensive modular organization.
User access direction should shape the layout. A right-handed user may prefer a radio or tool pouch on one side, but standardized team systems may require a common arrangement.
Departments and brands should distinguish between fixed and optional zones. Fixed zones serve universal equipment. Optional zones support role-specific modules.
The final layout should leave clear routes for zippers, compression straps, handles, hydration tubes, and quick-release hardware.
How Can Capacity Be Expanded?
Capacity can be expanded through detachable side pouches, removable lids, front cargo panels, compression cradles, roll-top extensions, expandable compartments, and lower attachment straps.
Each method changes the bag differently.
Closed pouches add protected volume.
Compression panels hold bulky irregular items.
Roll-top sections add flexible internal capacity.
Lower straps carry sleeping mats, jackets, or other light gear.
| Expansion Method | Best Use | Main Trade-Off |
|---|---|---|
| Detachable side pouch | Water or task modules | Adds width |
| Front utility pouch | Quick-access equipment | Moves weight outward |
| Removable lid | Small frequently used gear | Raises center of gravity |
| Compression cradle | Helmet or clothing | Contents remain exposed |
| Roll-top extension | Clothing or supplies | Slower access |
| Expandable zipper section | Temporary internal capacity | Adds zipper and fabric weight |
| Bottom straps | Light bulky gear | Increases ground contact risk |
| Modular day-pack panel | Detachable short-mission bag | More complex attachment |
Capacity expansion should not compromise the harness. A base pack designed for ten kilograms should not be expanded to twenty kilograms without upgrading the frame, belt, shoulder straps, and reinforcement.
The maximum configuration should be tested. Product descriptions often show several optional pouches but do not evaluate the full combined load.
External expansion should remain controlled. Two side pouches may create balance. One large front pouch may create backward pull.
An expandable main compartment can be more weight-efficient than multiple pouches, but it may reduce internal organization. The choice depends on whether the added load needs separation or simply more space.
Removable expansion also affects storage and inventory. Pouches can be lost or mixed between products. Identification labels, color coding, and packing lists help manage multi-part systems.
A modular family may include several compatible capacities. One base pack can accept a five-liter medical module, a ten-liter utility panel, or two three-liter side pouches. Developing these components as a coordinated system provides better fit than combining unrelated accessories later.
Attachment points should remain useful when expansion modules are removed. Empty buckles or exposed hook panels can look unfinished and create snag points. Covers, tuck-away components, or removable hardware may improve the base configuration.
What Should a Tech Pack Include?
A technical pack for a modular tactical bag should include dimensions, materials, panel drawings, attachment spacing, pouch specifications, hardware, reinforcement, stitching, load targets, artwork, testing, labeling, and packaging.
A general reference image is not enough. Modular systems depend on small dimensional relationships. A few millimeters of webbing or slot variation can make pouch installation difficult.
The tech pack should define:
Overall bag dimensions
Target capacity
Empty-weight target
Maximum recommended load
Panel measurements
Webbing width and row spacing
Vertical stitch intervals
Laser-cut slot dimensions
Slot corner radius
Laminate construction
Pouch attachment footprint
Buckle type and location
Webbing and strap length
Reinforcement zones
Thread type and size
Stitch patterns
Bar-tack locations
Zipper type and gauge
Foam thickness
Lining material
Logo method
Color standards
Label placement
Testing requirements
Packaging method
| Tech-Pack Section | Required Information |
|---|---|
| Material sheet | Fiber, denier, weight, coating, and finish |
| Component list | Zippers, buckles, webbing, hook-and-loop, and cord |
| Panel drawing | Shape, dimensions, seam allowance, and grain direction |
| MOLLE layout | Rows, columns, spacing, and backing |
| Laser-cut file | Vector slots, cut path, and material reference |
| Pouch drawing | Internal and external dimensions |
| Reinforcement map | Backing type and attachment to structural seams |
| Stitch guide | Seam type, thread, density, and bar tacks |
| Load requirement | Expected weight by panel or module |
| Artwork file | Logo size, color, and process |
| Test plan | Material, component, and field tests |
| Packing guide | Bag shape protection and included modules |
The tech pack should distinguish critical dimensions from reference dimensions. Attachment spacing, buckle alignment, and pouch footprint are critical. Minor aesthetic measurements may allow controlled tolerance.
The equipment list should be included when custom compartments are involved. Three-dimensional item measurements and weight help pattern engineers create accurate modules.
For third-party compatibility, reference pouches should be named or physically supplied. “Standard MOLLE” can be interpreted differently by different suppliers.
The laser-cut artwork should be a clean vector file. Slot dimensions should account for the actual laminate thickness and pouch straps. Decorative cutouts should not weaken load paths.
Revision control is essential. Every sample change should update the drawing and version number. Verbal instructions can be missed or applied inconsistently.
The approved pre-production sample and final tech pack should match. When they conflict, production teams may follow different standards.
How Are Logos and Colors Added?
Logos and colors can be added through custom fabric dyeing, screen printing, heat transfer, embroidery, woven labels, rubber patches, hook-and-loop identity panels, reflective printing, molded zipper pulls, and laser-cut branding.
The method should match the product’s environment and material.
Embroidery is durable and visually strong, but it creates needle holes and can stiffen coated panels.
Screen printing works well for bold graphics when the ink is compatible with the coating.
Heat transfer supports fine detail but requires controlled temperature and pressure.
Rubber patches create a rugged appearance and can be sewn or mounted on hook-and-loop.
Woven labels provide detail with relatively low weight.
Laser-cut logos can be integrated into laminated panels, but the cut geometry must not weaken the attachment area.
| Branding Method | Main Advantage | Main Limitation |
|---|---|---|
| Embroidery | Durable premium appearance | Adds holes and backing |
| Screen print | Efficient for bold graphics | Ink compatibility required |
| Heat transfer | Fine detail and color | Heat may affect coating |
| Woven label | Lightweight and detailed | Edge durability matters |
| Rubber patch | Rugged and dimensional | Adds thickness |
| Removable patch | Supports role changes | May collect debris |
| Reflective print | Improves visibility | May conflict with low-profile use |
| Laser-cut logo | Integrated modern look | Must preserve panel strength |
| Molded zipper pull | Repeated brand visibility | Requires tooling |
Logo placement should avoid high-stress attachment channels. A large embroidered logo across MOLLE webbing can interfere with pouch installation. Printing across laser-cut slots may create inconsistent appearance.
Colors should be approved using physical fabric samples. Nylon, polyester, laminate, webbing, zipper tape, thread, hook-and-loop, and molded hardware can all show different shades.
A coordinated tonal product may require several materials from different dyeing processes. Exact visual matching may be unrealistic, so an approved color range should be defined.
High-visibility colors are useful for medical, rescue, and emergency applications. Neutral colors suit military, police, outdoor, and urban tactical products.
Removable reflective panels can support both visibility and discretion. A rescue team can display the panel during field operations and remove or cover it during transport.
Interior colors should be considered separately. A light gray, tan, orange, or red lining can improve equipment visibility without changing the external appearance.
Branding should support function rather than compete with it. The most effective tactical products often use restrained logos placed where they remain visible but protected.
How Do You Choose a Manufacturer?
A manufacturer for modular tactical bags should understand textiles, attachment geometry, pattern engineering, heavy-duty sewing, laminates, hardware, sampling, testing, and production consistency. A factory that can sew a standard backpack may not automatically understand how loaded pouches affect panel structure and balance.
The manufacturer should ask detailed questions about:
The intended user
Equipment list
Pouch dimensions
Loaded module weights
Third-party compatibility
Attachment frequency
Expected weather
Carrying duration
Maximum bag load
Required tests
Logo and color standards
Order volume
The quality of these questions reveals whether the development team is thinking about function or only appearance.
| Manufacturer Capability | Why It Matters | Evidence to Review |
|---|---|---|
| Fabric development | Matches shell to load | Material samples and specifications |
| Webbing knowledge | Controls compatibility | Physical grid and pouch testing |
| Laminate processing | Supports laser-cut systems | Cut samples and aging tests |
| Pattern engineering | Maintains balance and capacity | Technical drawings and prototypes |
| Heavy sewing | Secures reinforcement | Critical seam samples |
| Hardware sourcing | Controls closures and straps | Component references |
| Sample revision | Solves functional problems | Version records |
| Load testing | Validates attachment panels | Test setup and results |
| Field evaluation | Confirms real usability | Loaded prototype trial |
| Production QC | Maintains spacing and alignment | Inspection procedures |
| Traceability | Supports repeat orders | Lot and material records |
| Packaging design | Protects structured bags | Packing sample |
The lowest price should not be evaluated independently from material quality, reinforcement, hardware, testing, and development support. Reducing backing layers or changing webbing may lower the quotation while weakening the system.
Sampling should use real or representative equipment. A sample approved while empty may reveal serious balance and access problems when fully configured.
The factory should maintain sewing guides for MOLLE spacing and buckle placement. Manual visual positioning without templates can create production variation.
Incoming materials should be checked before cutting. Webbing width, laminate thickness, fabric shade, zipper operation, buckle fit, and hook-and-loop strength should match the approved standard.
In-line inspection is valuable because critical backing and reinforcement become hidden after lining is closed. Final inspection alone cannot always confirm that internal layers were installed correctly.
Production samples should be compared with the signed reference bag and approved modules. Pouch compatibility should be checked randomly across the production lot.
Szoneier combines more than 18 years of fabric development, post-processing, and finished-product manufacturing experience. Modular tactical bags can be developed using nylon, polyester, Oxford fabric, canvas, coated fabrics, laminated panels, woven webbing, hook-and-loop systems, reinforced stitching, and custom hardware.
Custom options can include sewn MOLLE grids, laser-cut attachment panels, detachable medical modules, utility pouches, bottle holders, admin organizers, reinforced tool compartments, internal loop walls, expandable capacity, body-armor-compatible harnesses, custom colors, private-label logos, and coordinated retail or shipping packaging.
To request a custom modular tactical bag quotation, send Szoneier the intended application, bag dimensions, target capacity, equipment list, loaded pouch weights, preferred attachment system, required pouches, reference samples, logo files, color requirements, quantity, and testing expectations. Szoneier can support material selection, free design assistance, rapid prototyping, sample evaluation, manufacturing, quality inspection, and OEM or ODM production for modular bags built around real equipment and real use.